Managing orders, products and subscriptions
- How to publish a product through the portal interface, managing product specifications
- How to set the product pricing model, managing product offerings
- How to publish a service through the portal interface, managing service specifications
- How to publish a resource through the portal interface, managing resource specifications
- How to publish and manage catalogues
- How to check your orders and invoices
How to publish a product through the portal interface, managing product specifications
Product Specifications represent the product being offered, both digital and physical. To list your product specifications go to My Offerings section and click on Product Specifications.
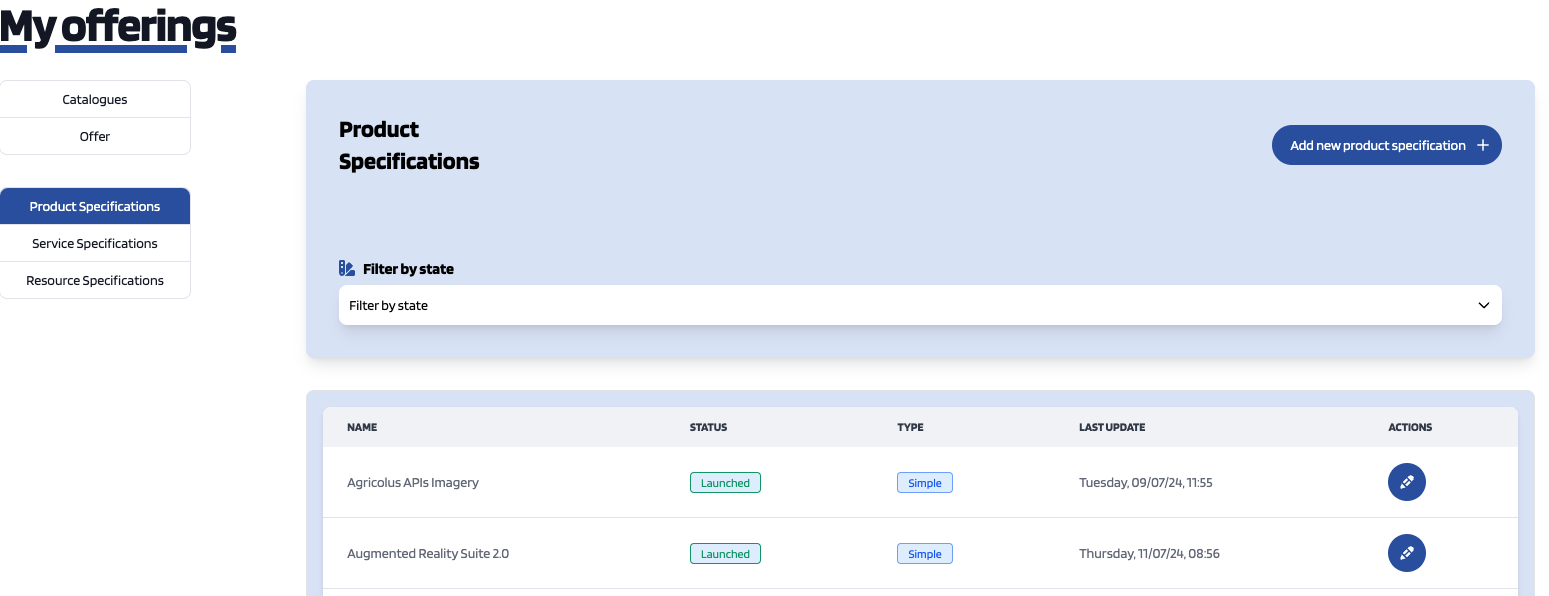
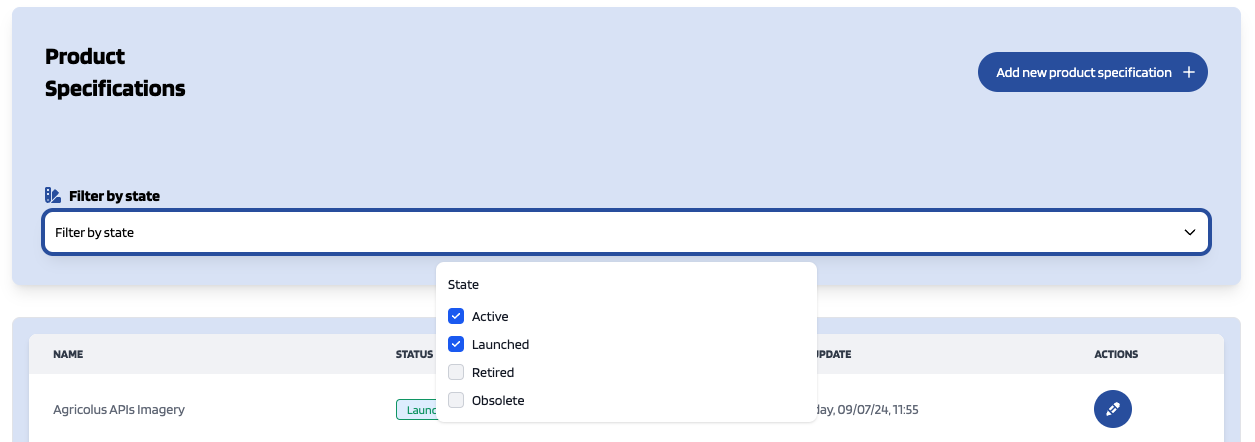
In the same way as catalogues, services and resources, product specifications can be filtered by state by clicking on Filter by state and choosing the appropriate properties.
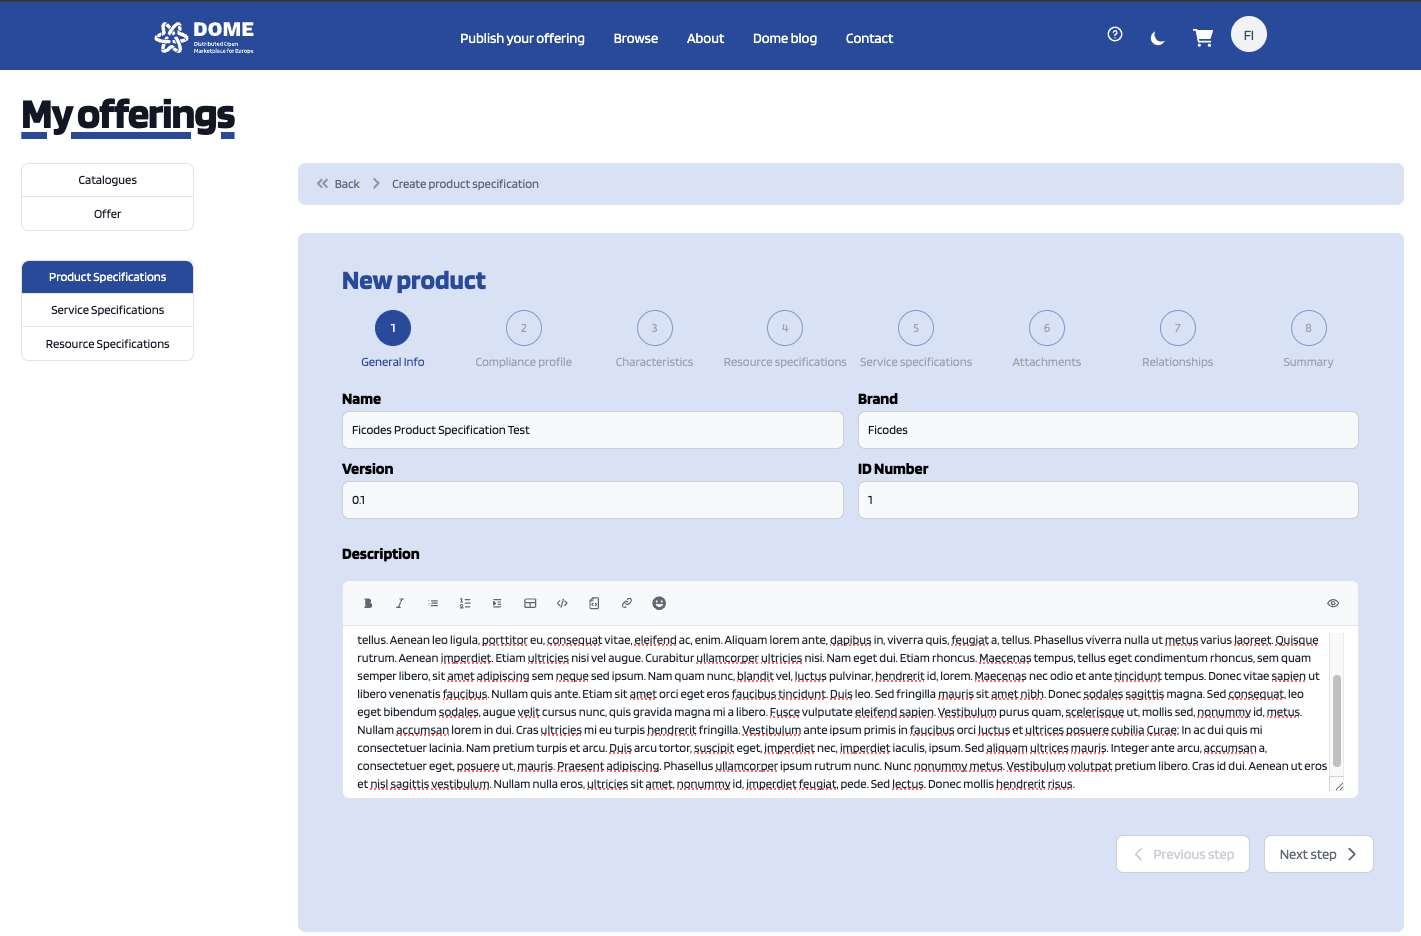
To create a new product specification click on Add new product specification.
The product specification creation form has several steps. In the displayed view, provide the general information of the product spec. including its name, version, and an optional description. In addition, you have to include the product brand (Your brand), and an ID number which identifies the product in your environment. Then, click on Next.
The next step in the creation of a product is including its compliance profile. The first document needed is the "Self attestation" document. This document is required in order to reach the "Basic Level" within the compliance's levels. In order to add this you should click the Upload button right next to the text "Upload your self attestation document".
For including a certification to the compliance profile you should click the Add Compliance Profile button and then the Plus button next to the certification that you want to add.
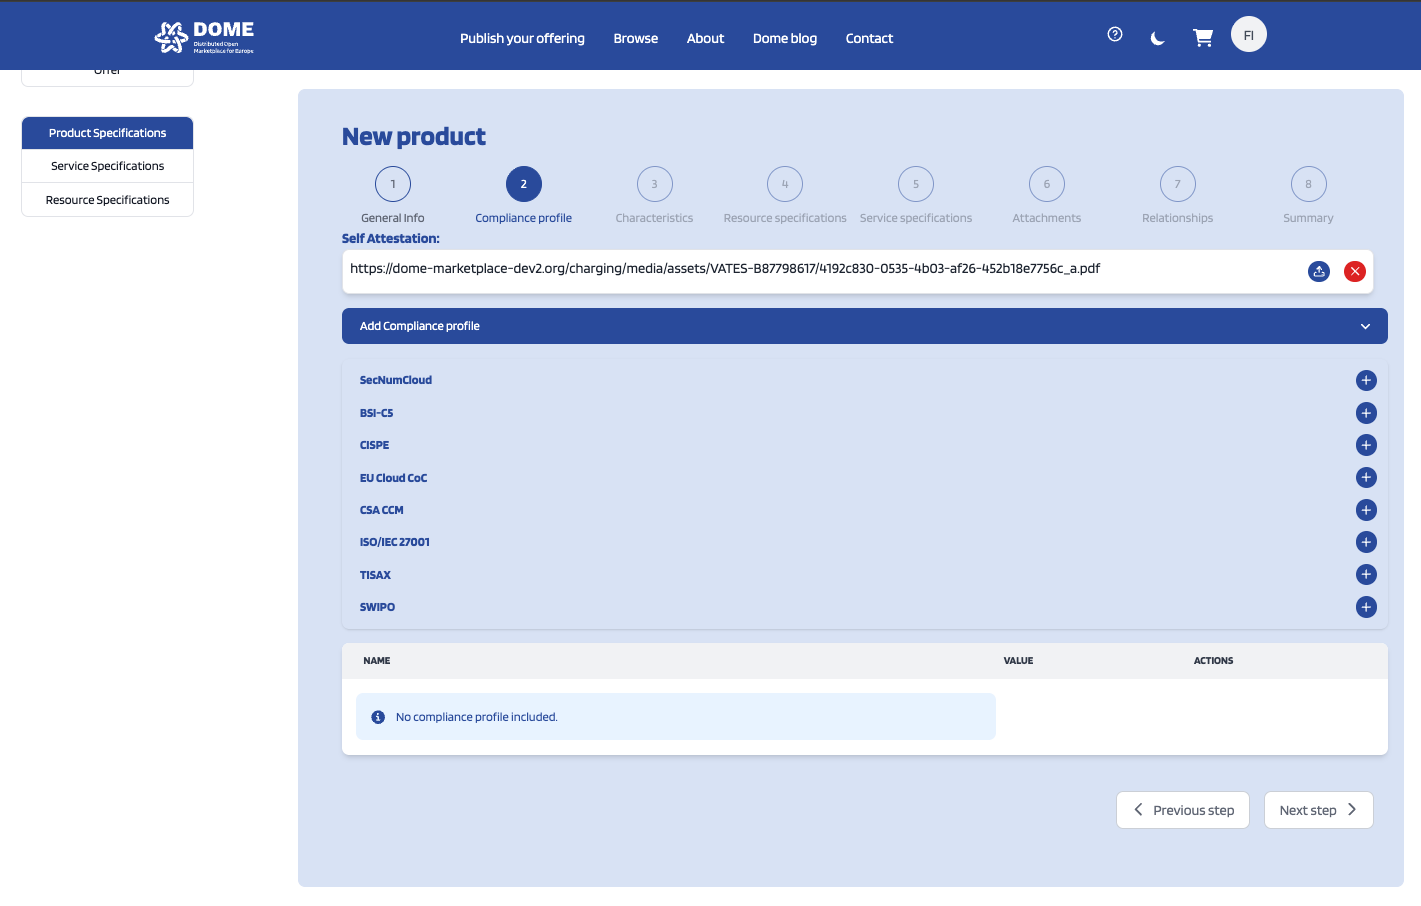
Once you've selected the certification you should click the Upload button and upload the certification archive from your computer.
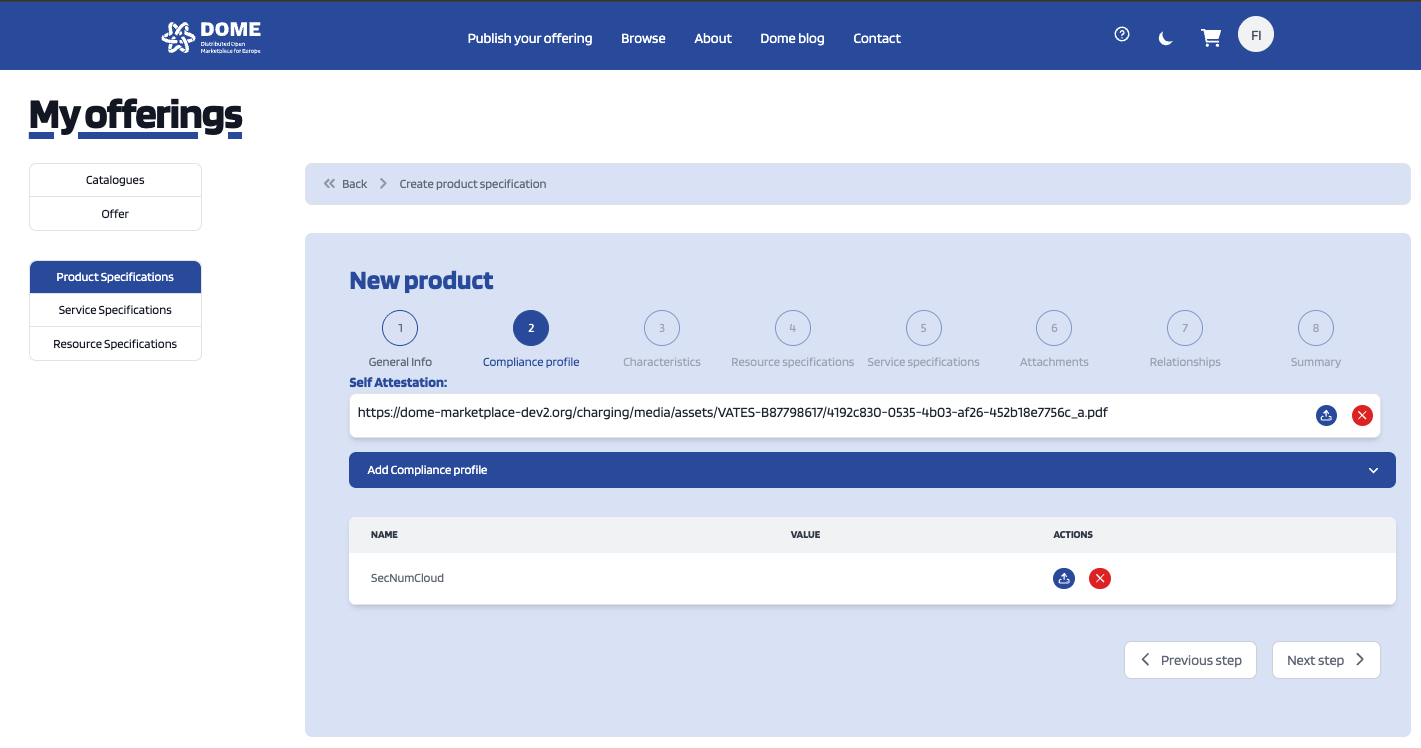
Whenever you've finished adding certifications you should click on Next button.
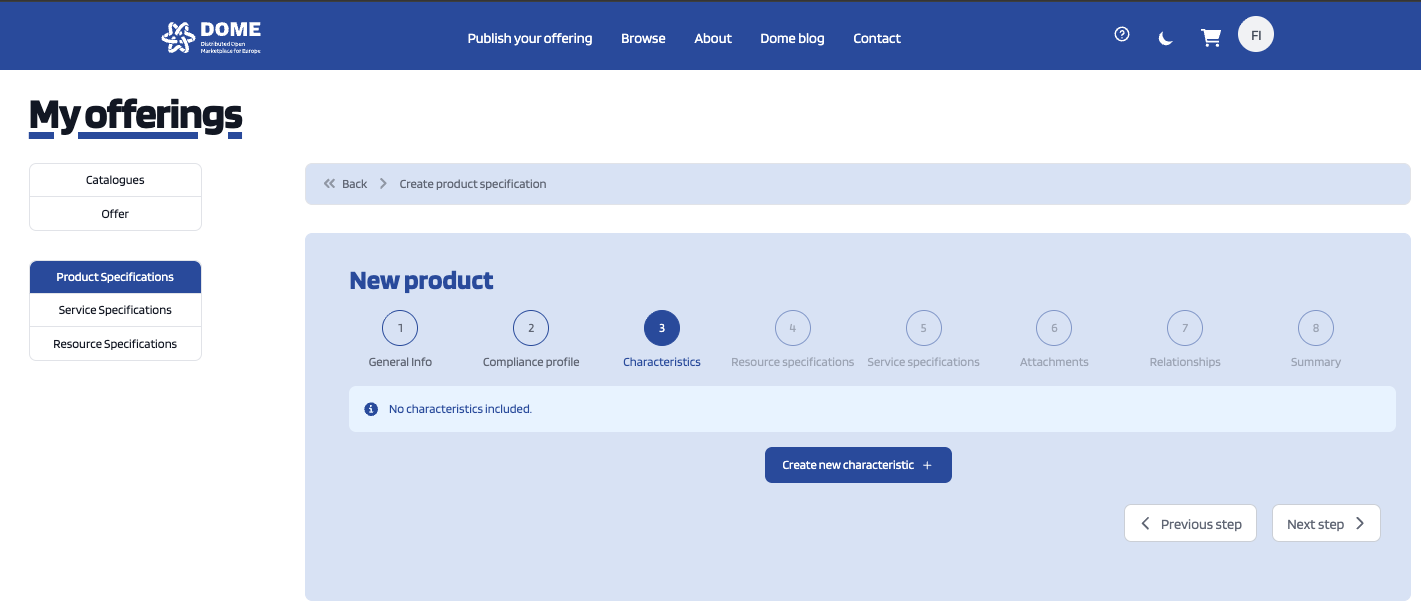
The next step in the creation of a product is including its characteristics. For including a new characteristic click on Create new characteristic and a creation form will be displayed.
In this form you can select the type of characteristic that you want to create (i.e. String, Number, Number Range or Boolean -used to enable/disable other characteristics-) by clicking on the type dropdown button.
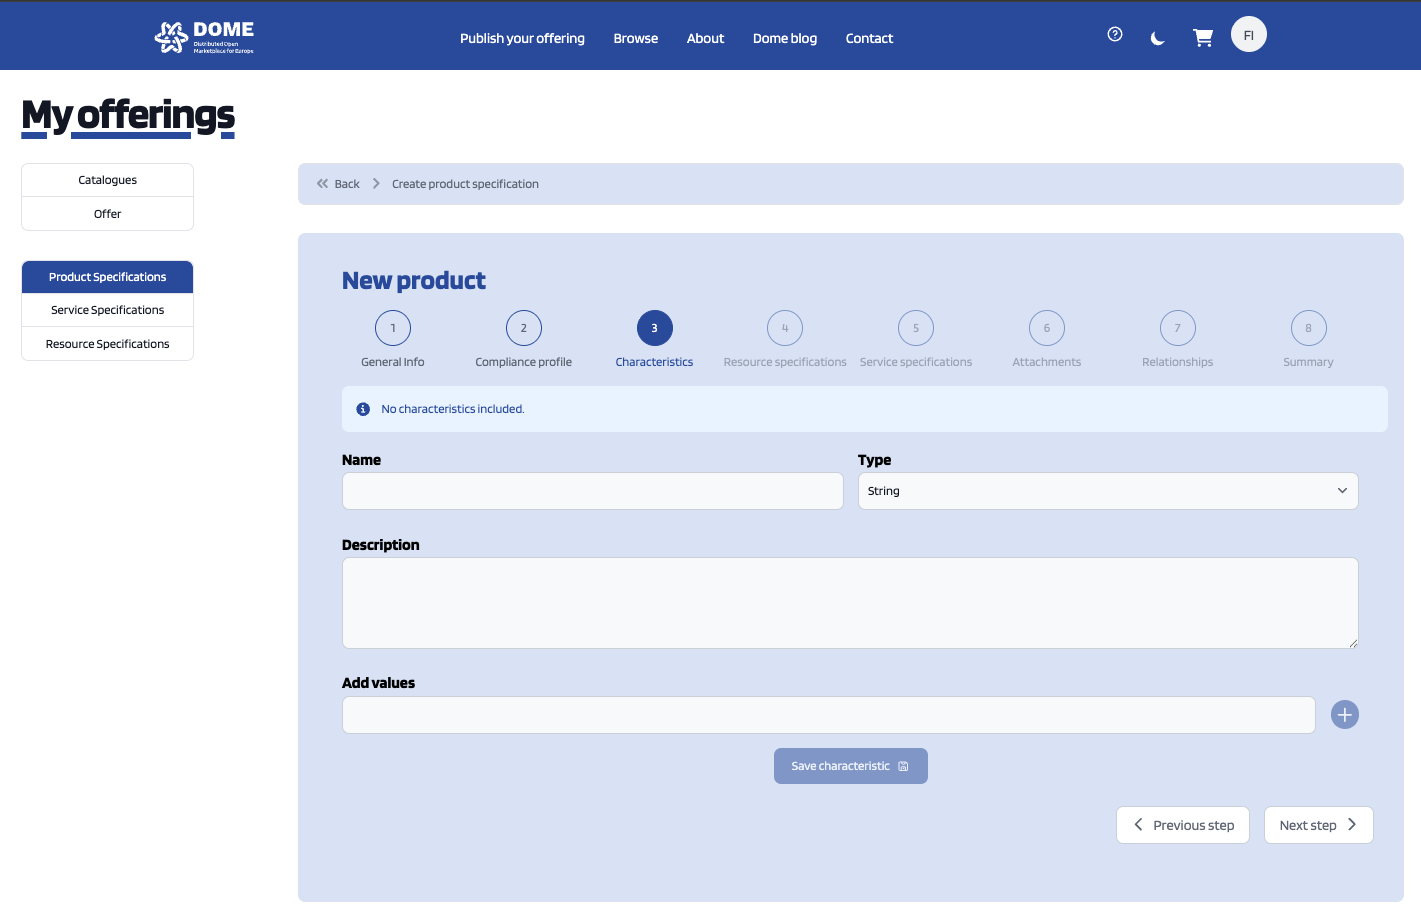
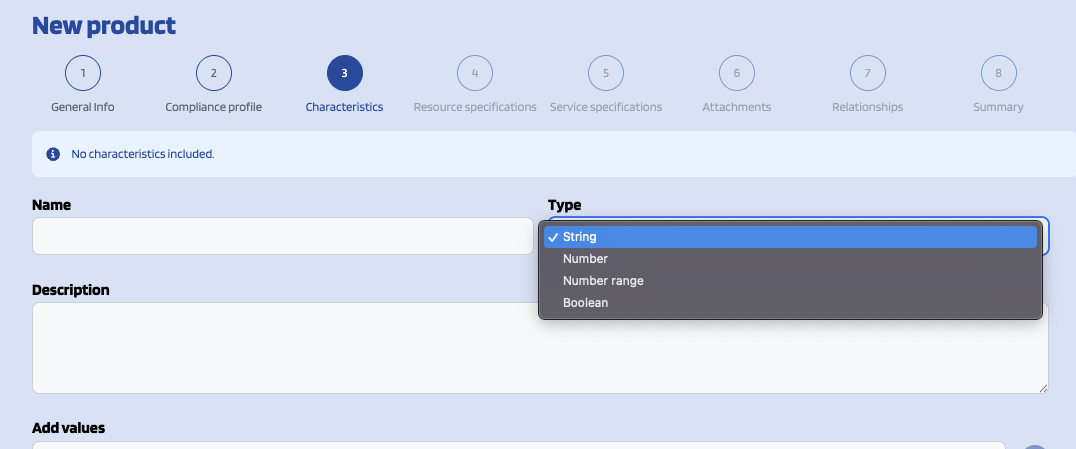
Once you've selected the type of characteristic that you want to create you should fill the name and description fields and add at least one value by filling its fields and clicking on the Plus button next to them.
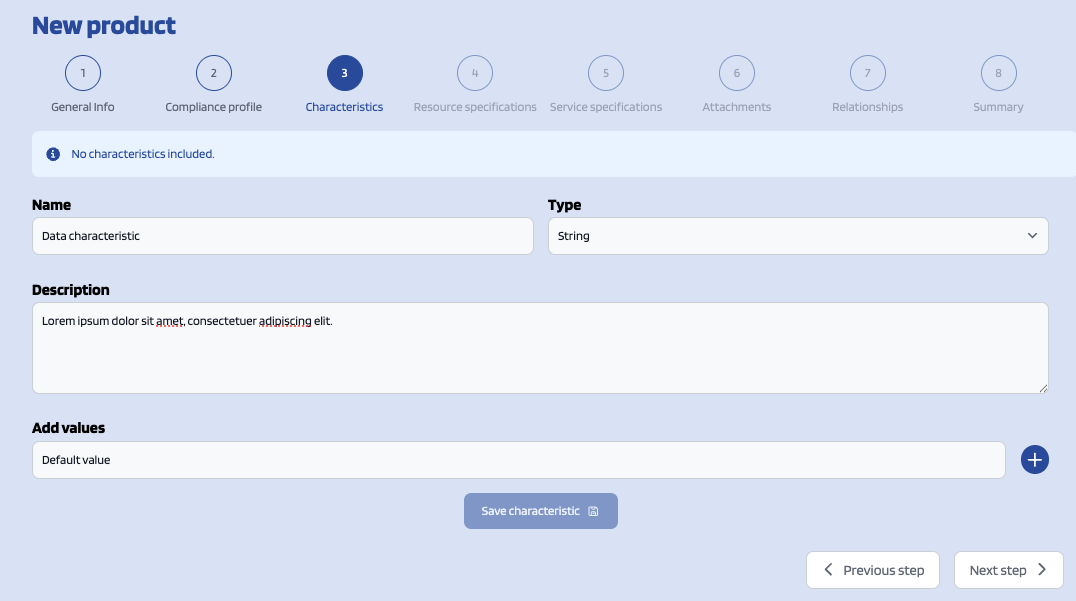
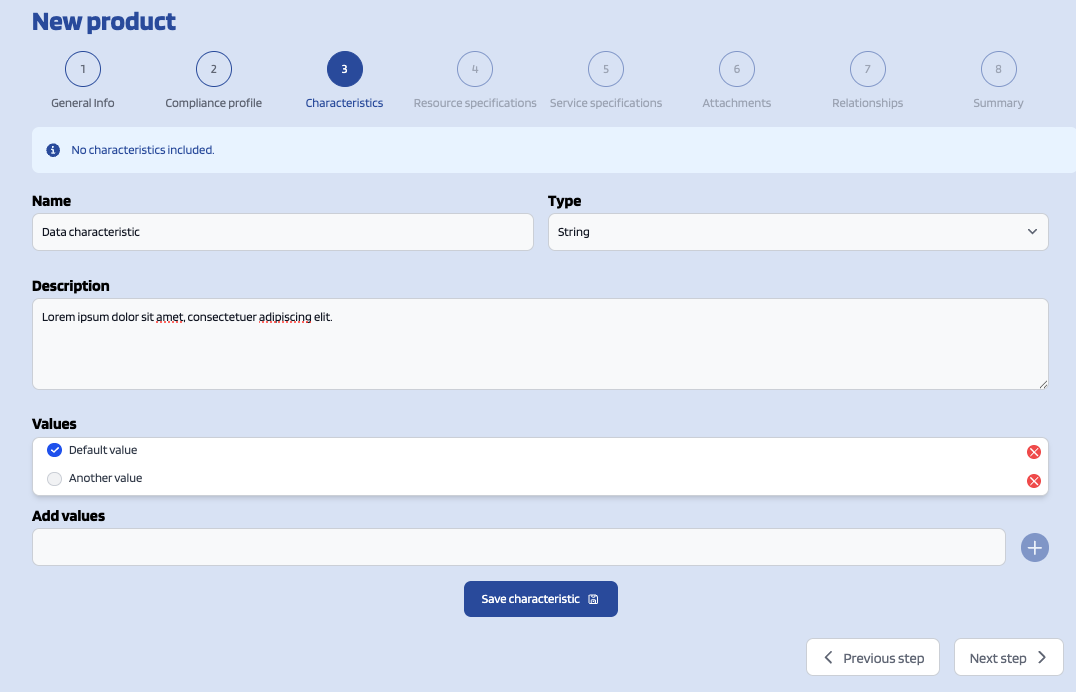
Additionally you can delete any value you've created by clicking on the Delete button next to the value itself and select the default value for the characteristic by clicking on the check button of the specific value (the one with the blue check next to it is the default value).
Whenever you finish filling the characteristic's information you should click the Save characteristic button.
On the characteristic's list preview you can also remove any characteristic by clicking the Delete button next to it.
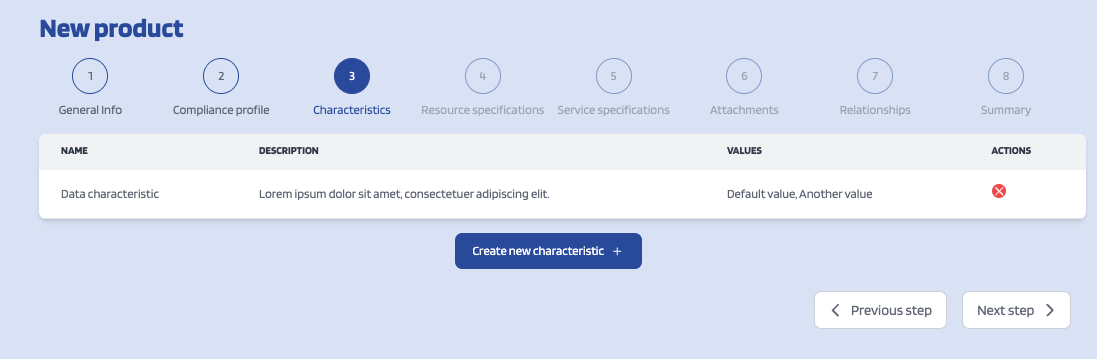
If you're done with the characteristics you can click the Next button.
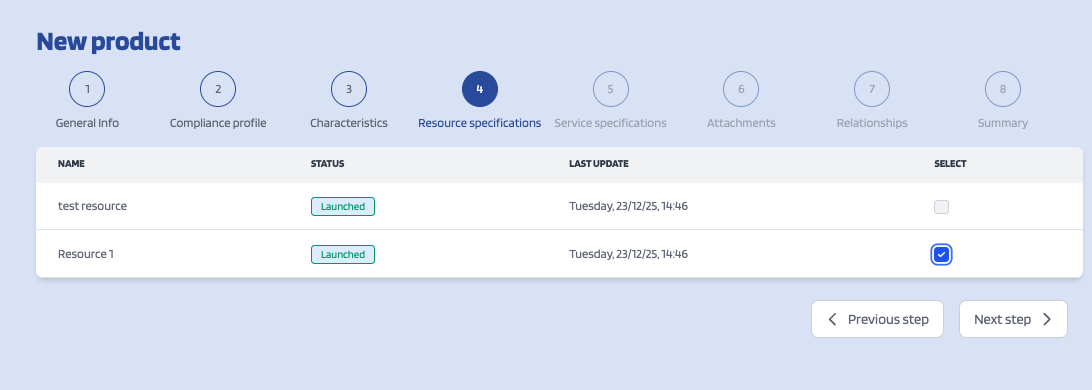
In the next step you can add as many resources as you want to the product by clicking on the check button next to them and then click Next.
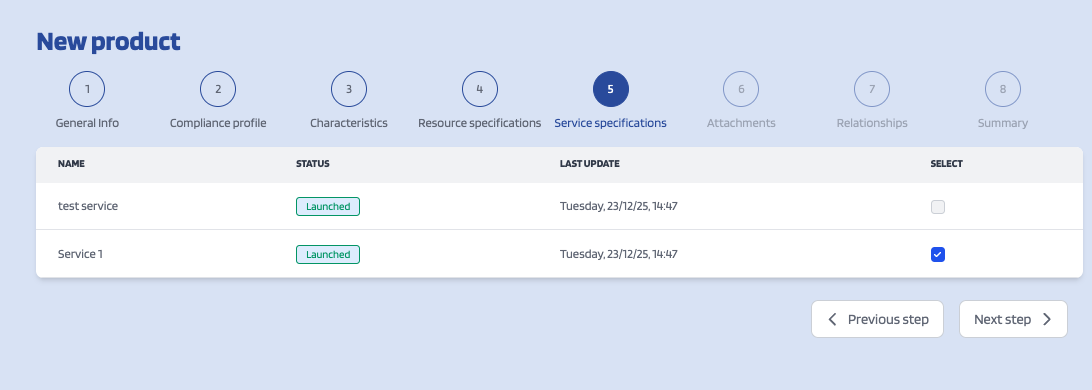
The same way as in the previous step, in this step you can add services to the product.
In the next step you can include a picture for your product and add as many files (such as images, PDF documentation, etc.) as you want to the product as attachments.
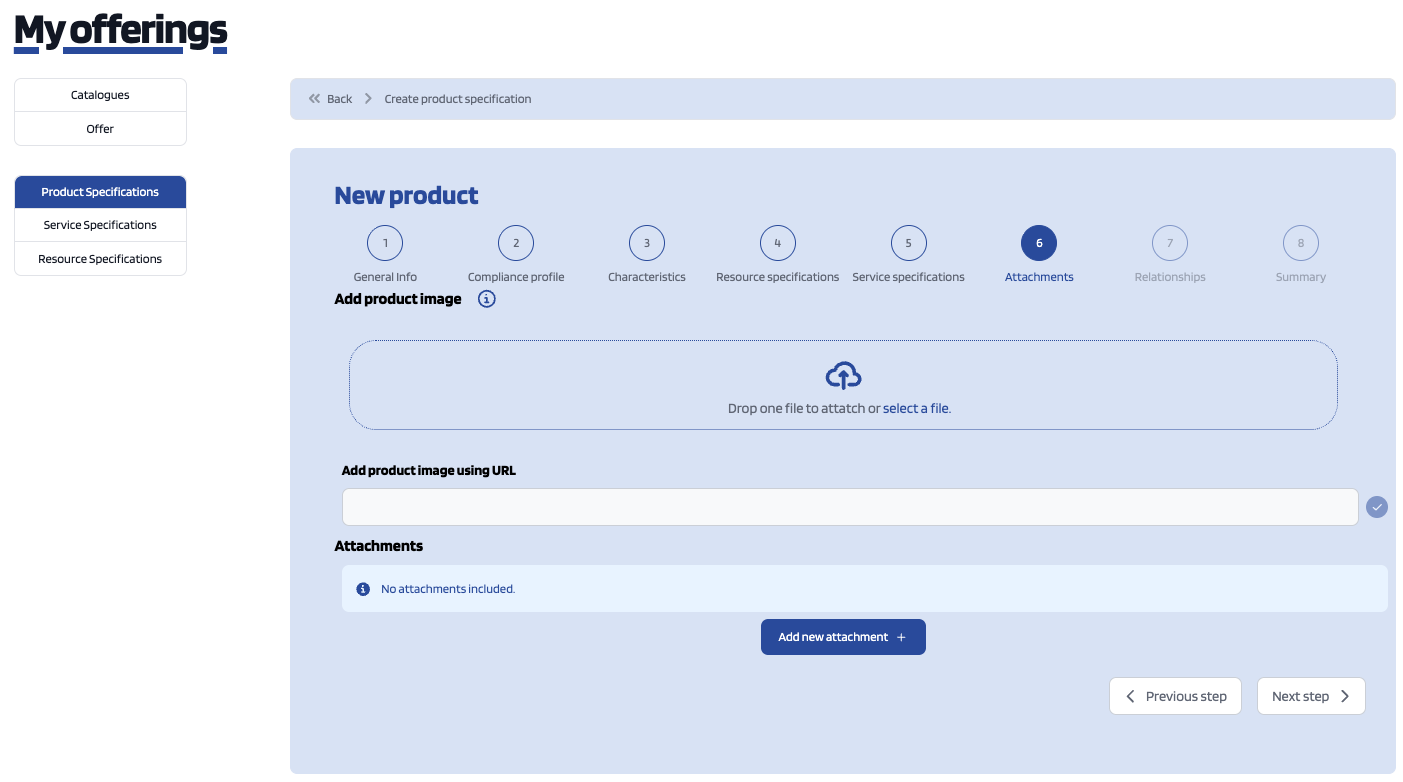
If you want to add a picture for your product you have two options, providing an URL pointing to the picture or directly uploading it.
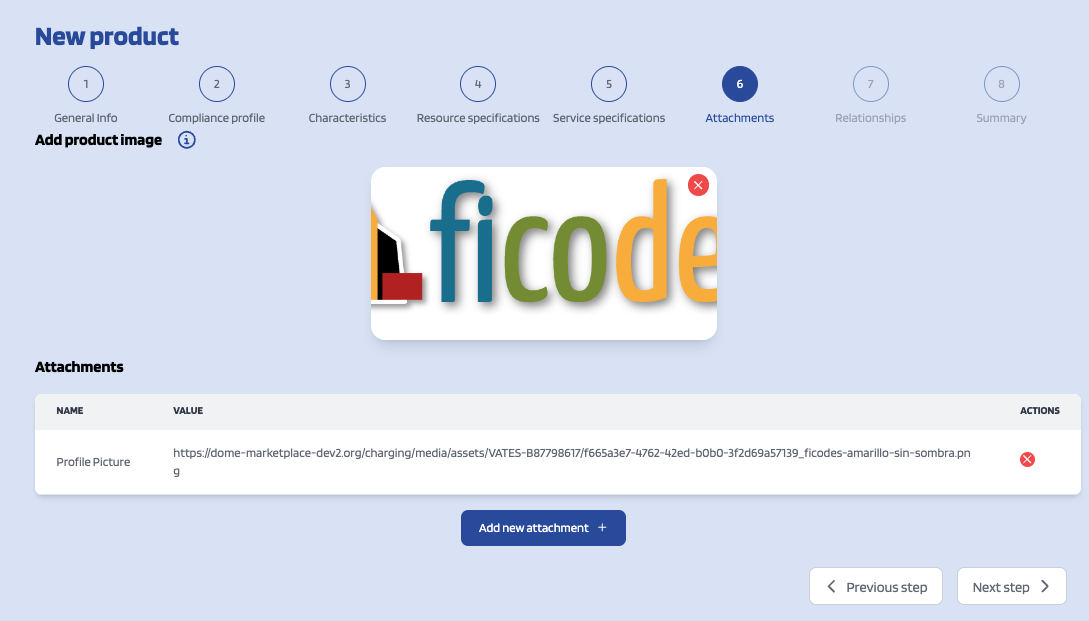
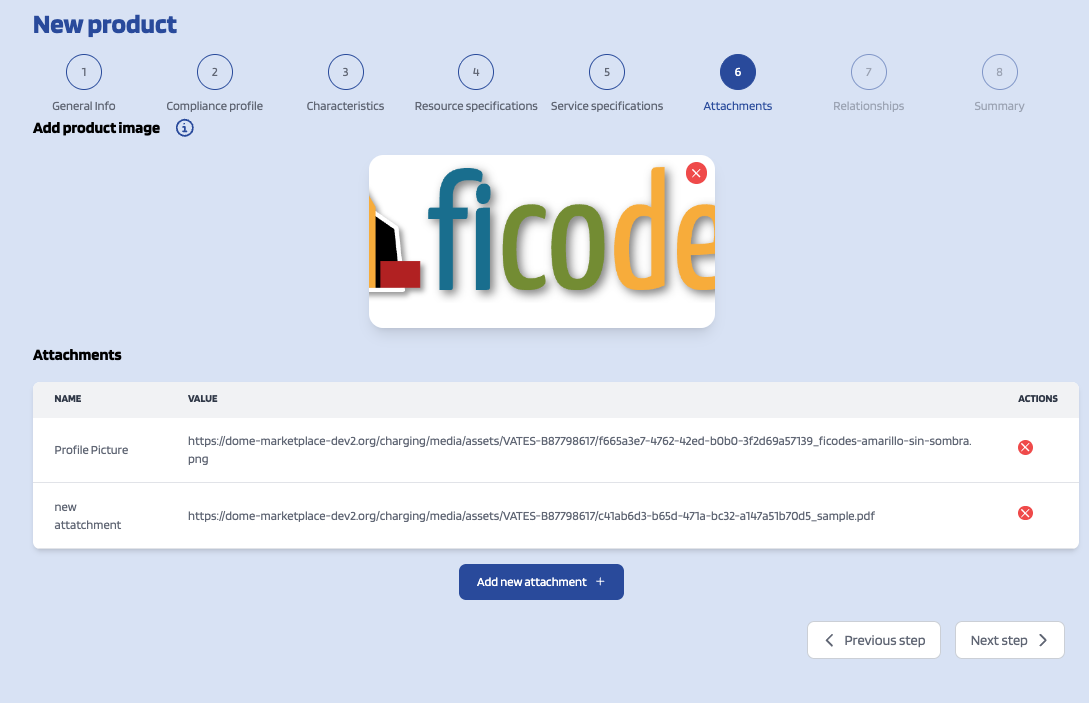
If you want to add other files you can do it by clicking on the Add new attachment button. Here you should fill the attachment's name and upload the file. Once provided click Save attachment.
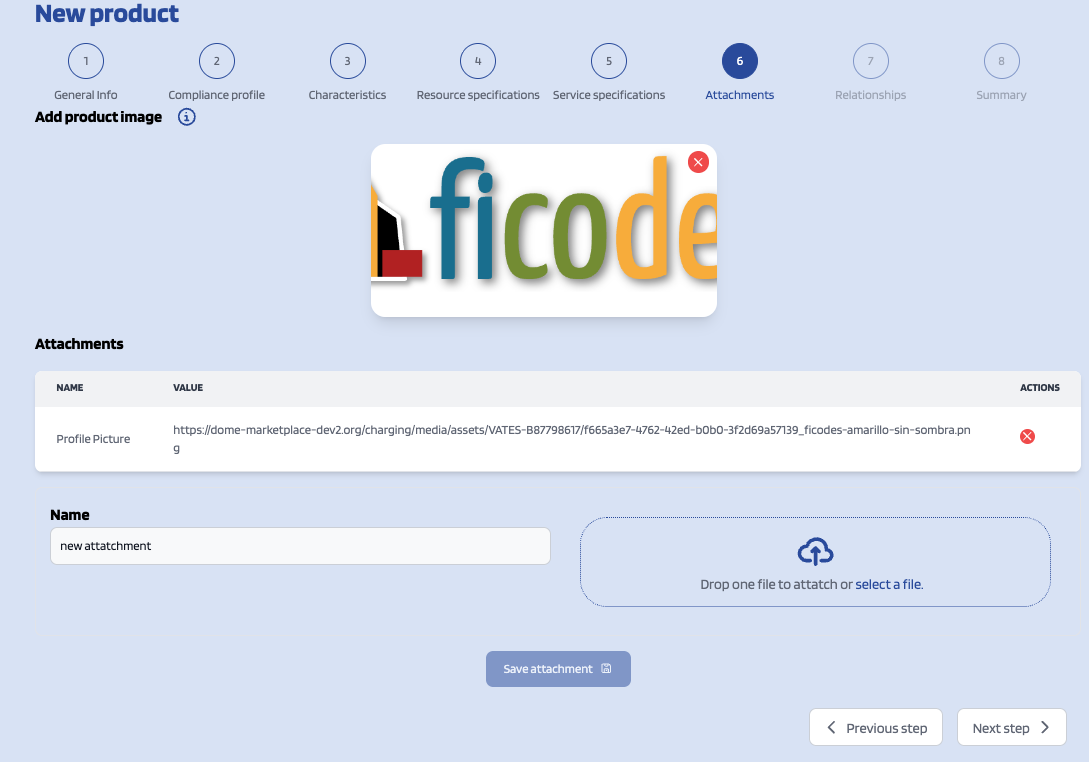
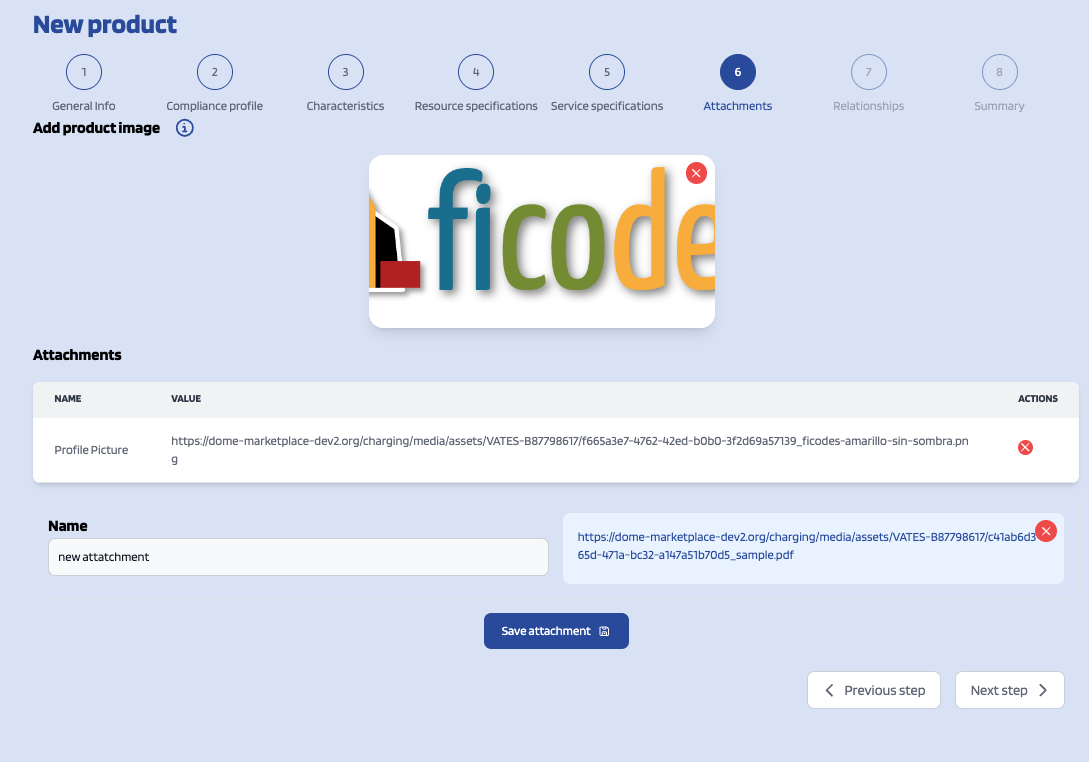
Additionally you can remove added attachments by clicking the Delete button next to it.
Whenever you've finished adding attachments click Next.
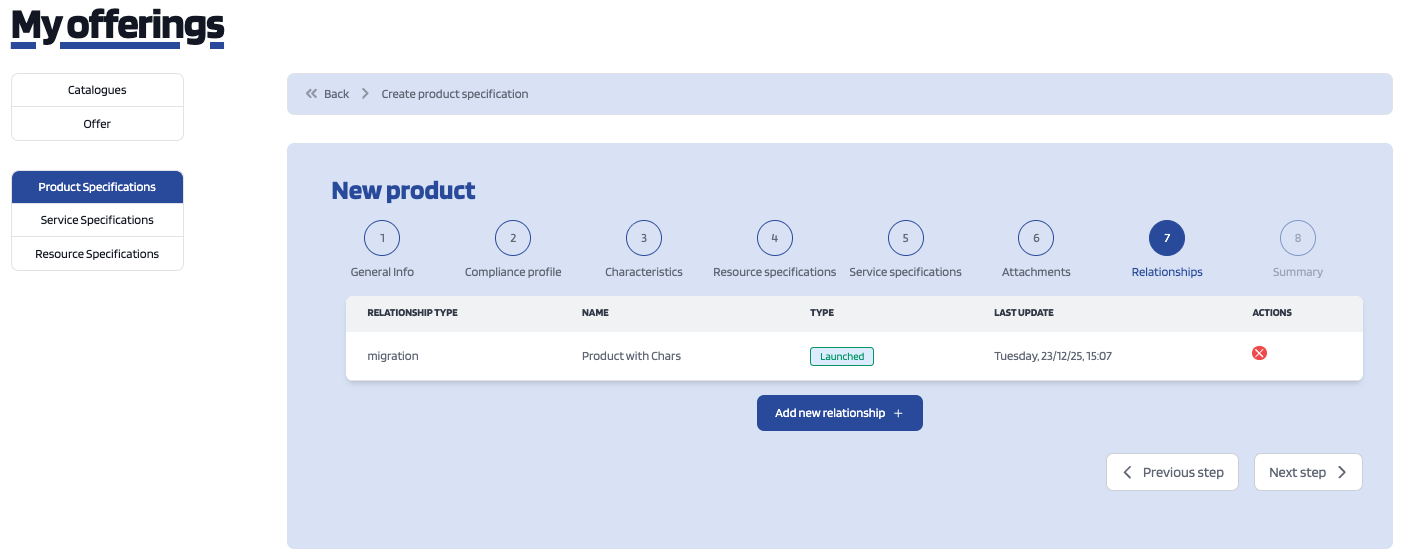
In the next step, you can specify relationships of the product you are creating with other of your product specs.
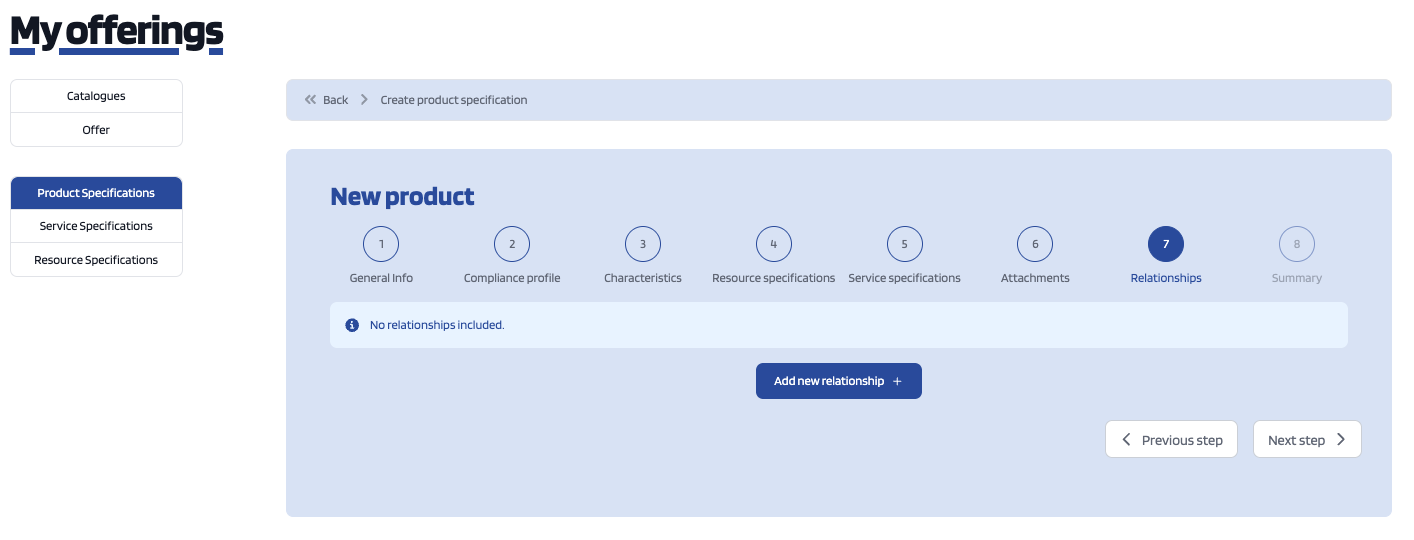
If you want to add any relationship to your product click Add new relationship.
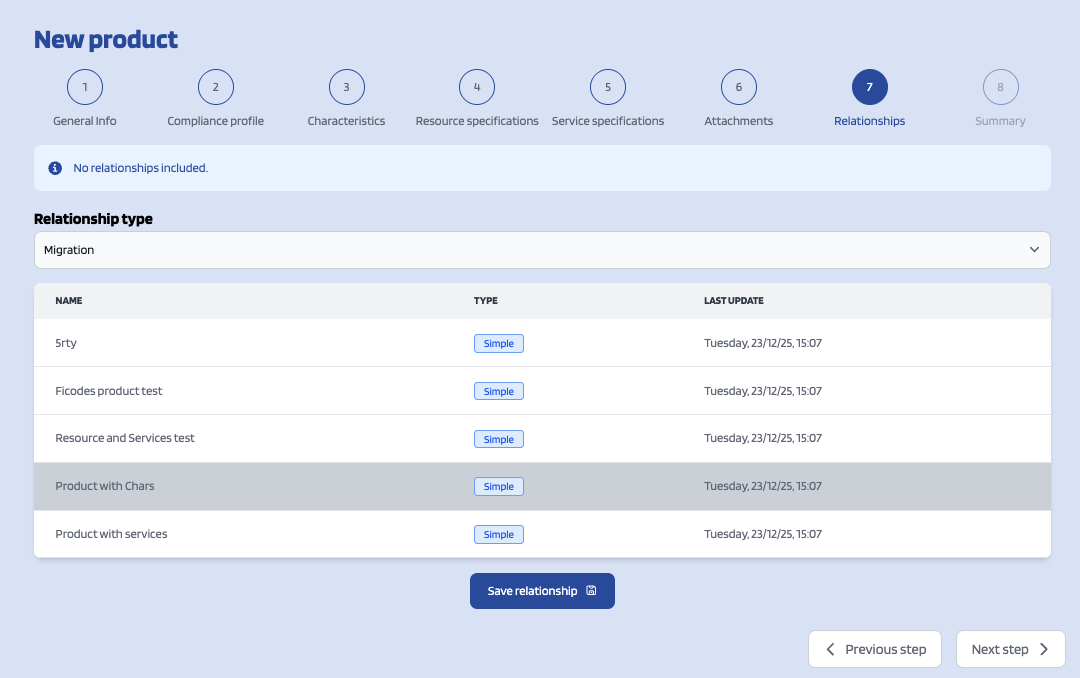
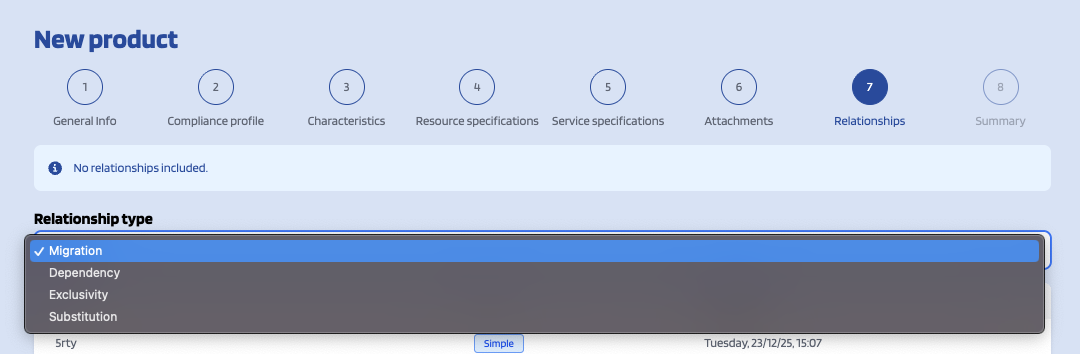
You should select the relationship's type by clicking on the Relationship Type dropdown and the product with the product to created will be related by clicking on its row on the table. Once you're done click Save Relationship.
Whenever you've finished adding relationships to the product click Next Step.
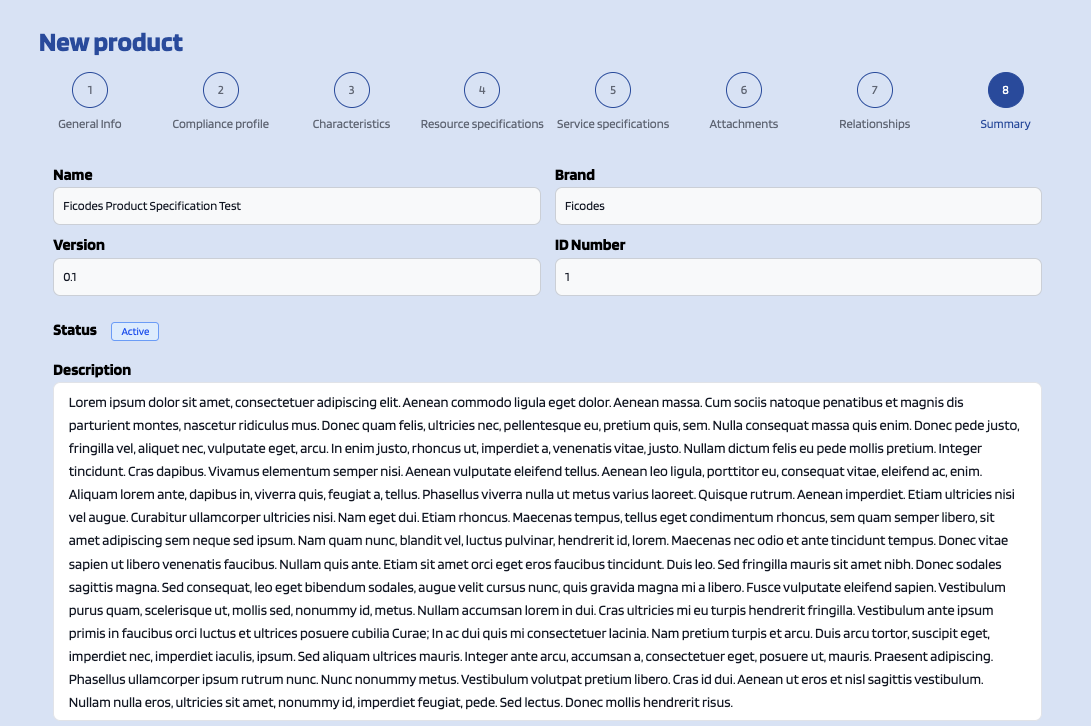
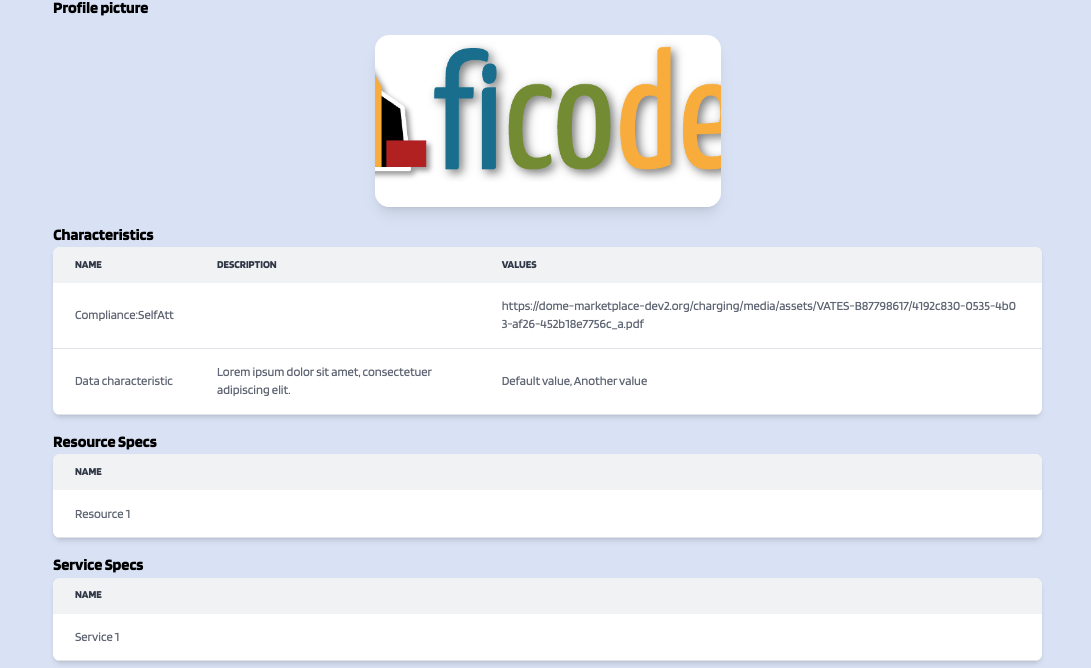
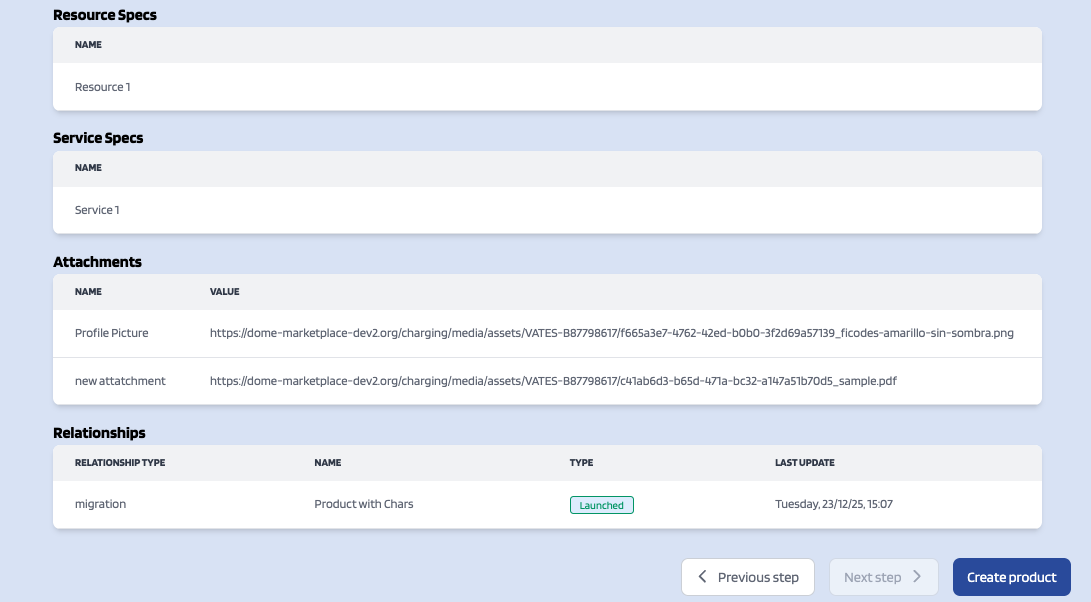
In the last step a review of the product to create is shown. If everything is okay click Create product.
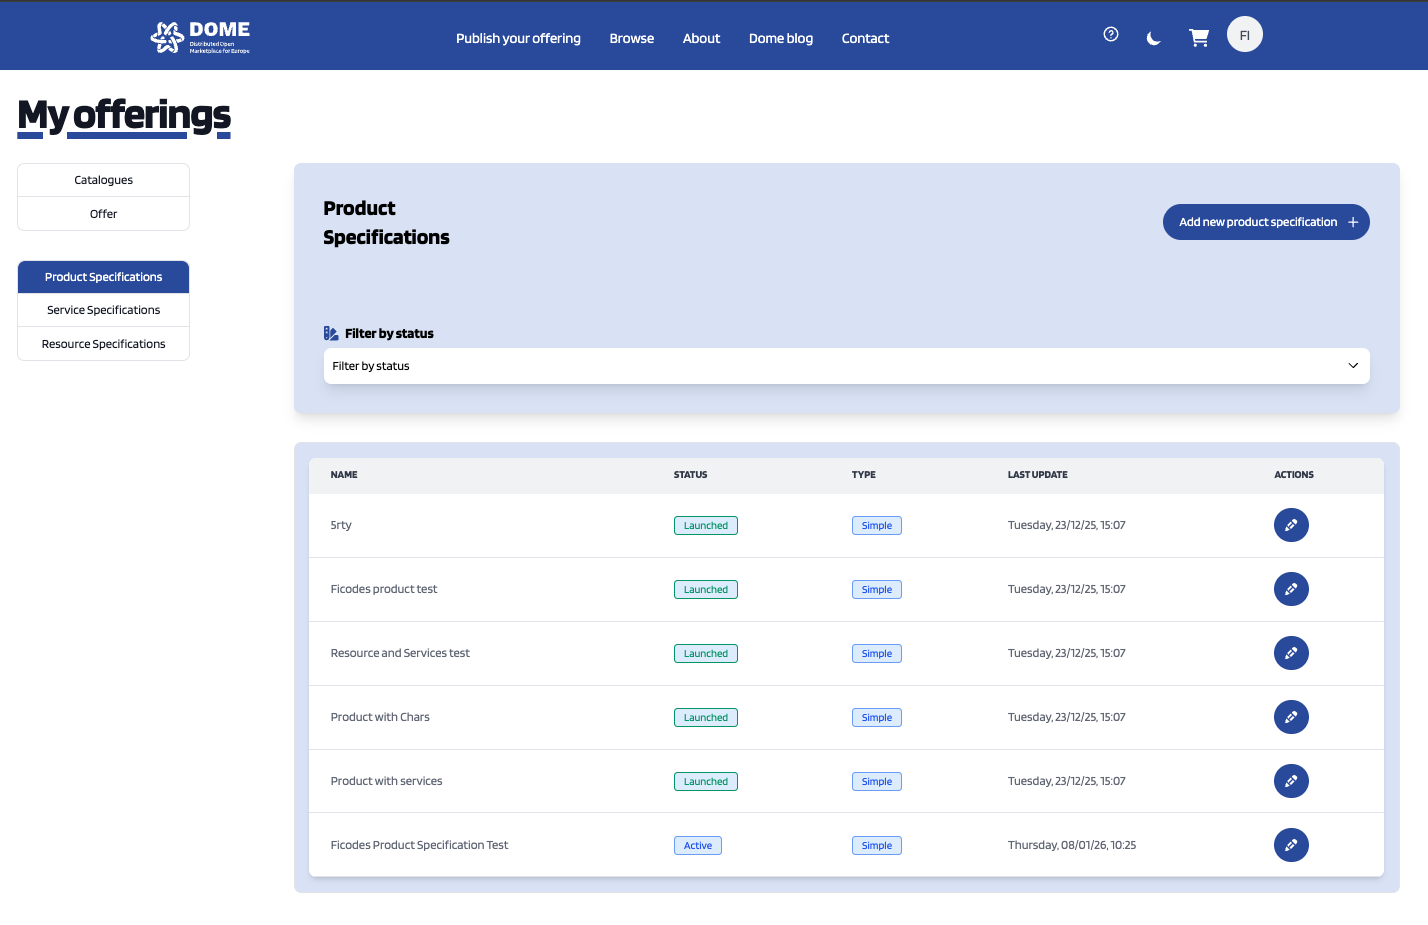
Providers can update their products. To do that click the Edit button next to the product specification to be updated.

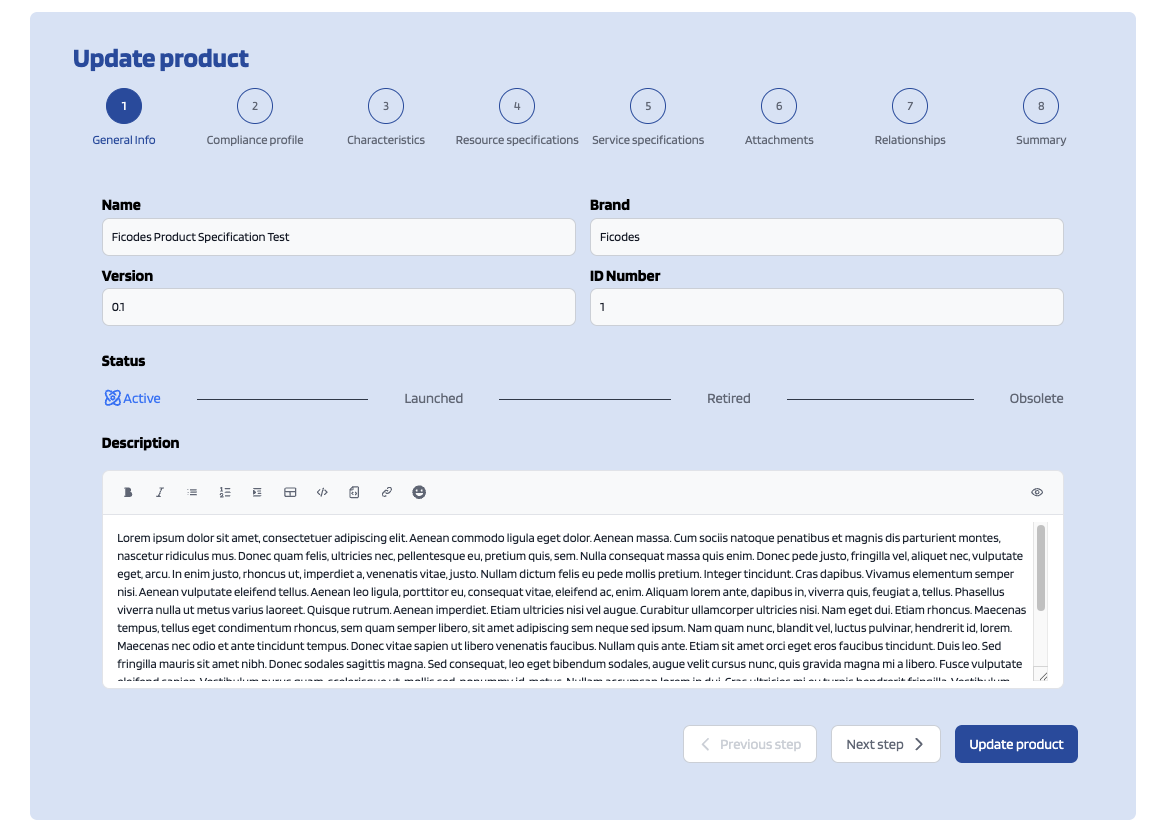
Update the required values, click over Next buttons (or directly on the step that you want to go) and once you've finished click on Update product. Note that for start selling an offering that includes the product specification you will be required to change its status to Launched.
Additionally on the update product view you can verify the product's certificates by clicking the check button next to the certification that you want to verify.
How to set the product pricing model, managing product offerings
Product Offerings are the entities that contain the pricing models and revenue sharing info used to monetize a product specification. To list your product offerings, go to My Offerings section and click on Offer.
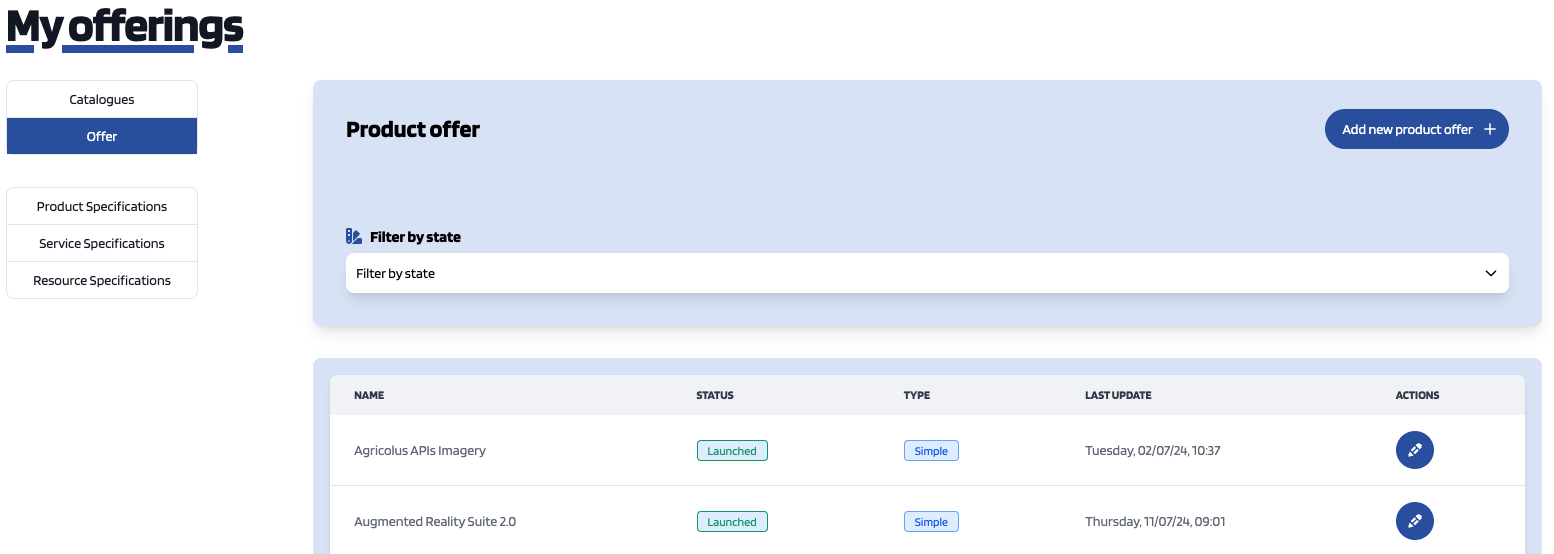
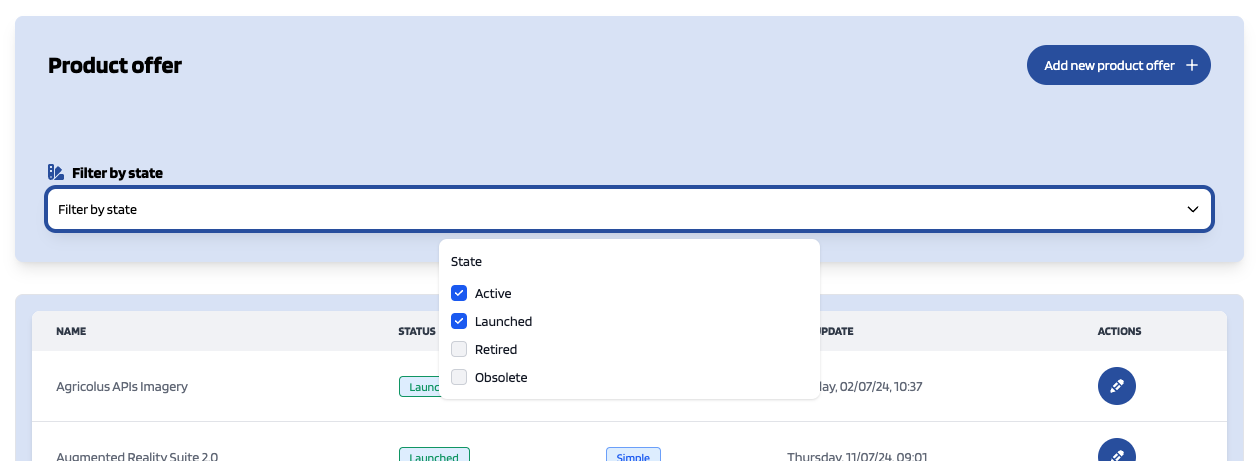
The existing product offerings can be filtered by state clicking on Filter by state and choose the appropriate properties.
To create a new offering click on Add new product offer.

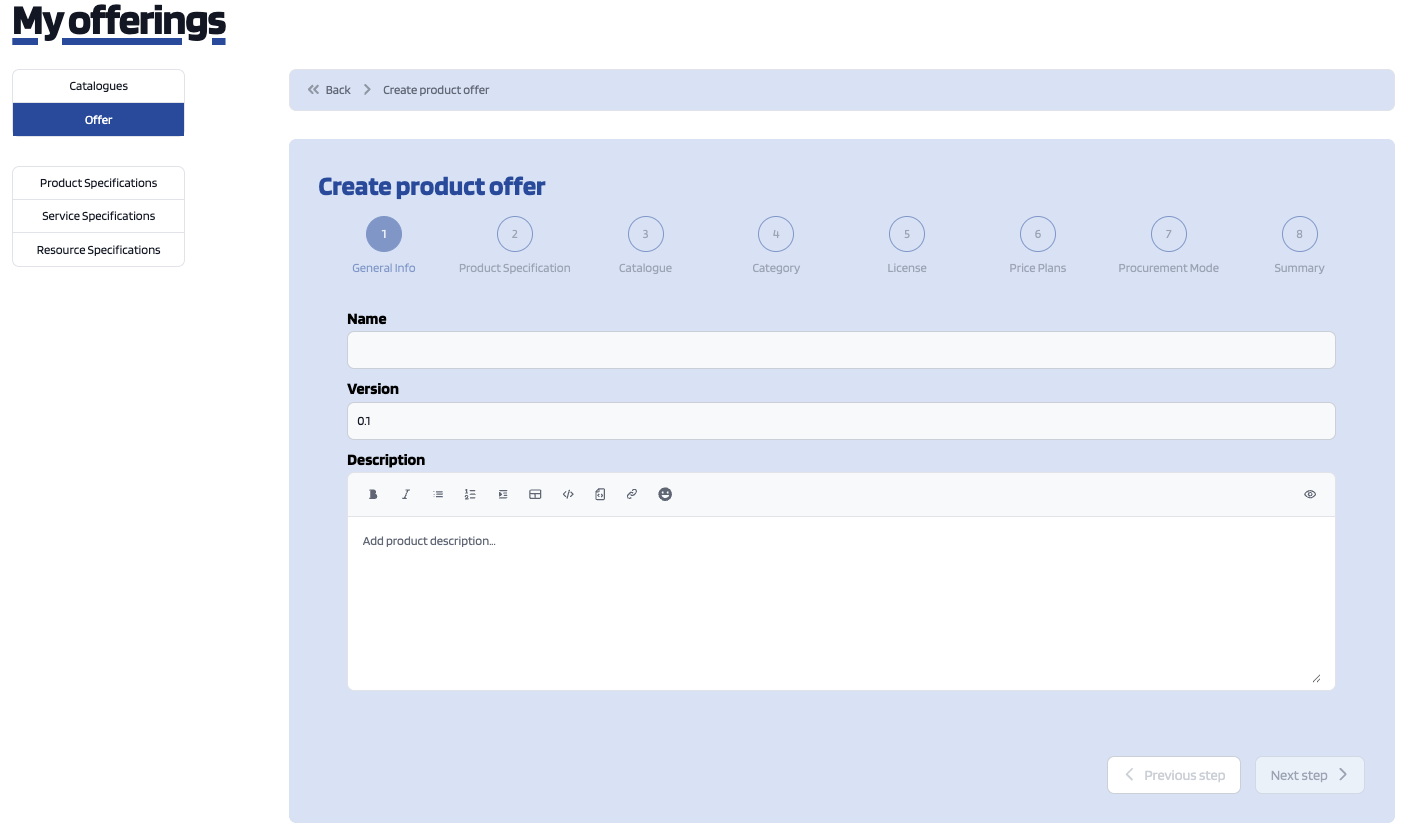
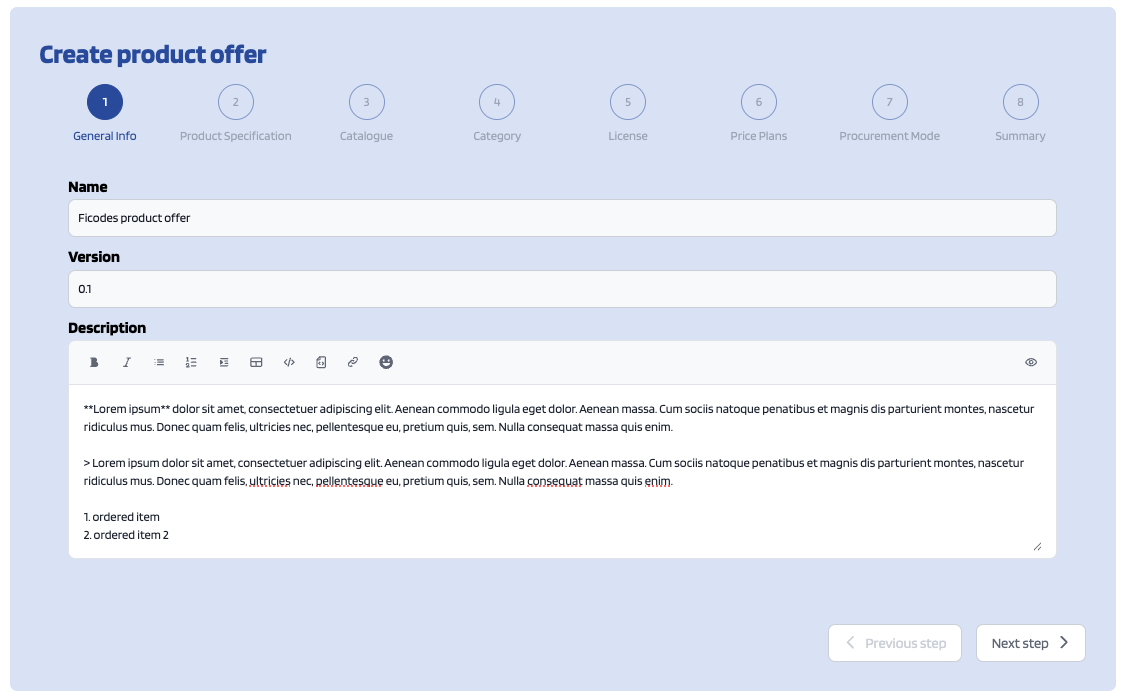
In the displayed form, include the basic info of the offering. Including, its name, version and an optional description. Once the information has been provided click on Next step.
In the next step you have to select the product specification that is going to be monetized in the current offering. Once selected click on Next step.
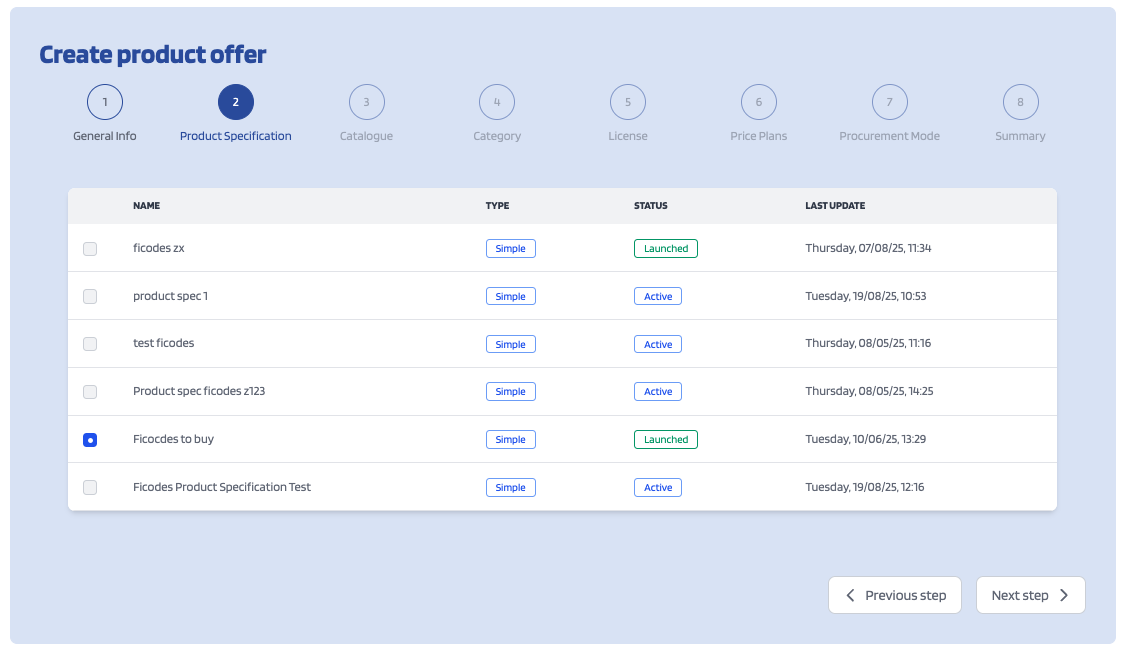
Then, you have to select the catalogue where you want to publish you offering and click on Next step.
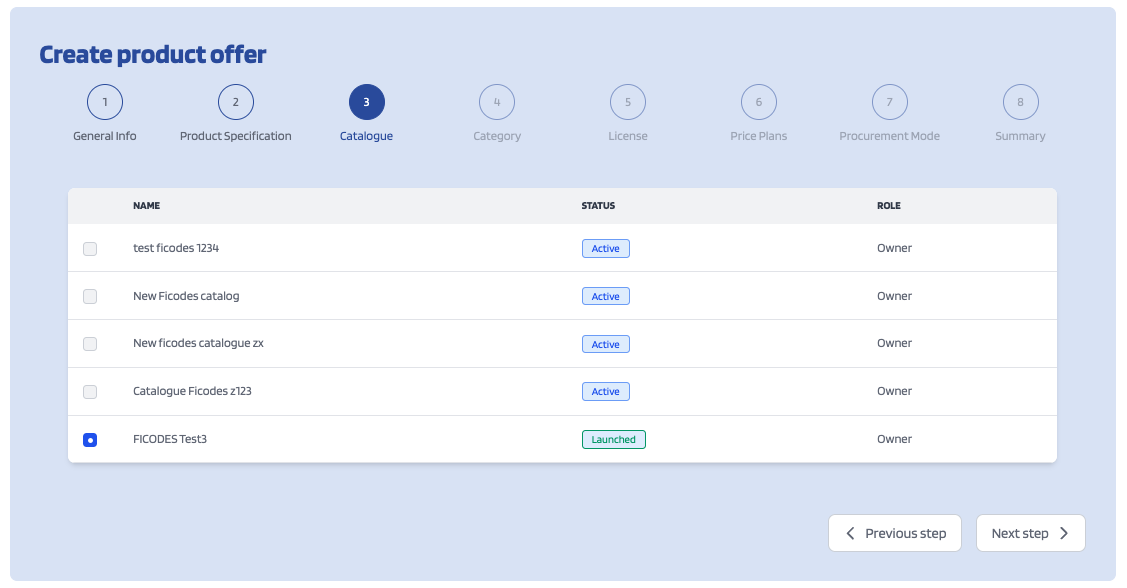
In the next step, you can optionally choose categories for you offering. Once done, click on Next step.
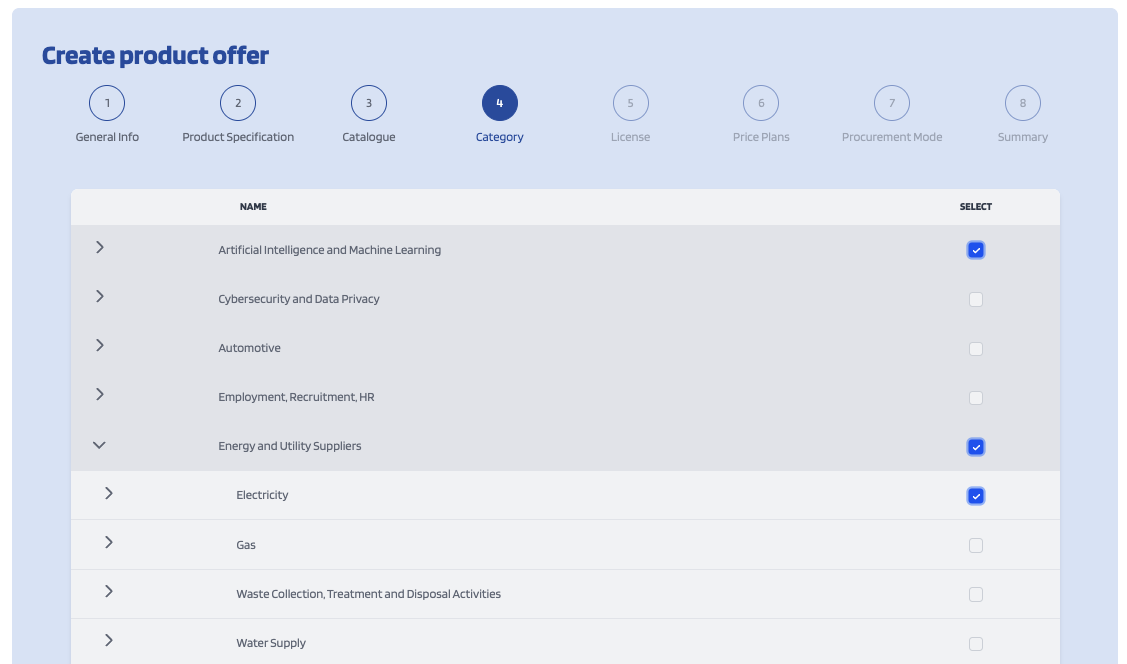
Next, it is possible to include the License or terms and conditions to be applied to the offering being created. In order to do that fill the fields and click Next step once you're done.
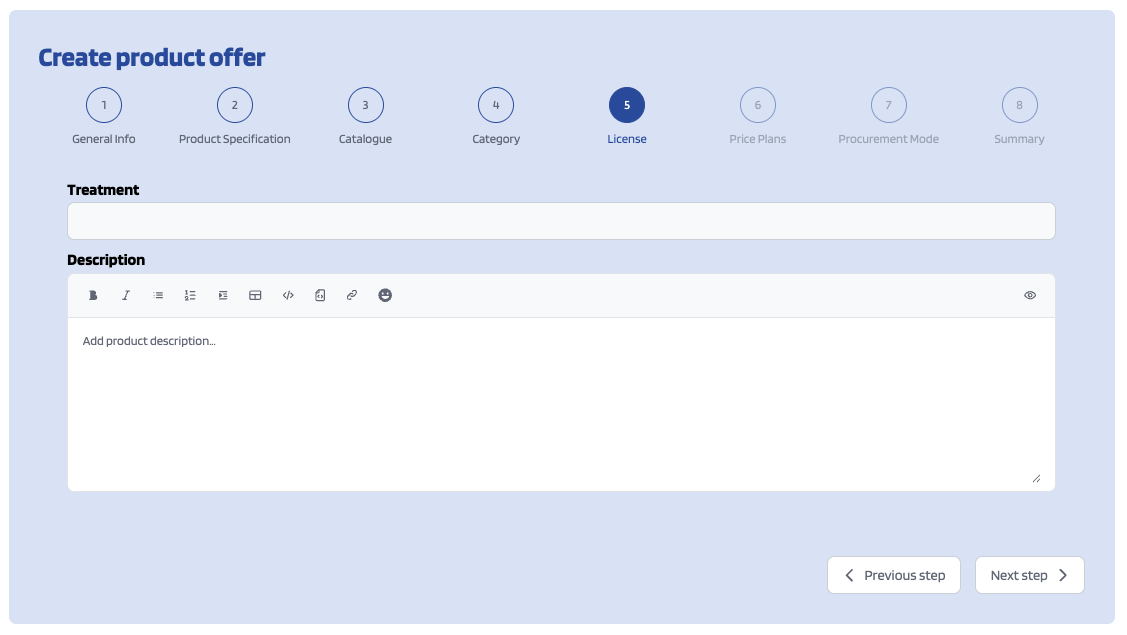
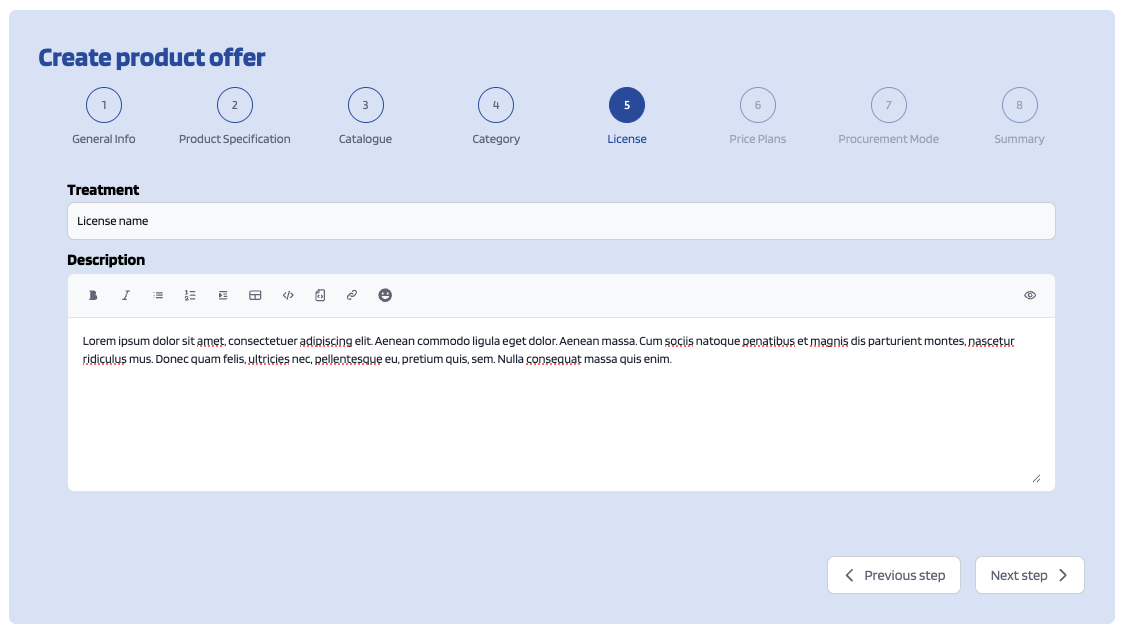
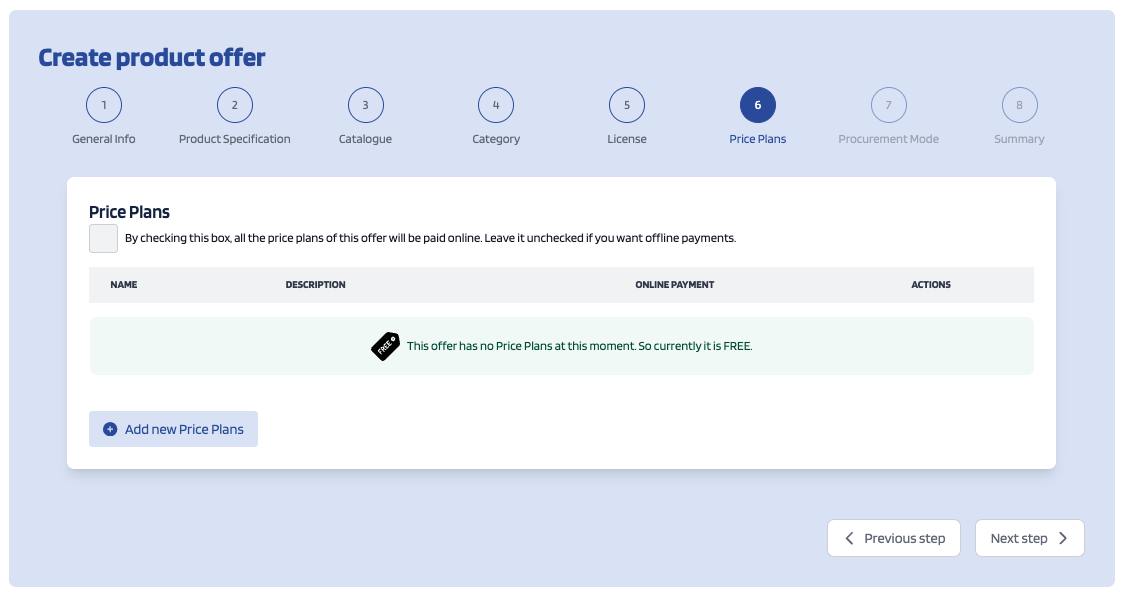
The next step is the most important for the offering. In the displayed form you can create different price plans for you offering, which will be selectable by customers when acquiring the offering. If you do not include any price plan the offering it is considered free.
To include a new price plan the first step is decide if the type of payment that suits best for you. Offline payments allow the customers to contact the provider with a price proposal. Online payments allow the customers to directly buy the offer within the marketplace with a fixed price. If you want your prices to be paid online you should click on the check box and leave if checked. If you want them to be paid offline then leave the checkbox unchecked.
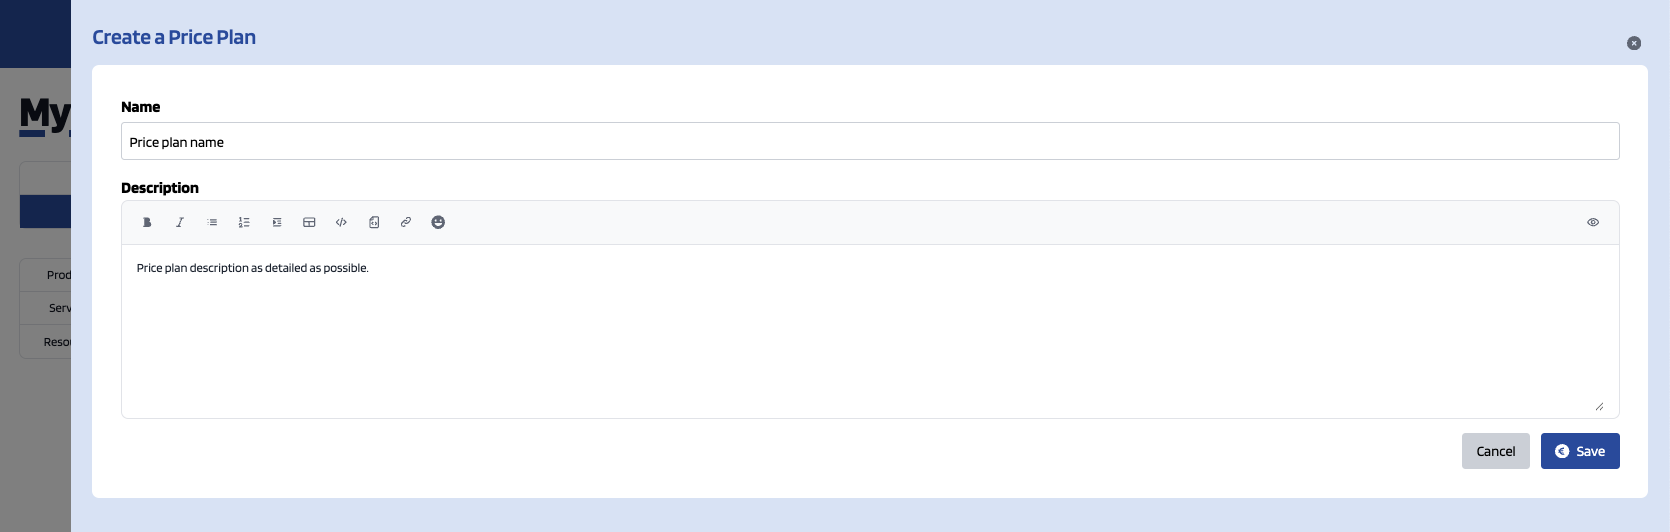
If you decided to create "Offline price plans" and you click on "Add new Price Plans" button a drawer will display. Within the drawer you have to fill the price plan's name and description. Once you're done click Save button in order to save the price plan.
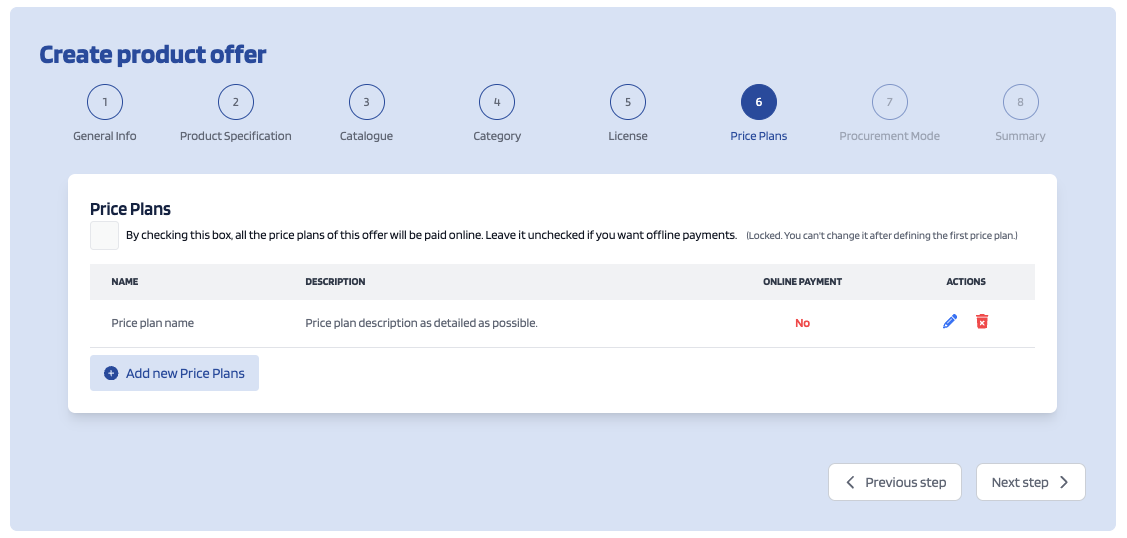
If you decided to create "Online price plans" you'll have to fill more information.
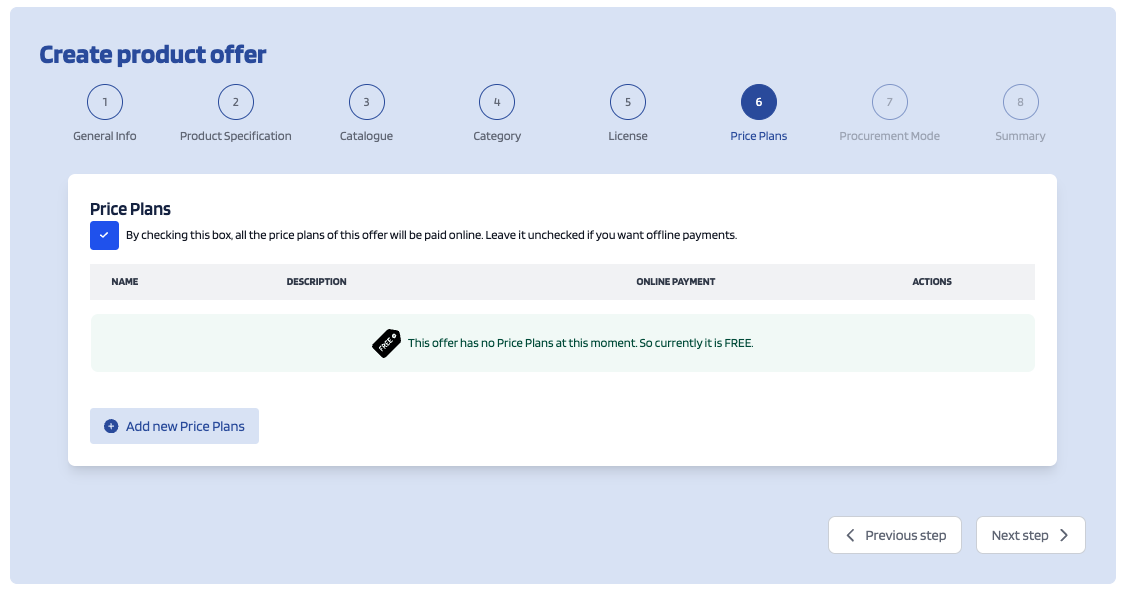
Once the checkbox is checked if you click on "Add new Price Plans" a drawer will display, but now more information is displayed.
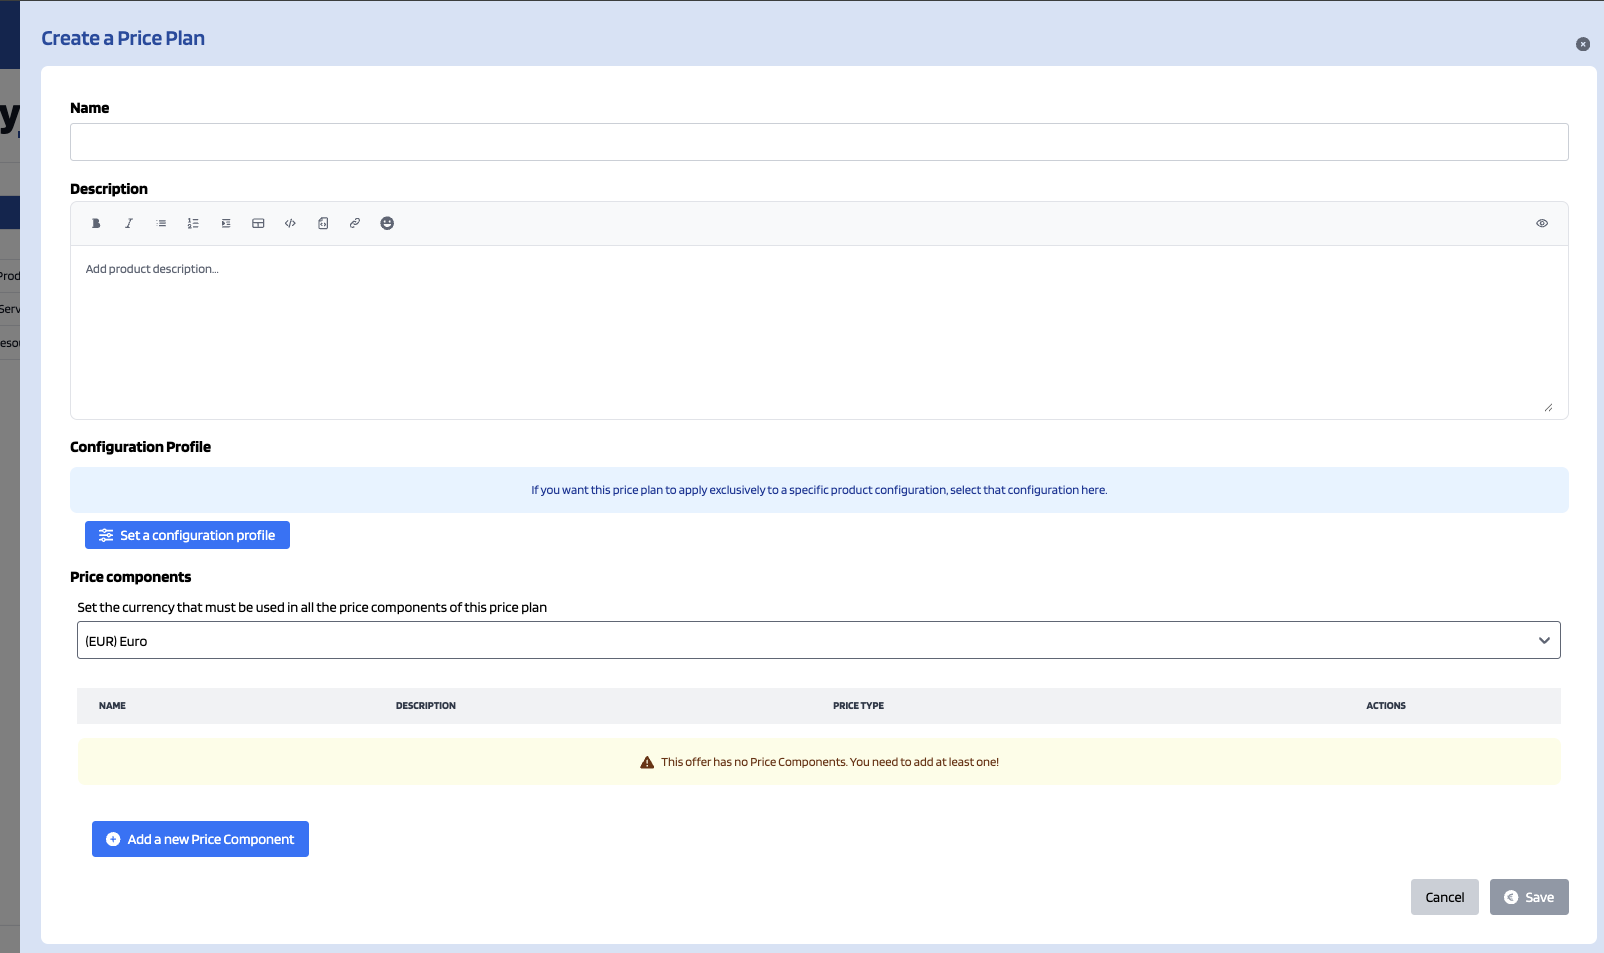
Here you should fill the price plan name and description, the same as the offline payment price plans. Futhermore you should decide whether the price plan will have a configuration profile or not (i.e. set a fixed value of the offer's characteristics to define this price plan). If you want to define this you've to click on "Set a configuration profile" button. Once you've done that a new drawer will display.
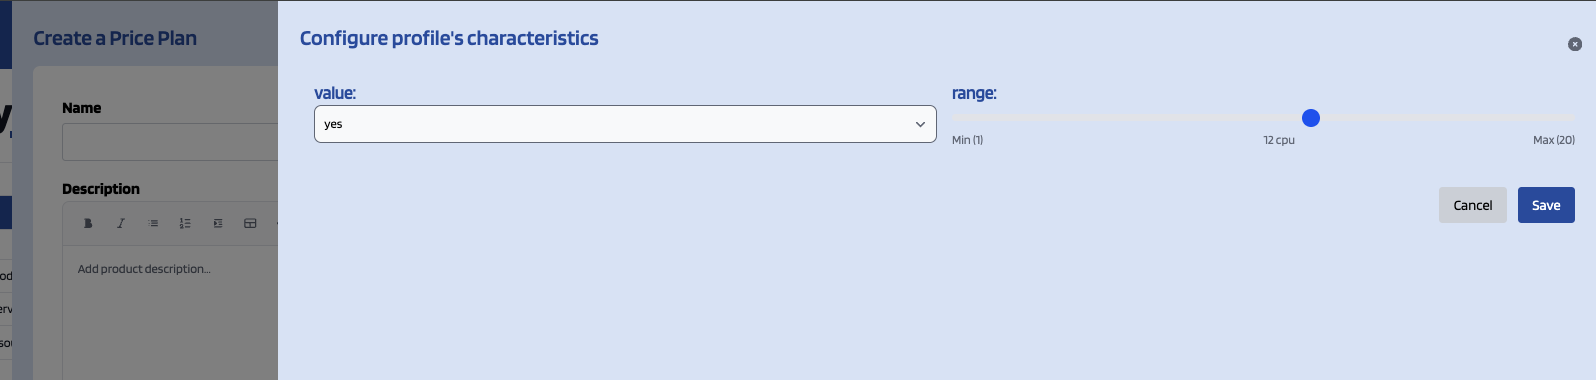
On this drawer you've to decide the characteristics' values. Once you're done you should click Save button. Now the preview for the price plan will have a table with the summary of the characteristic information that you've selected.
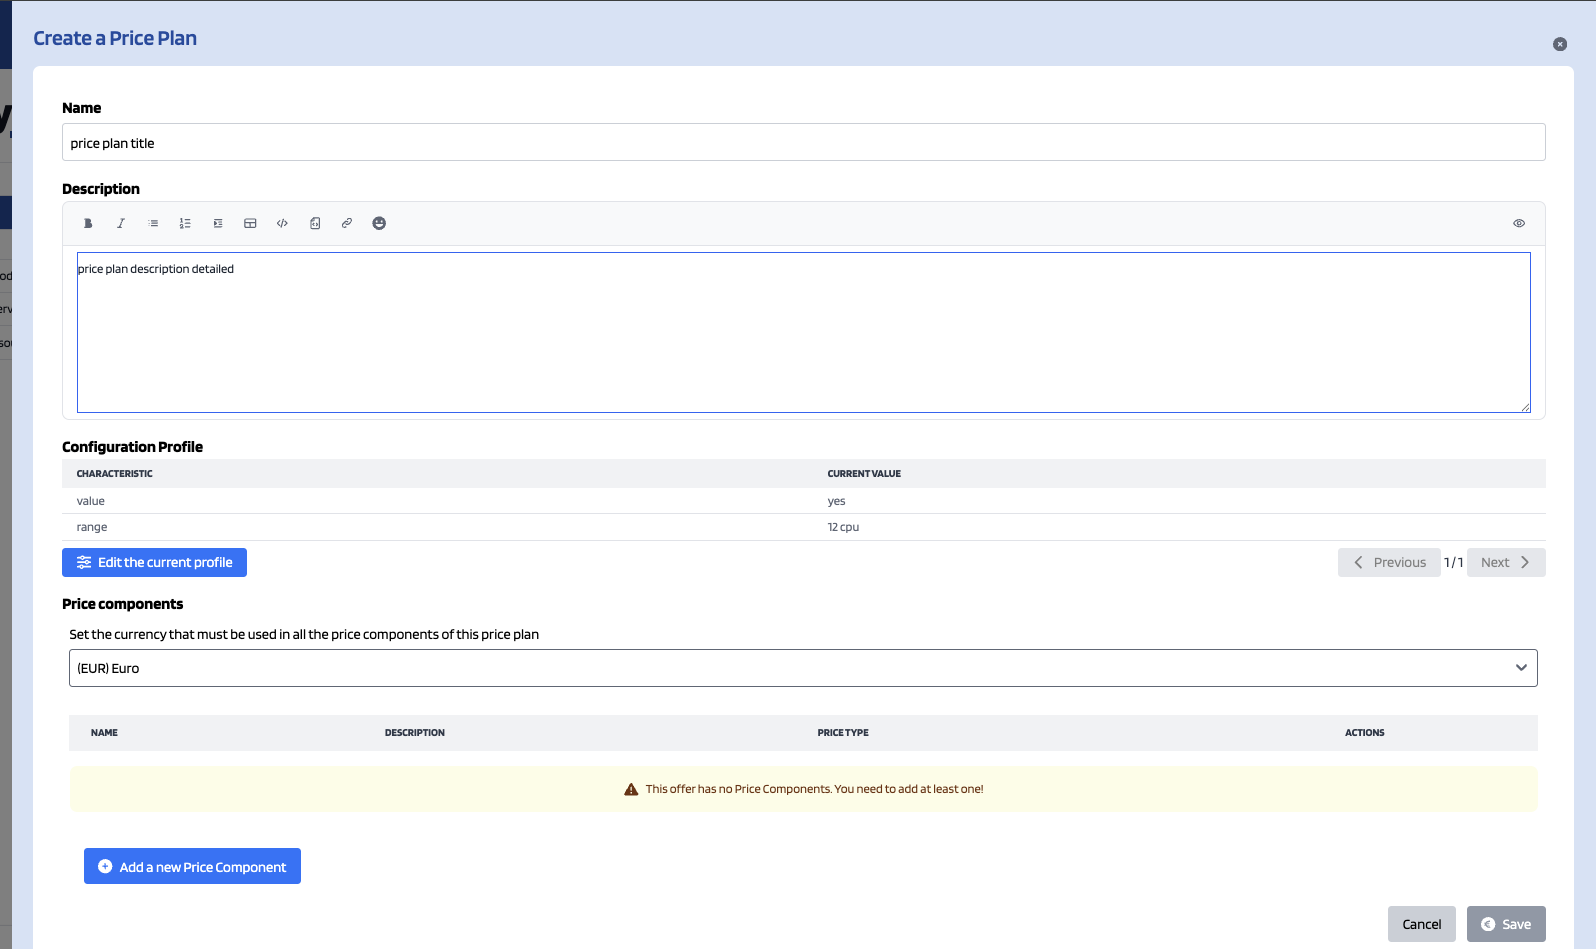
If you don't want to add this kind of information or define the price plan like this you should leave this field empty.
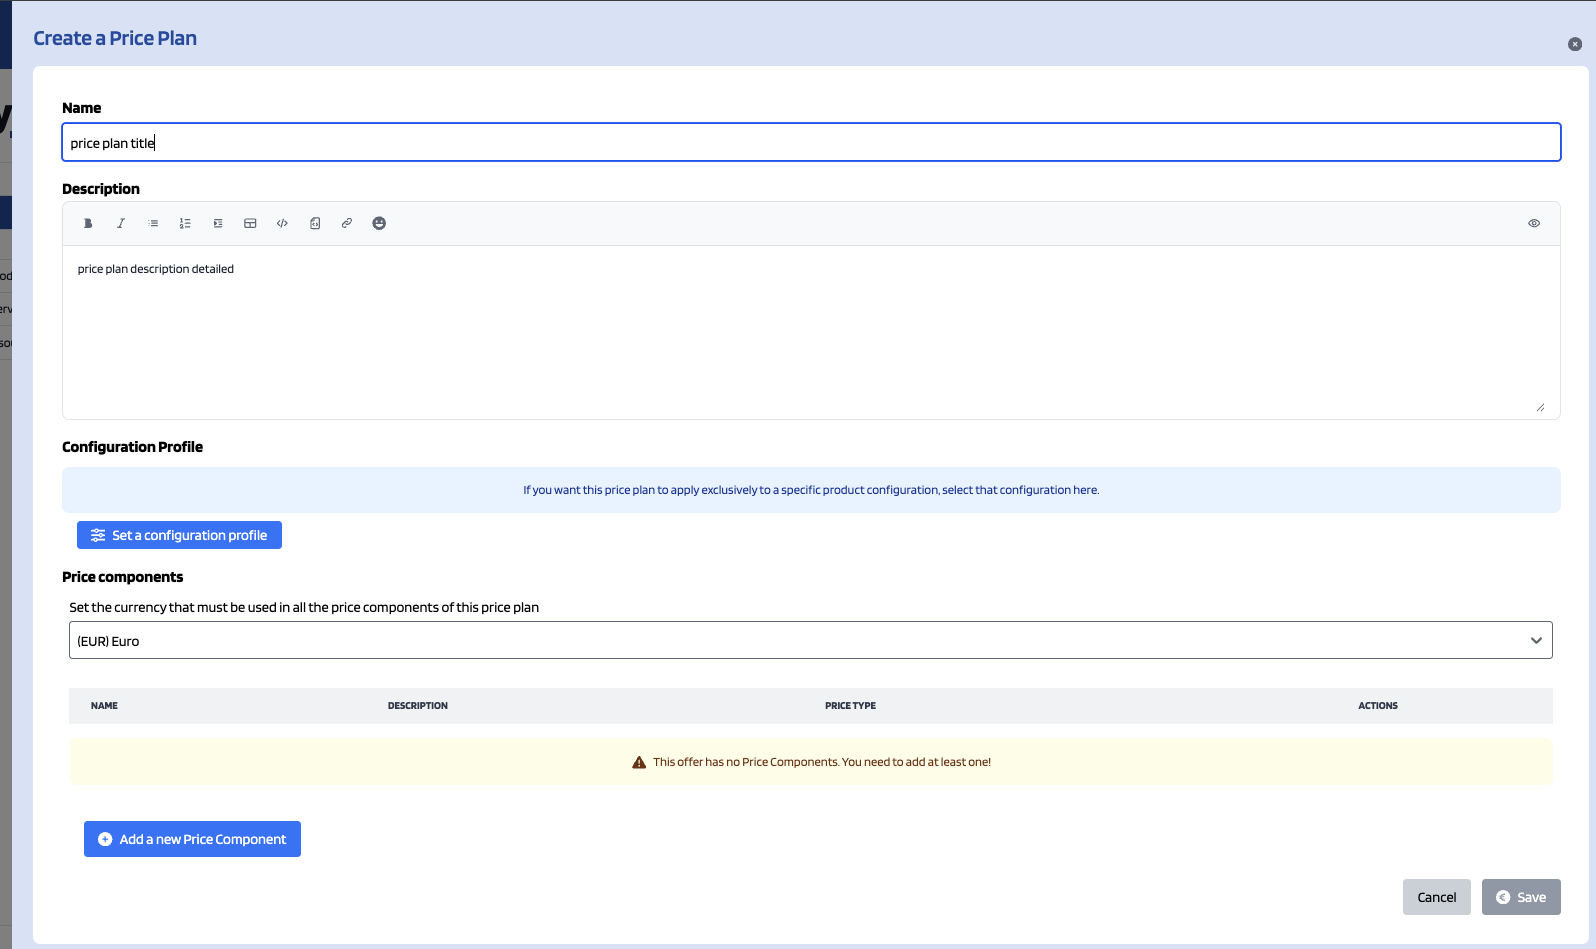
Every price plan should have at least one price component, this provides the price plan a specific monetary value to the price plan. In order to create a price component you should click "Add new Price Component" button. This will display a new drawer with the information that is needed to be filled.
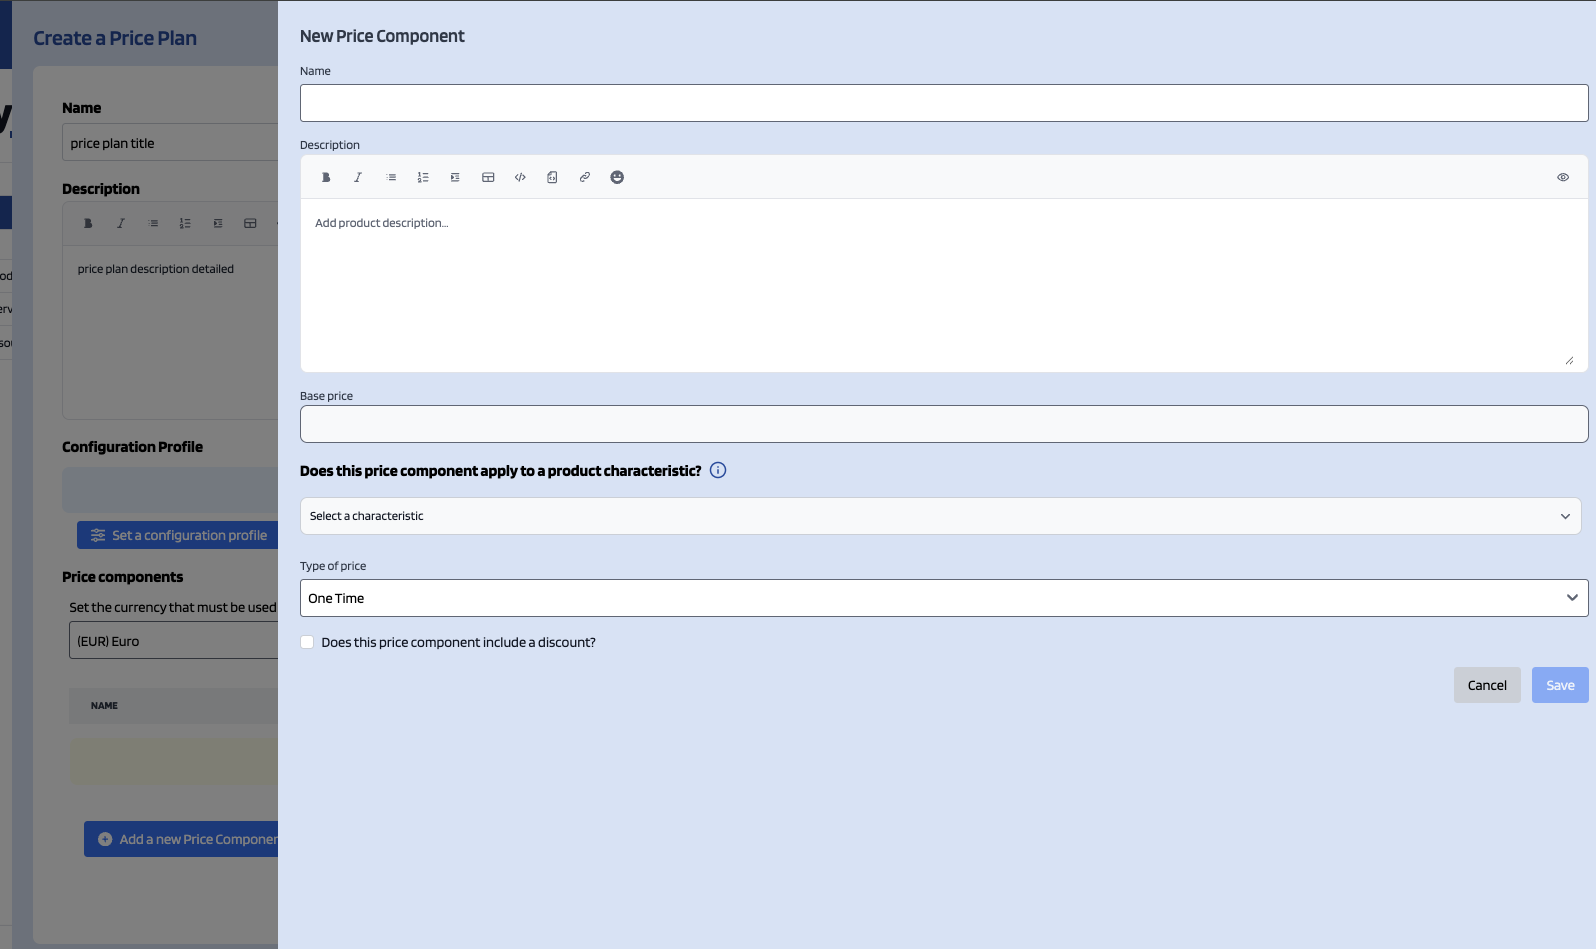
On this drawer you should fill the price component name and description, the monetary value of the component and its price type.
The supported price types are:
- One Time: single payment.
- Recurring: paid every X period (e.g. week, month, year...) once the period is reached (e.g. if you selected month and today is January 1st the payment will happen on January 30th).
- Recurring Prepaid: paid every X period (e.g. week, month, year ...) but paid in advance.
- Usage: paid based on how the customer is planning to use the product (e.g. customer chooses a 8GB virtual machine but there are other RAM options available).
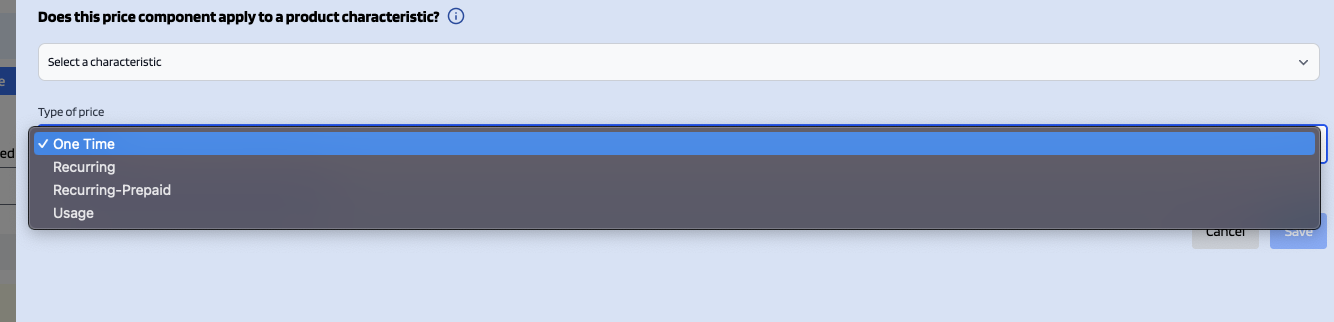
If you select "One Time" type you only have to fill the previously displayed inputs (i.e. name, description and monetary value).
If you select "Recurring" or "Recurring Prepaid" type, in addition to that information, you'll have to specify the recurring period.
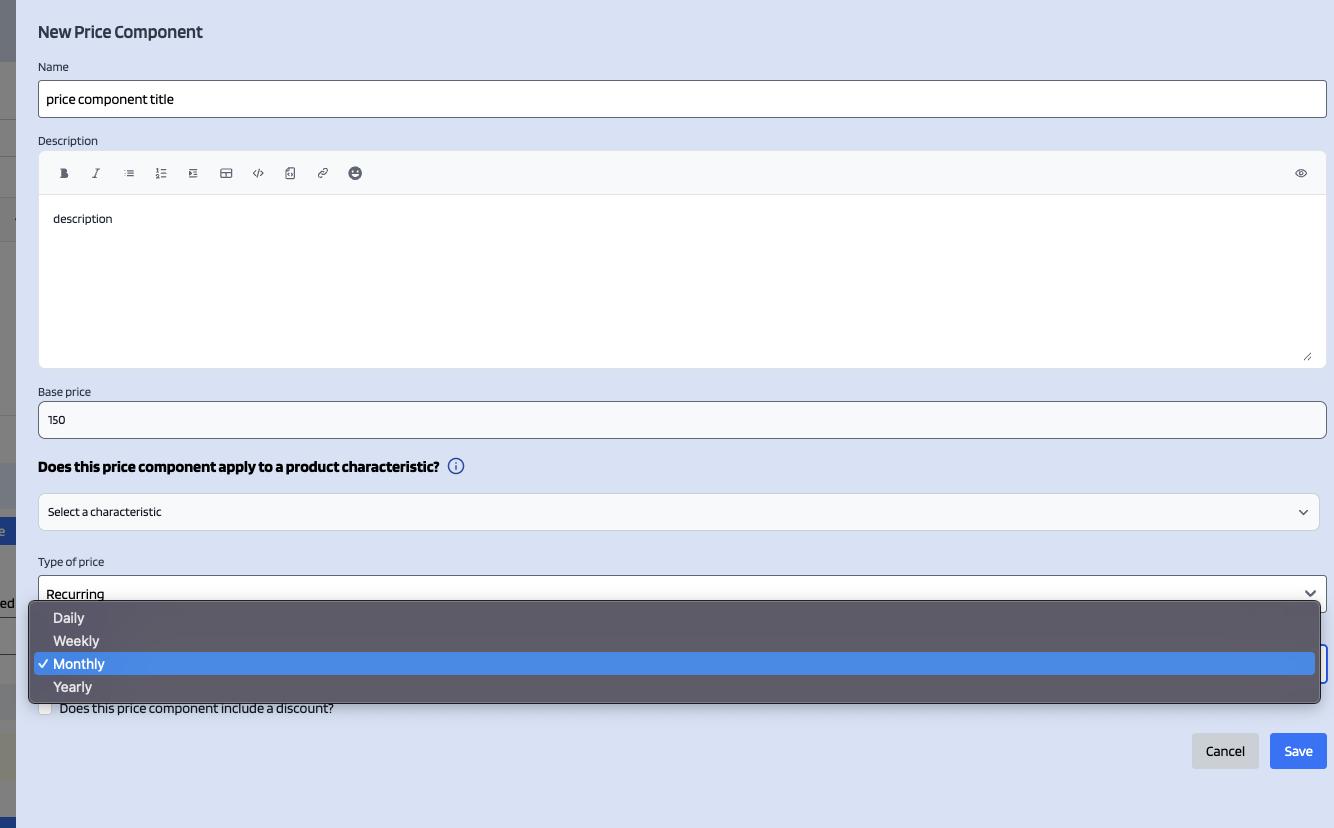
If you select "Usage" you should specify the usage unit.
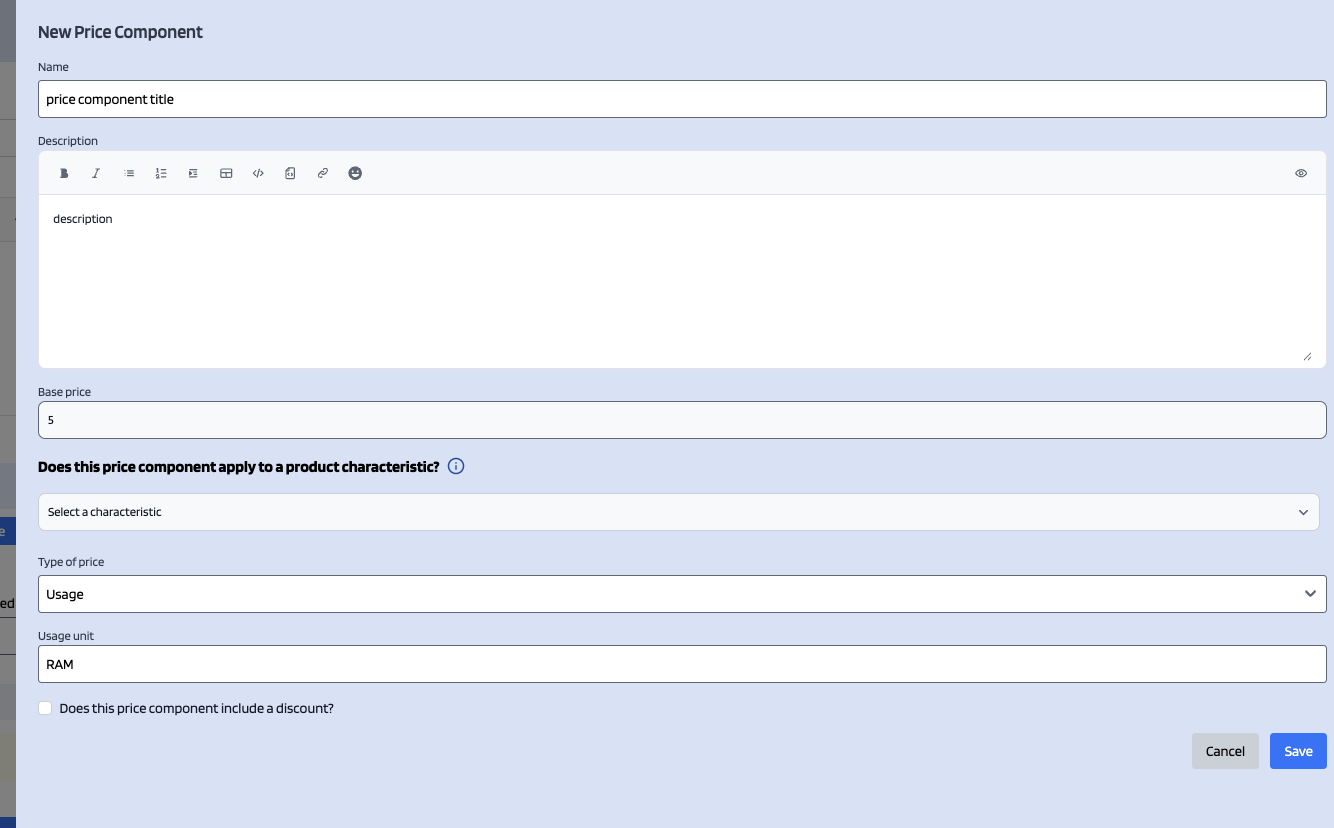
You can add a discount to the price component by checking the discount checkbox and filling the displayed information.

Additionally if you want to specify that this price component applies to a product characteristic you should select it on the characteristic's dropdown and, if needed, select the desired characteristic value.

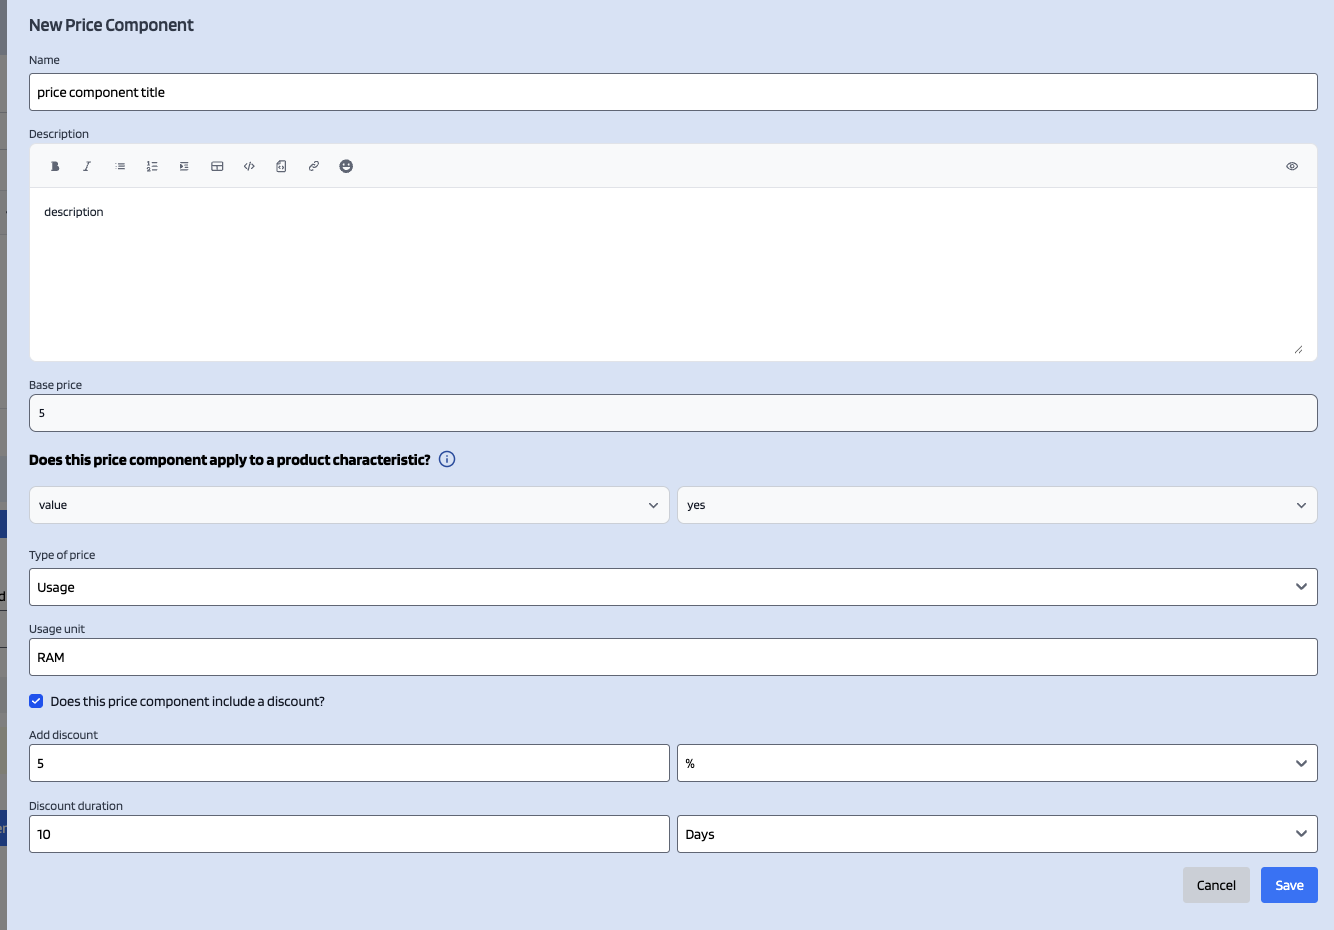
Once you're done you should click Save.
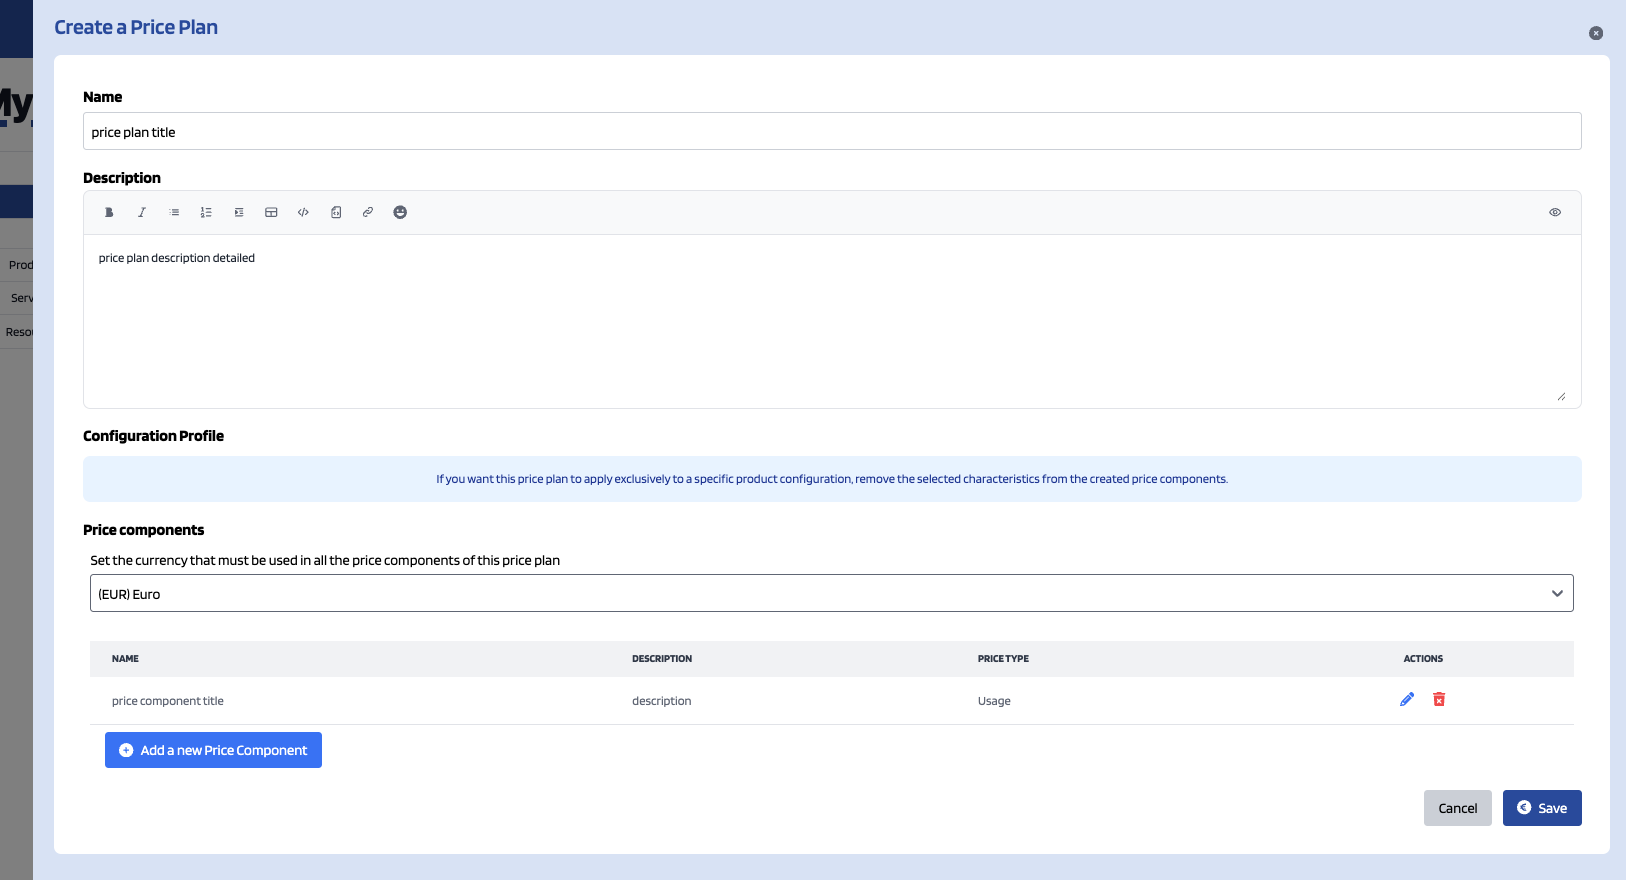
Once you're done creating price components and you're price plan is ready you should click Save.
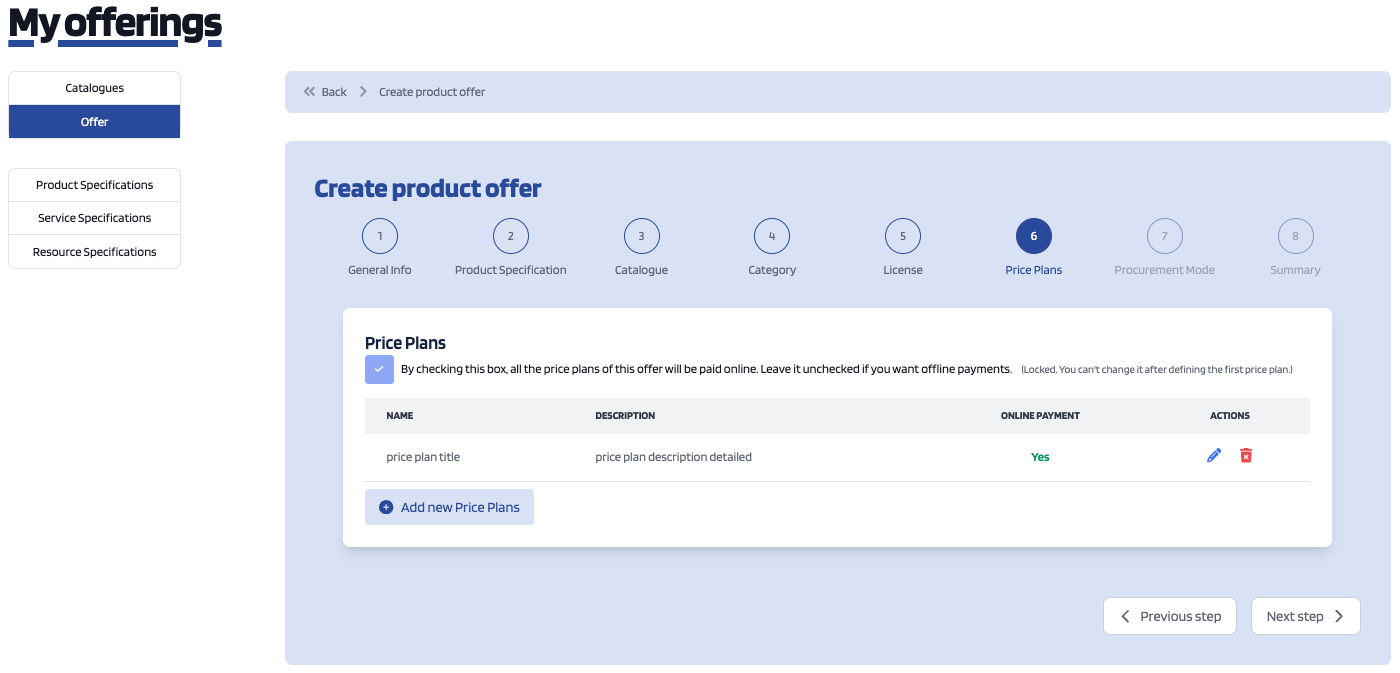
If you're done creating price plans you should click Next step.
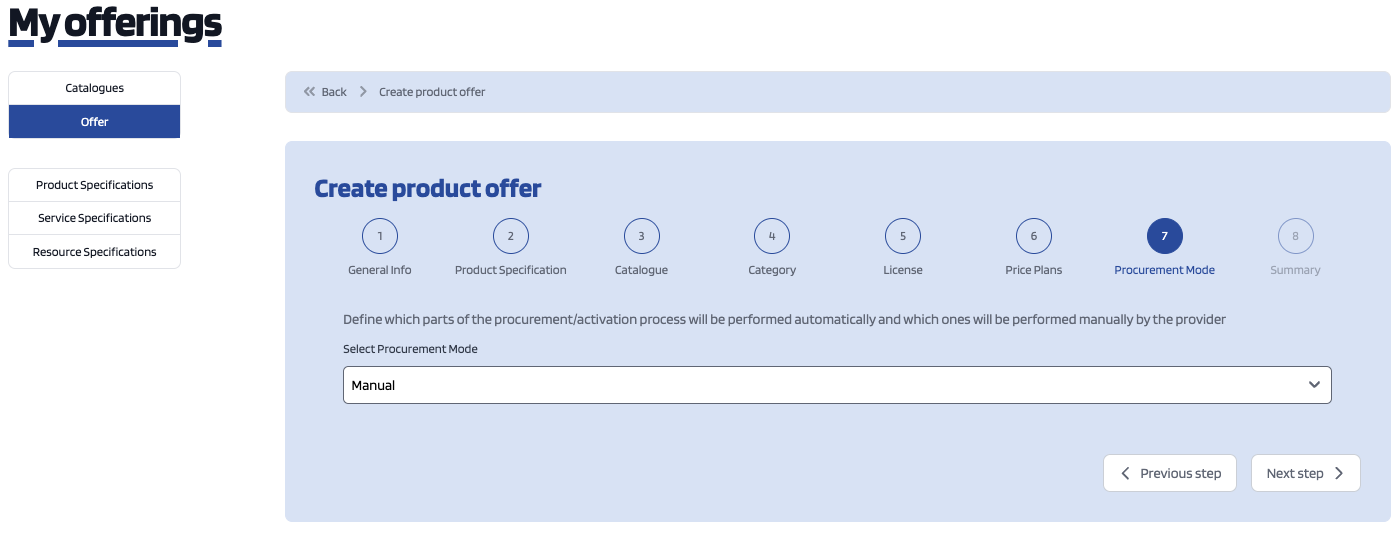
On the next step you should select the procurement mode, in order to do that you should click on the dropdown and choose the one that best fits your needs.
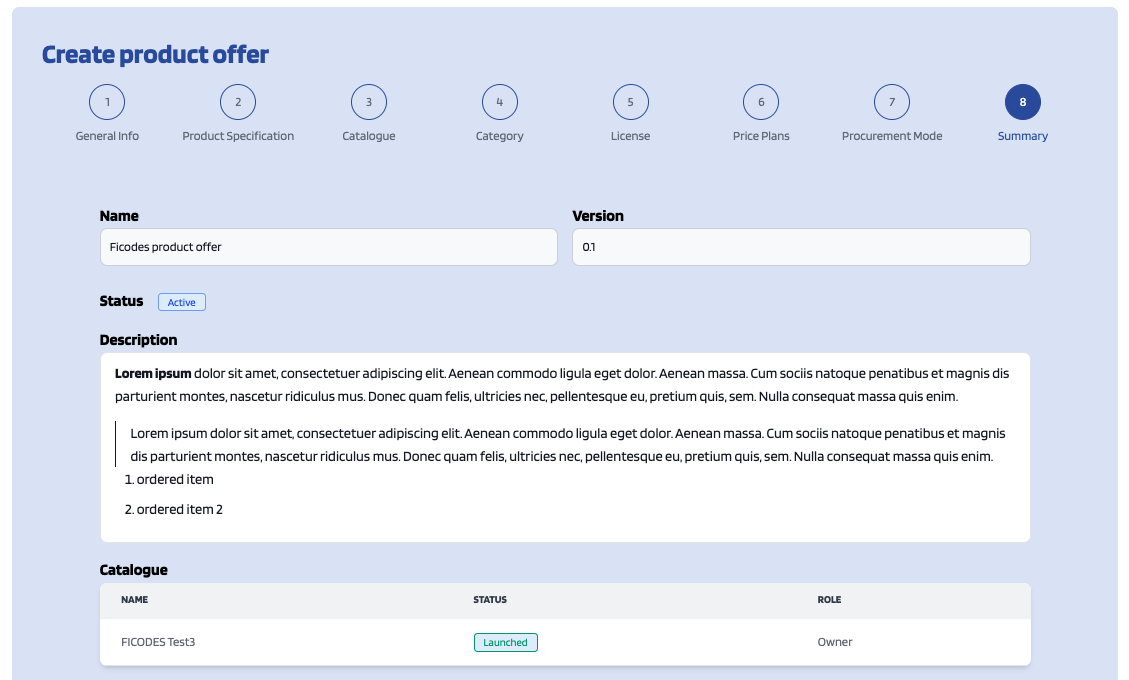
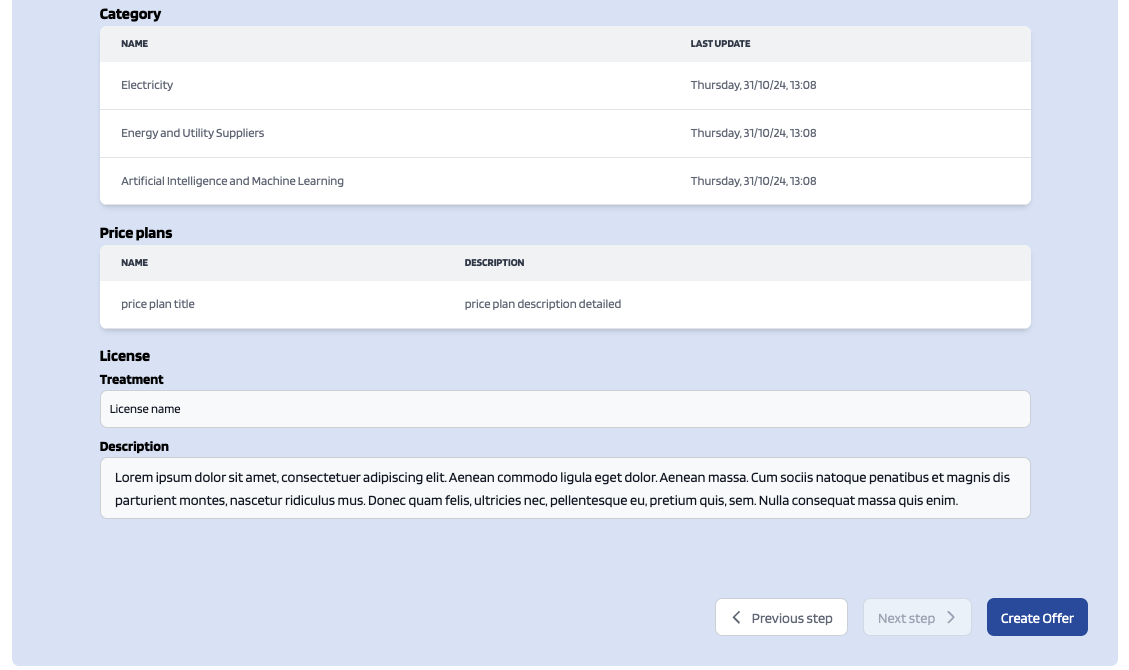
In the last step a review of the offer to create is shown. If everything is okay click Finish.
Providers can also edit their offerings. To do that click on the Edit button next to the offering to be updated.
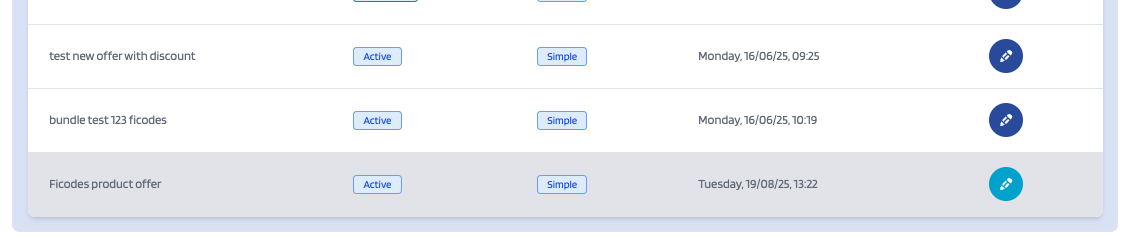
In the displayed form, update the required values, click over Next step button (or directly on the step that you want to go) and once you've finished click on Update offer. Note that for start selling you offering you have to update its status to Launched.
How to publish a service through the portal interface, managing service specifications
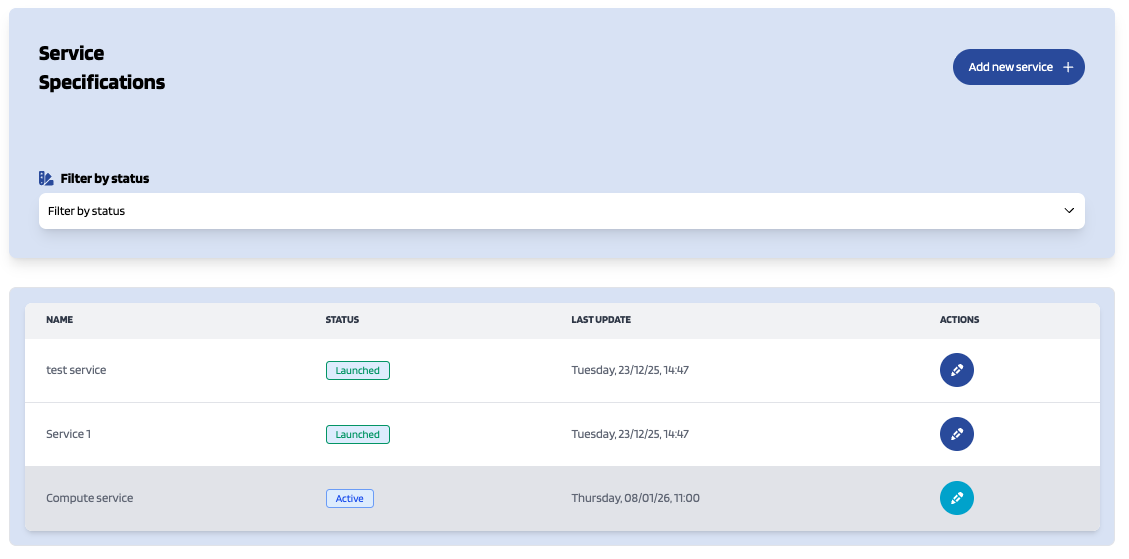
Service Specifications represent the services being offered. To list your service specifications go to My Offerings section and click on Service Specifications.
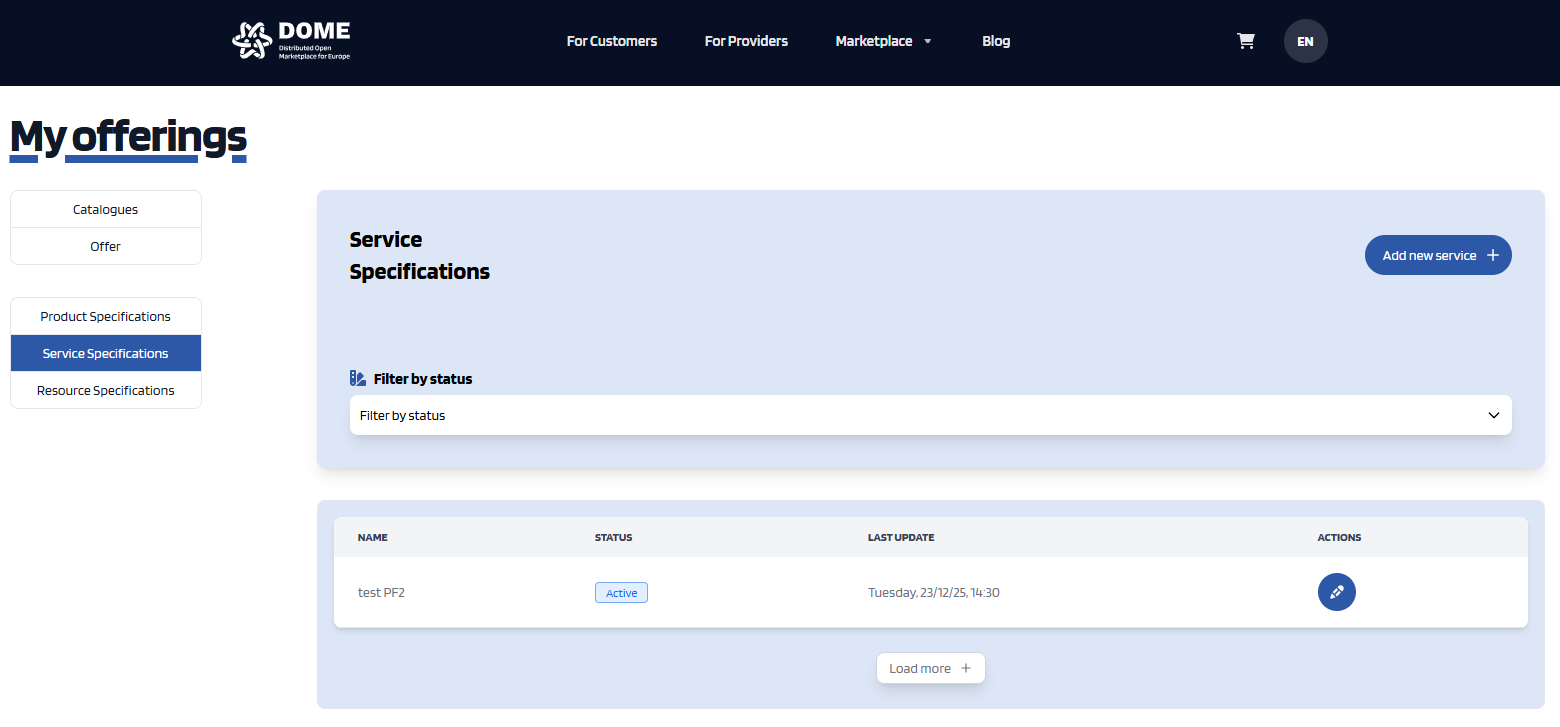
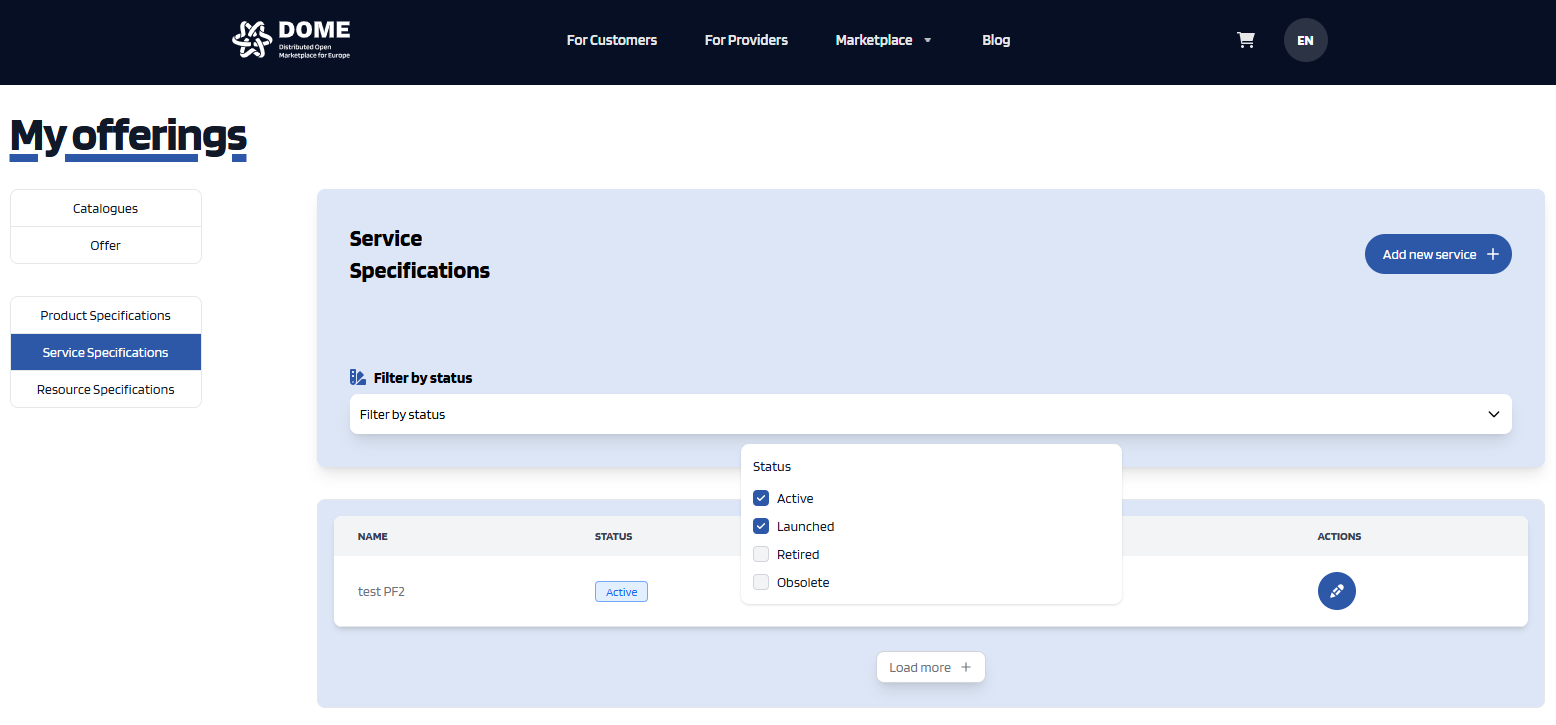
Additionally, it is possible to filter the shown services by its state. To do that, click on Filter by state and choose the required parameters.
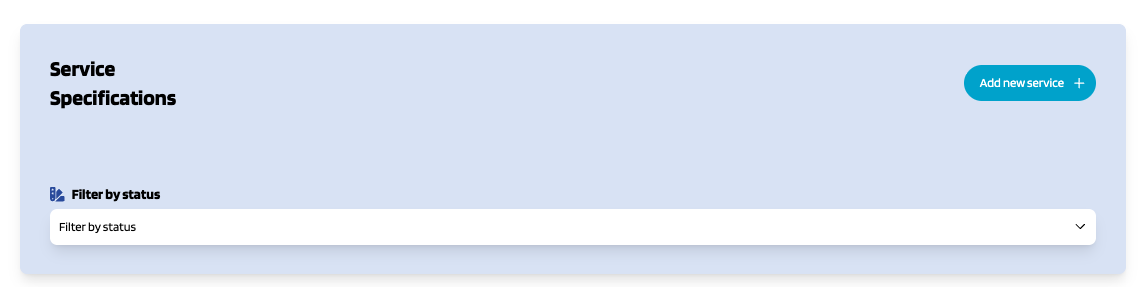
To create a new service click on the Add new service button.
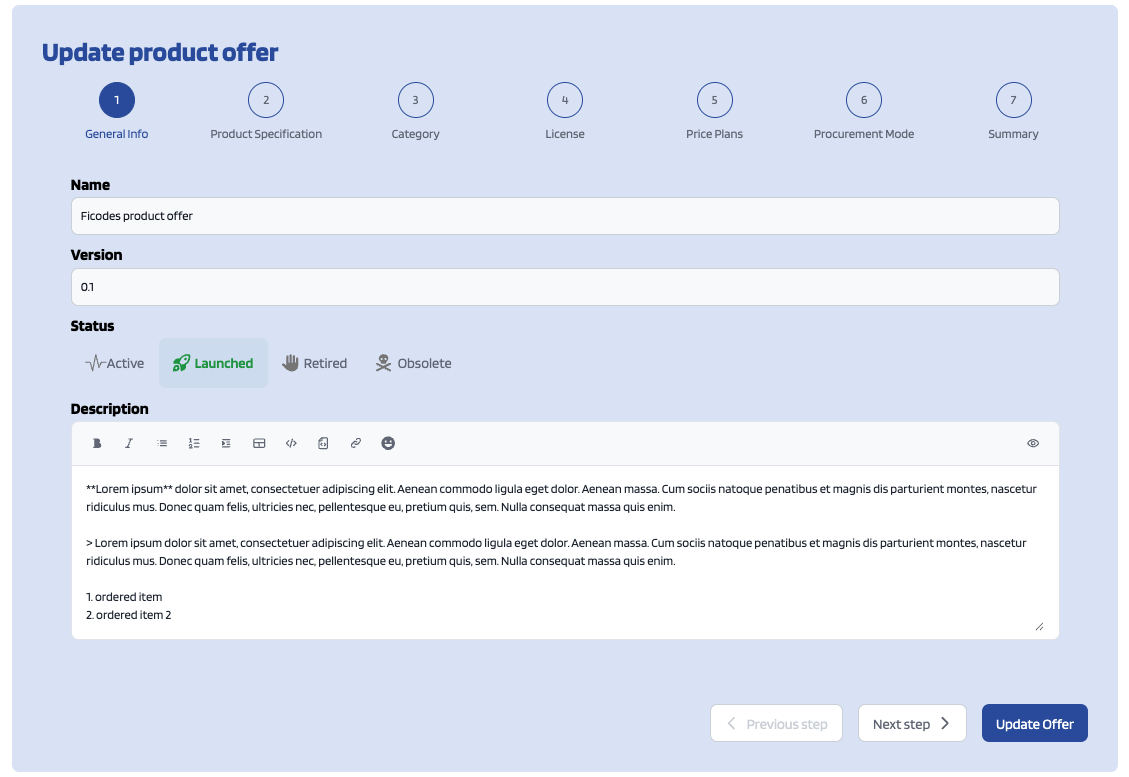
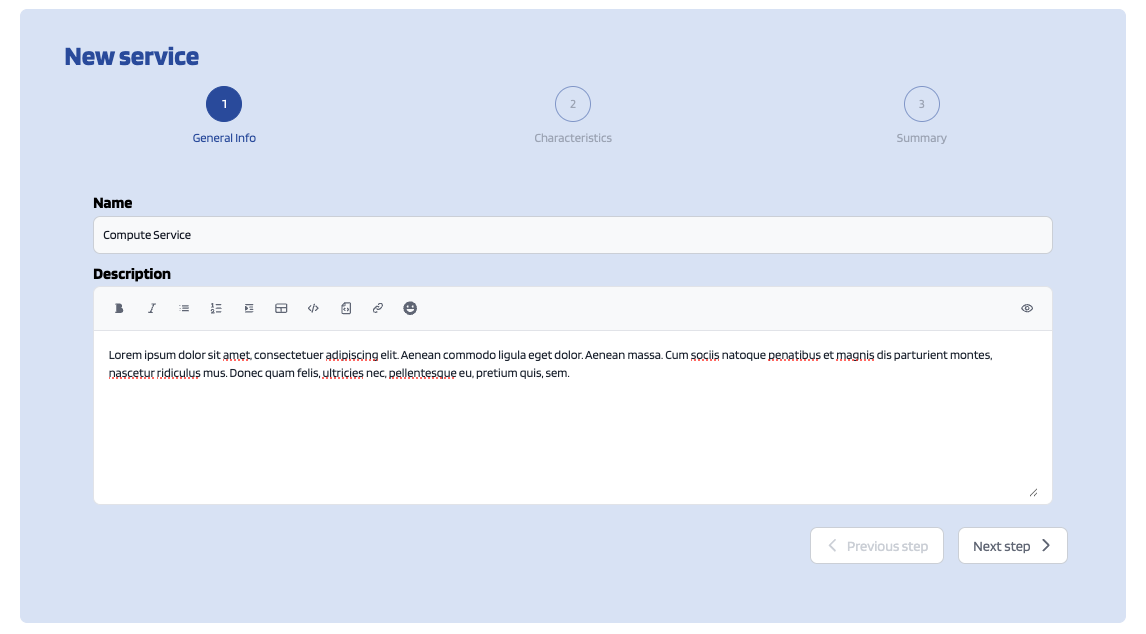
Service's creation form has three steps. On the first step, related to the service's general information, you should provide the service's name and optionally its description.
The second step is where you can (optionally) add characteristics related to the service.
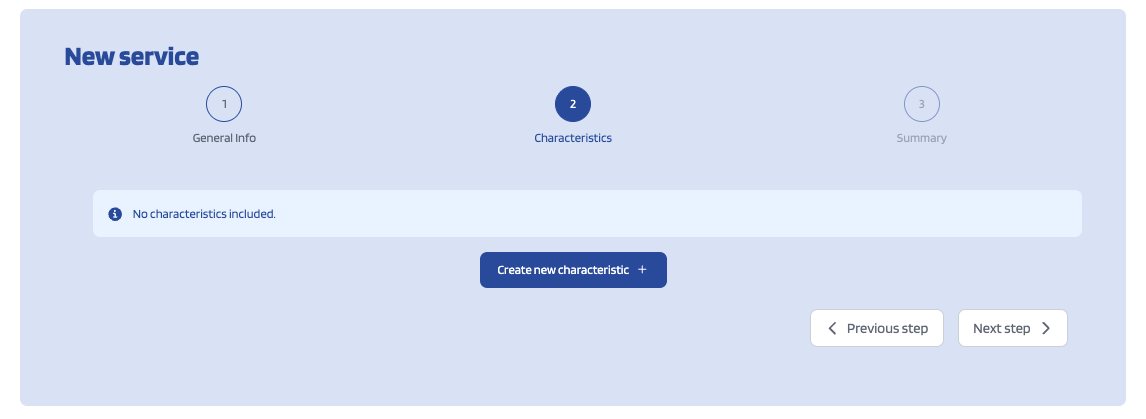
In order to do that you should click on the Create new characteristic button and a creation form will be displayed. In this form you can select the type of characteristic that you want to create (i.e. String, Number or Number Range) by clicking on the type dropdown button.
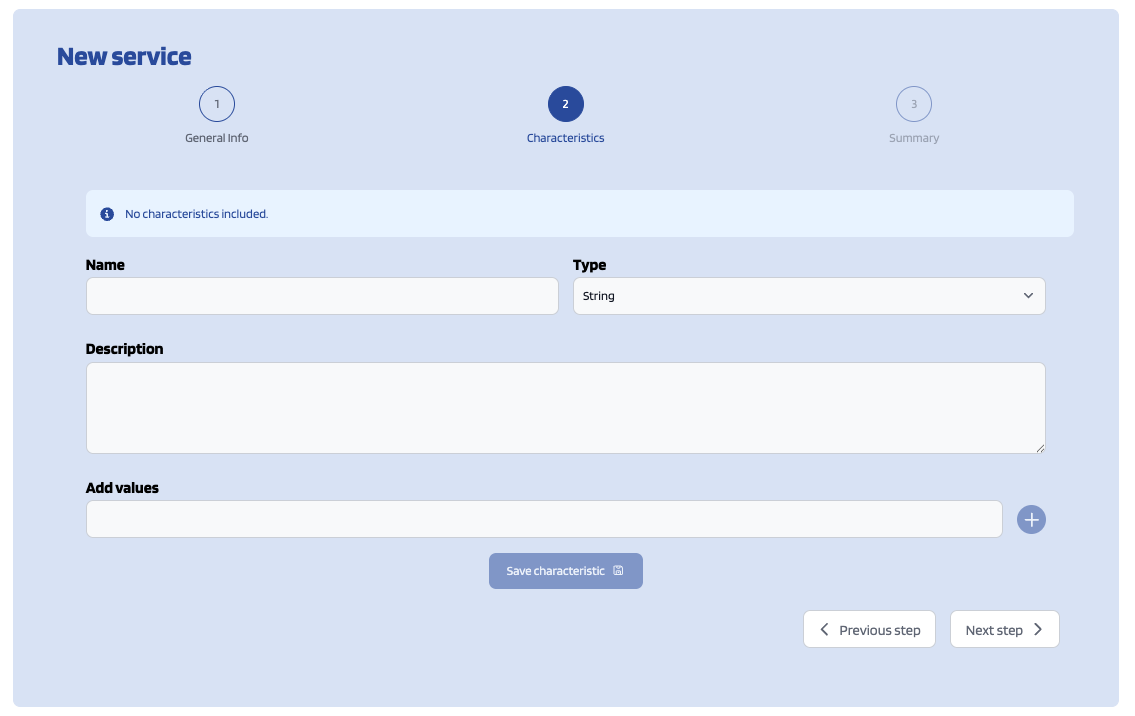
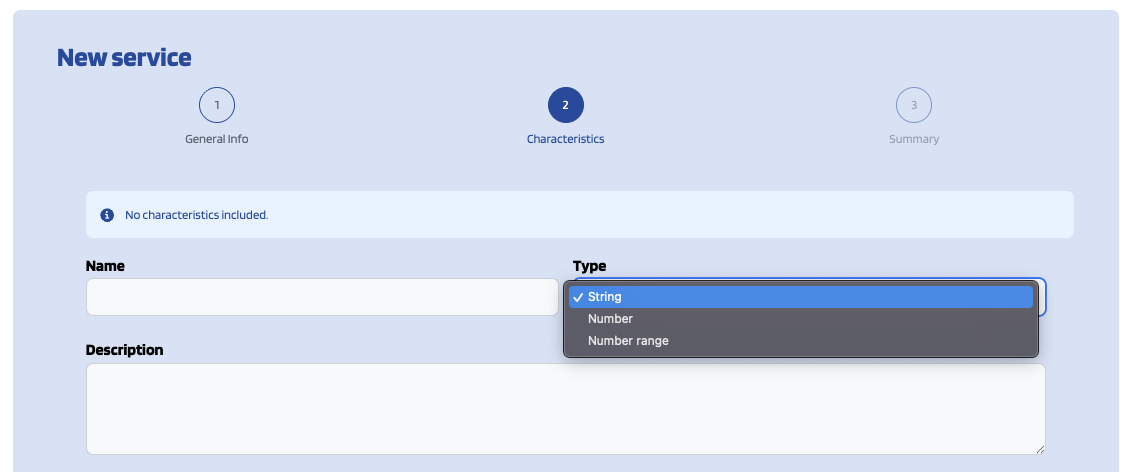
Once you've selected the type of characteristic that you want to create you should fill the name and description fields and add at least one value by filling its fields and clicking on the Plus button next to them.
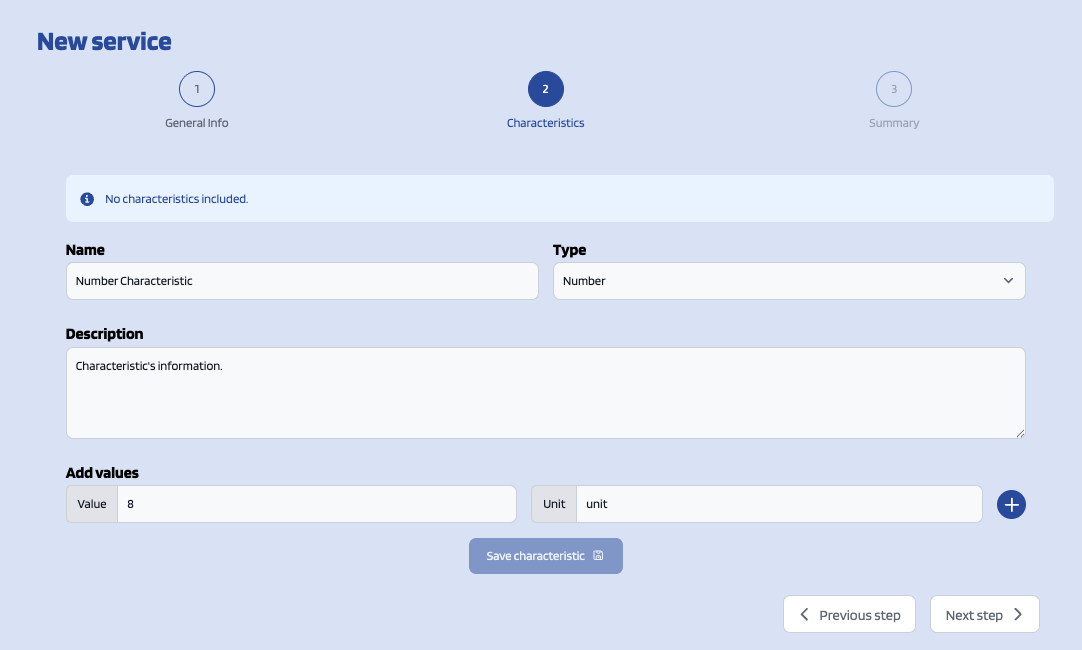
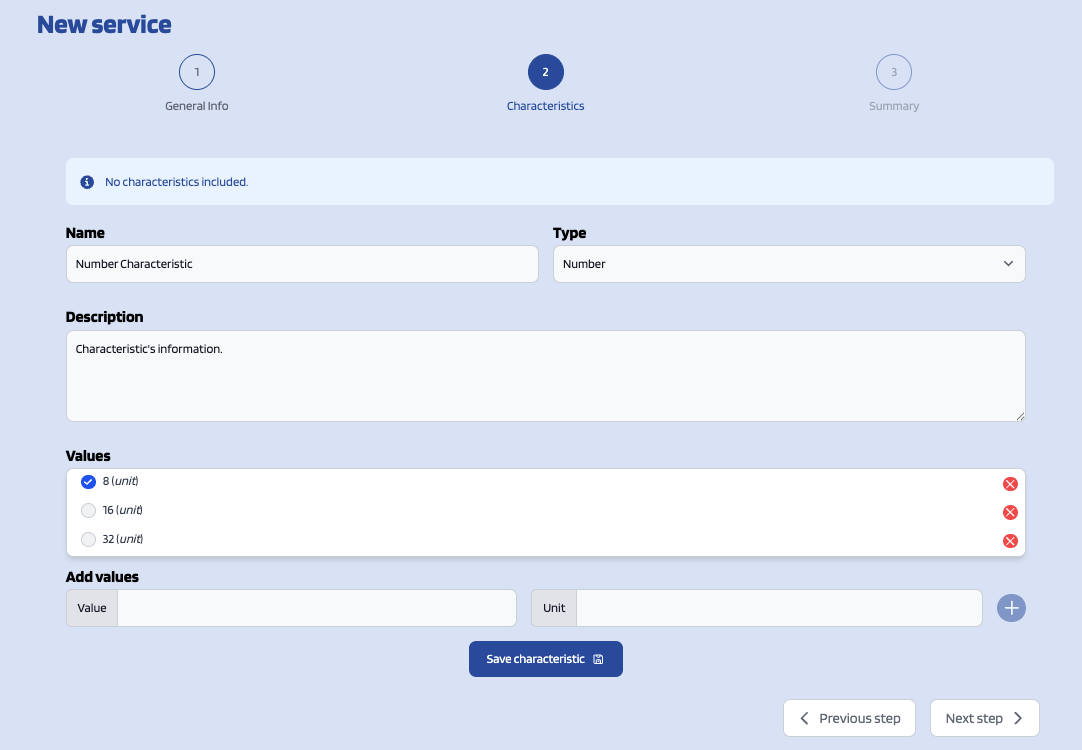
Additionally you can delete any value you've created by clicking on the Delete button next to the value itself and select the default value for the characteristic by clicking on the check button of the specific value (the one with the blue check next to it is the default value).
Whenever you finish filling the characteristic's information you should click the Save characteristic button.
On the characteristic's list preview you can also remove any characteristic by clicking the Delete button next to it.
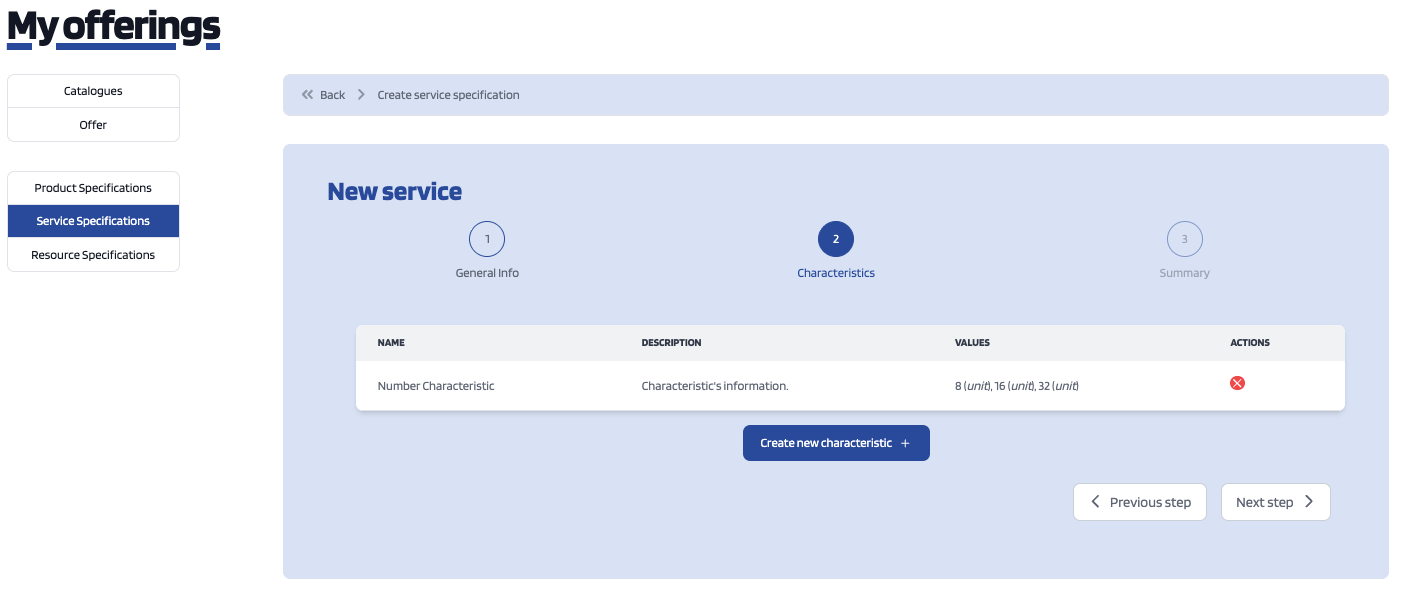
If you're done with the characteristics you can click the Finish button which will lead you to the service's preview.
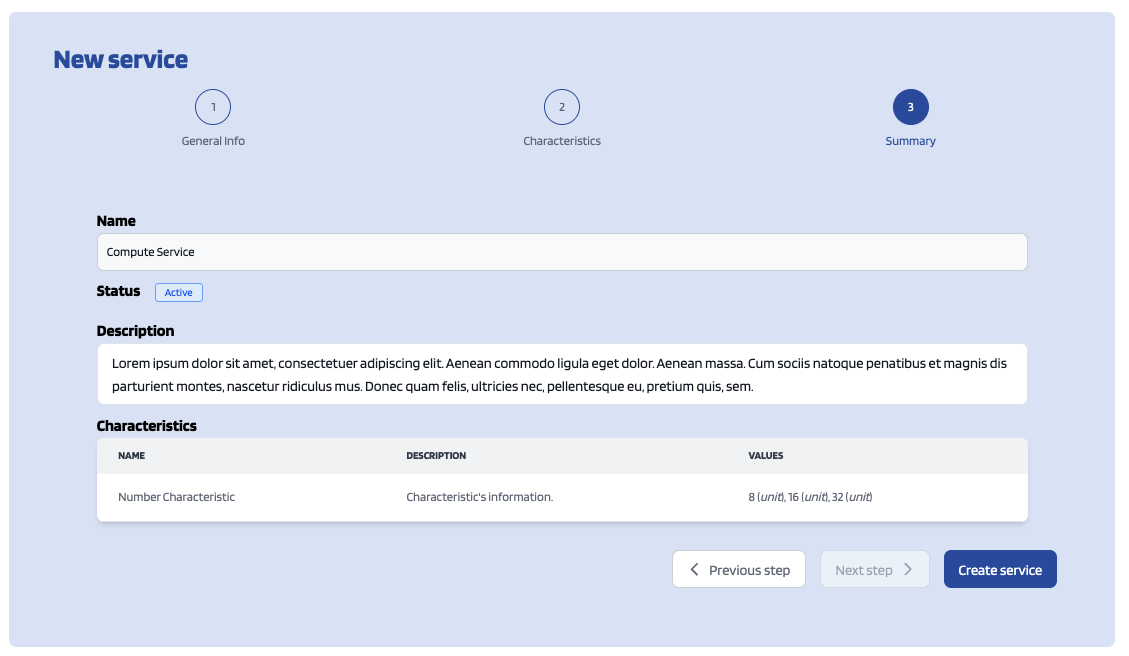
Finally in order to create the service click on the Create service button.
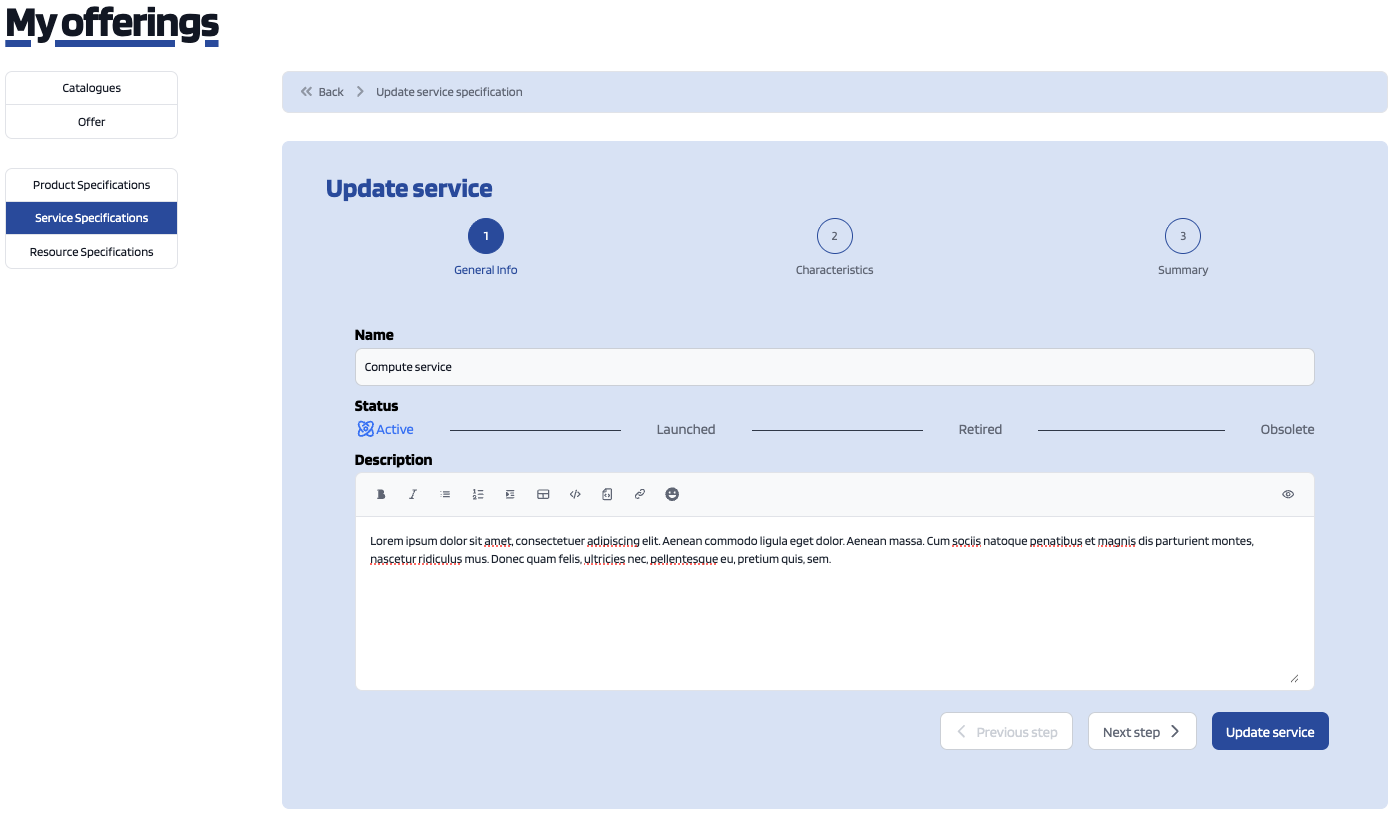
Providers can also update their services. To do that, click on the Edit button of the service to open the update view.
Then, update the fields you want to modify, click on Next over the steps and then click on Update Service.
How to publish a resource through the portal interface, managing resource specifications
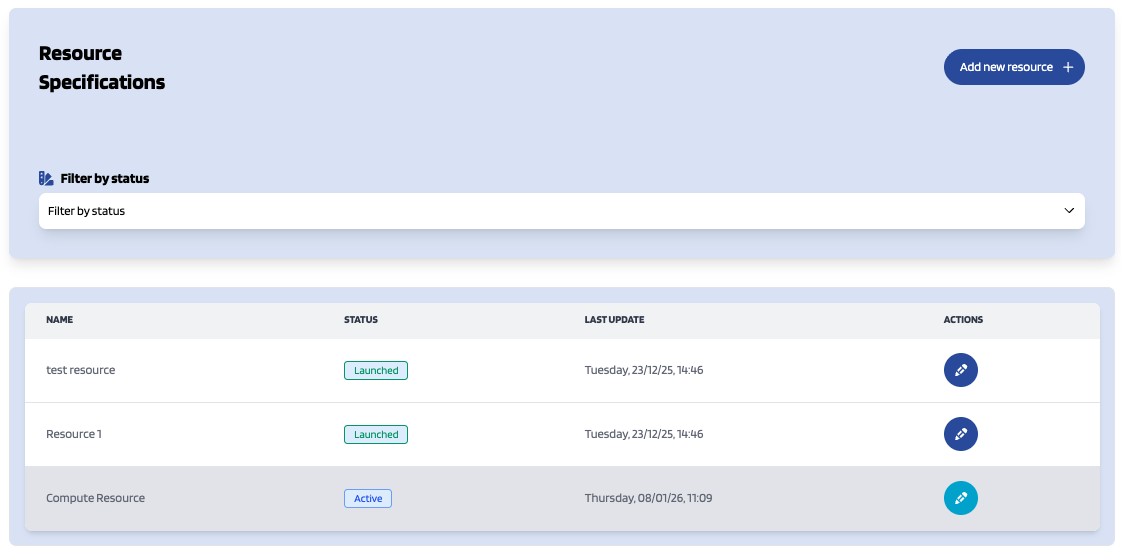
Resource Specifications represent the resource being offered. To list your service specifications go to My Offerings section and click on Resource Specifications.
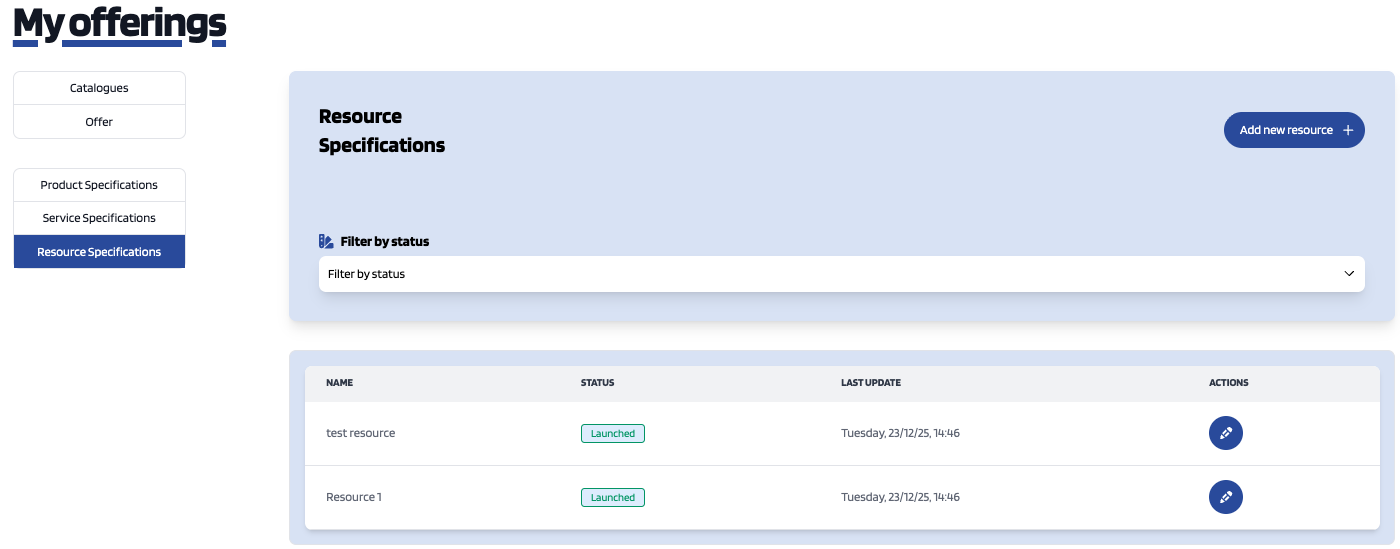
Additionally, it is possible to filter the shown resources by its state. To do that, click on Filter by state and choose the required parameters.
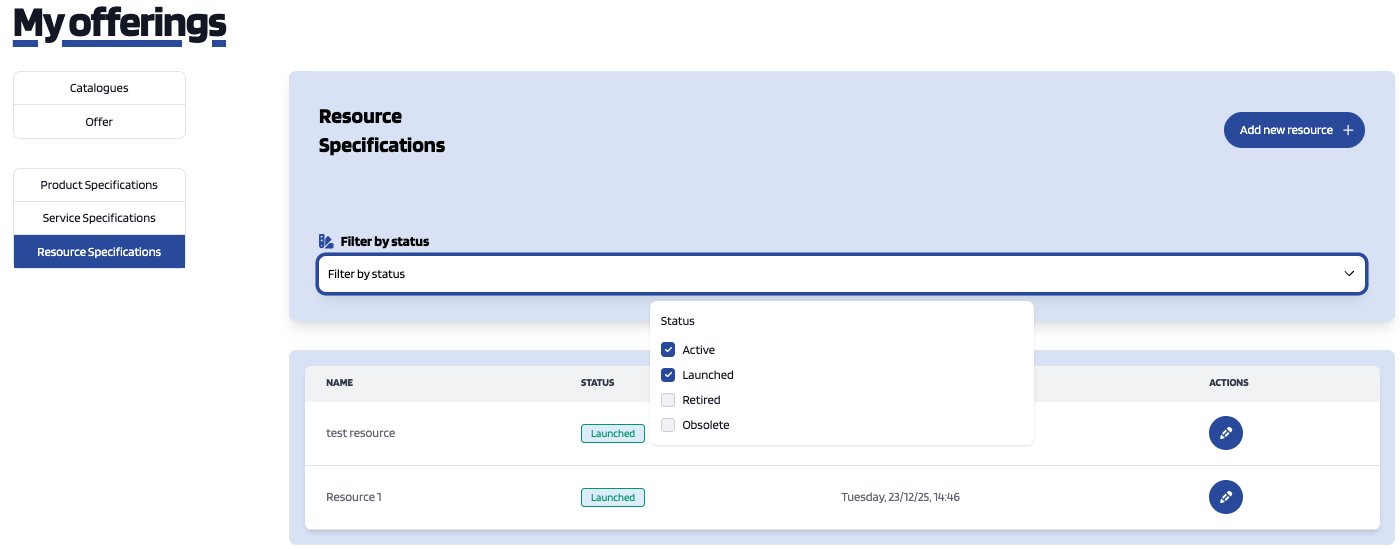
To create a new service click on the Add new resource button.
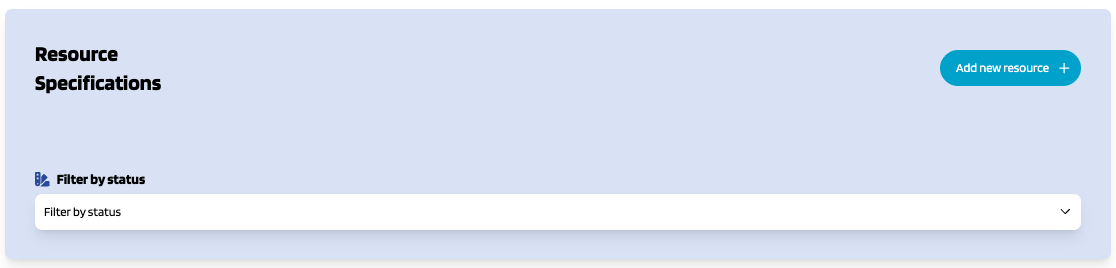
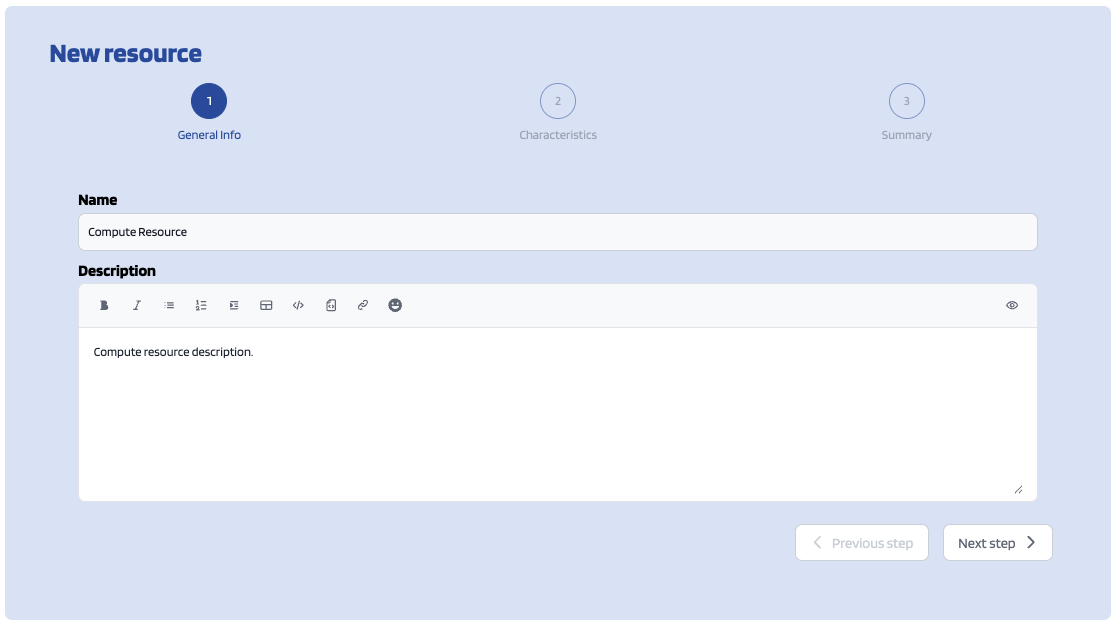
Resource's creation form has three steps. On the first step, related to the resource's general information, you should provide the resource's name and optionally its description.
The second step is where you can (optionally) add characteristics related to the resource.
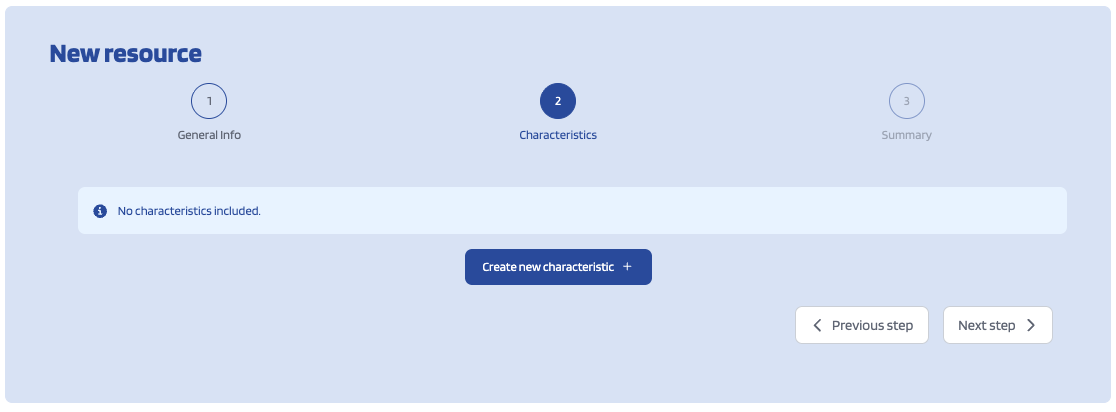
In order to do that you should click on the Create new characteristic button and a creation form will be displayed. In this form you can select the type of characteristic that you want to create (i.e. String, Number or Number Range) by clicking on the type dropdown button.
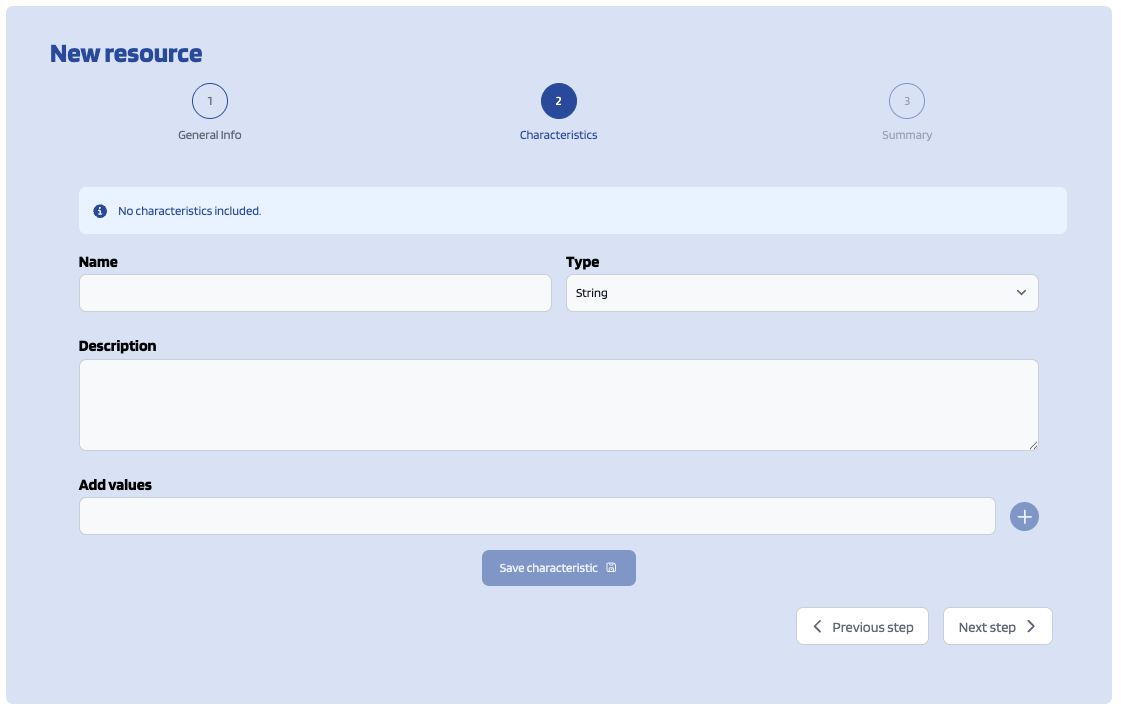
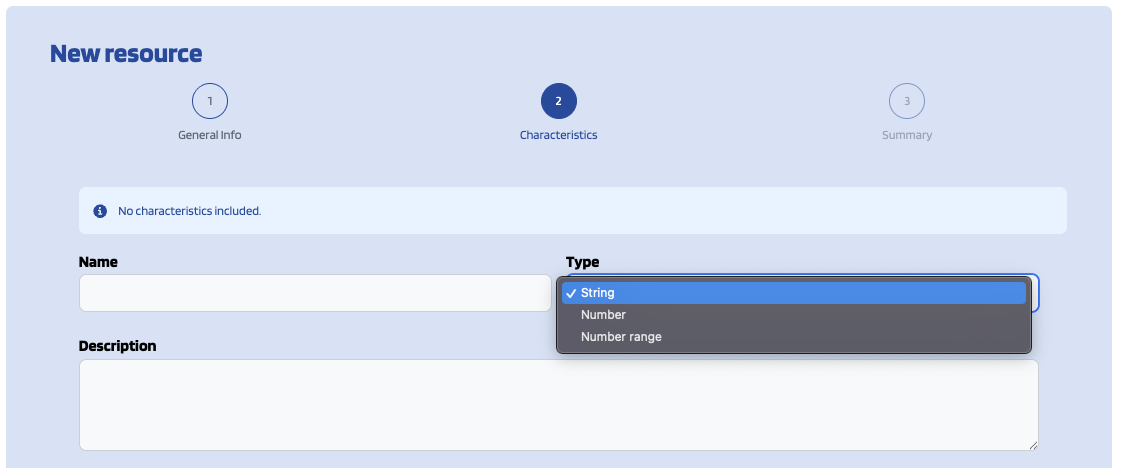
Once you've selected the type of characteristic that you want to create you should fill the name and description fields and add at least one value by filling its fields and clicking on the Plus button next to them.
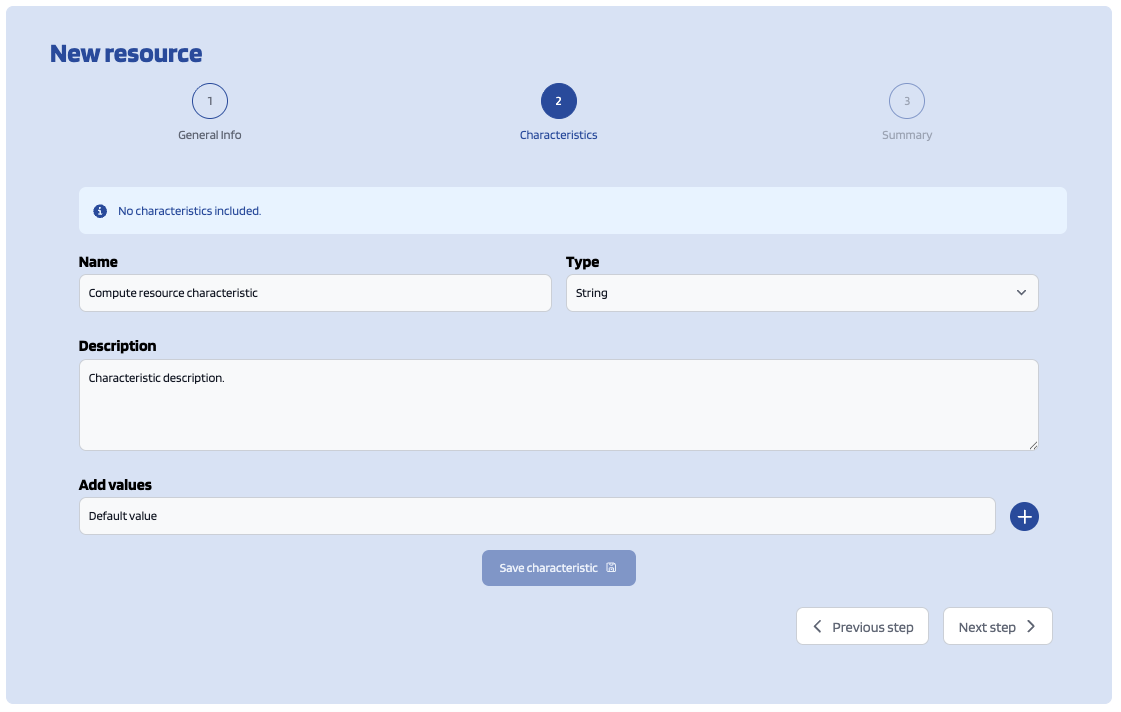
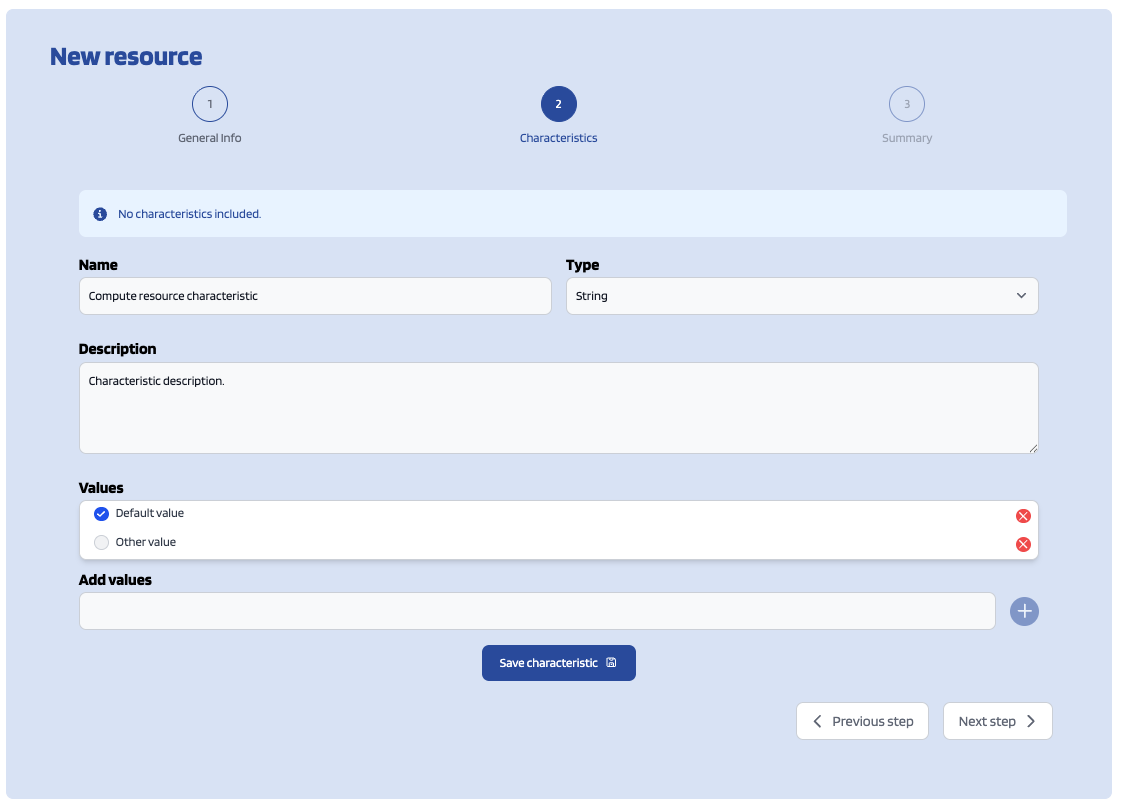
Additionally you can delete any value you've created by clicking on the Delete button next to the value itself and select the default value for the characteristic by clicking on the check button of the specific value (the one with the blue check next to it is the default value).
Whenever you finish filling the characteristic's information you should click the Save characteristic button.
On the characteristic's list preview you can also remove any characteristic by clicking the Delete button next to it.
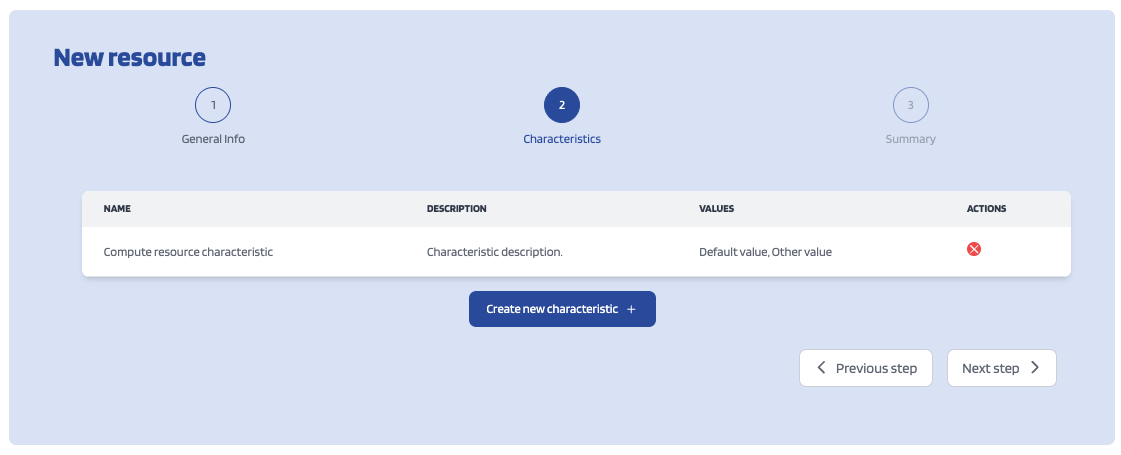
If you're done with the characteristics you can click the Finish button which will lead you to the resource's preview.
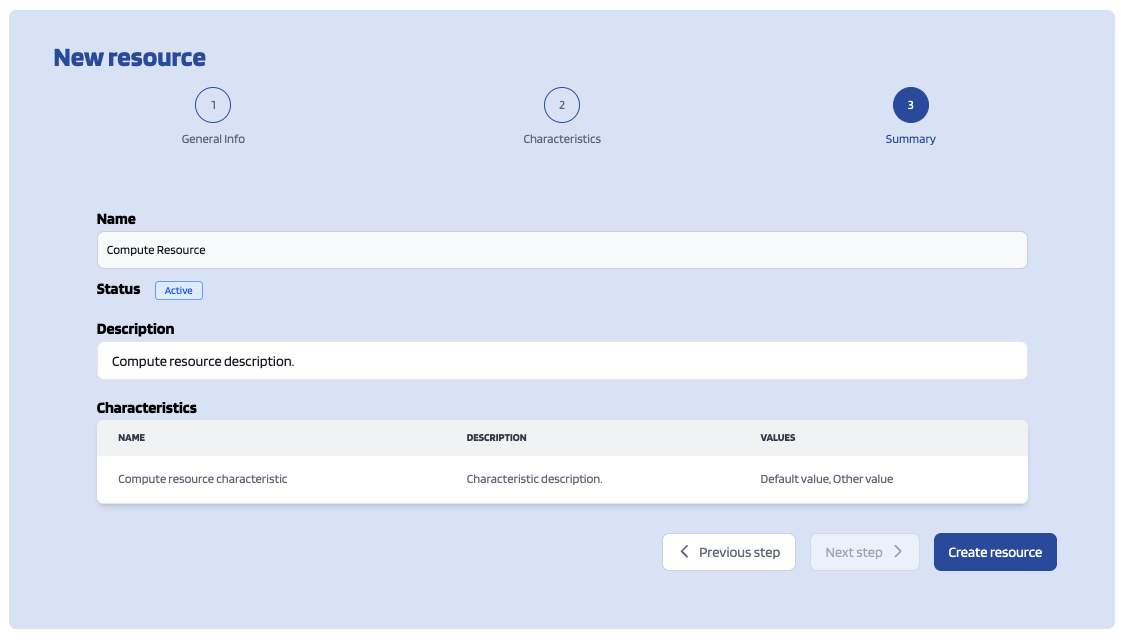
Finally in order to create the resource click on the Create resource button.
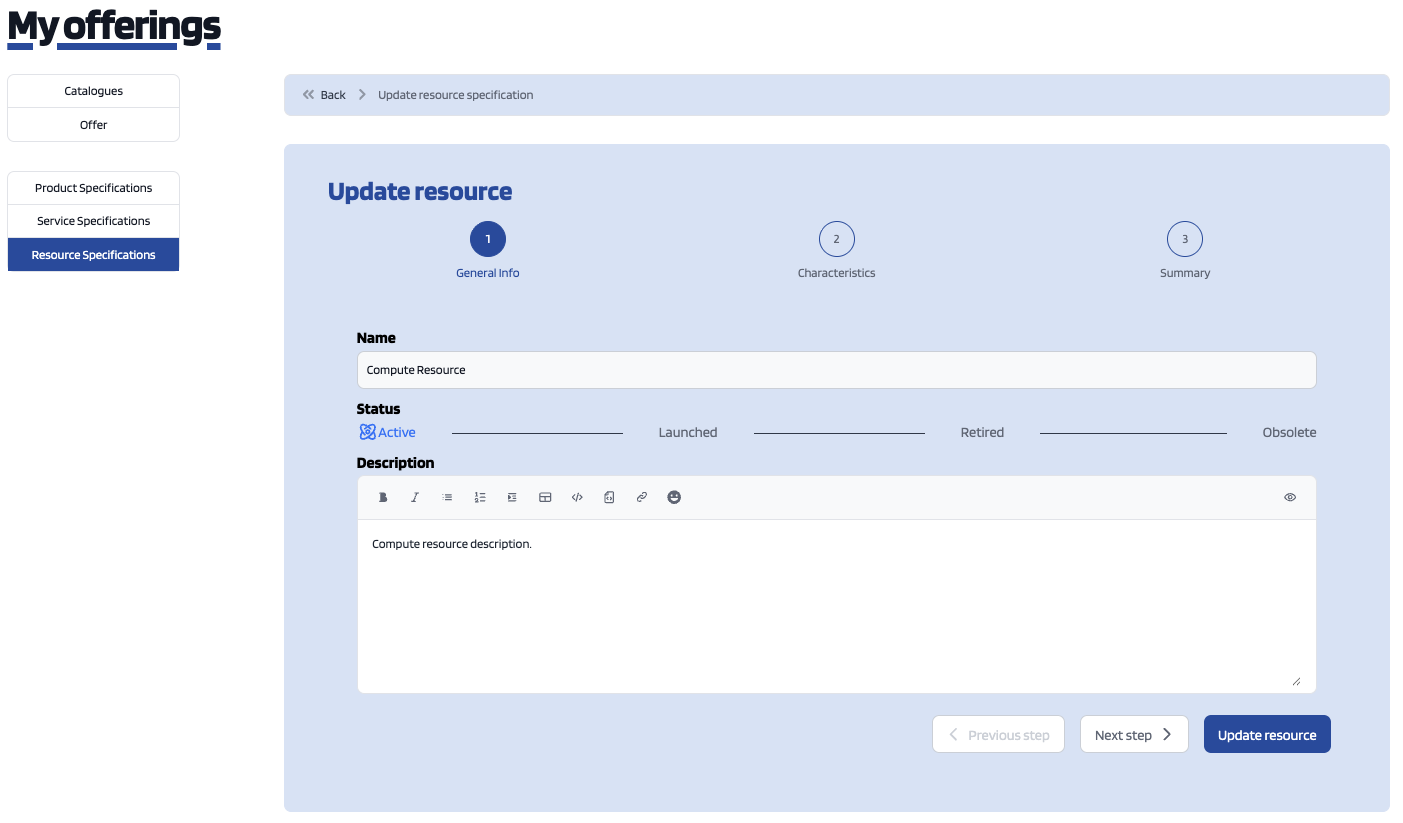
Providers can also update their resources. To do that, click on the Edit button of the resource to open the update view.
Then, update the fields you want to modify, click on Next over the steps and then click on Update Resource.
How to publish and manage catalogues
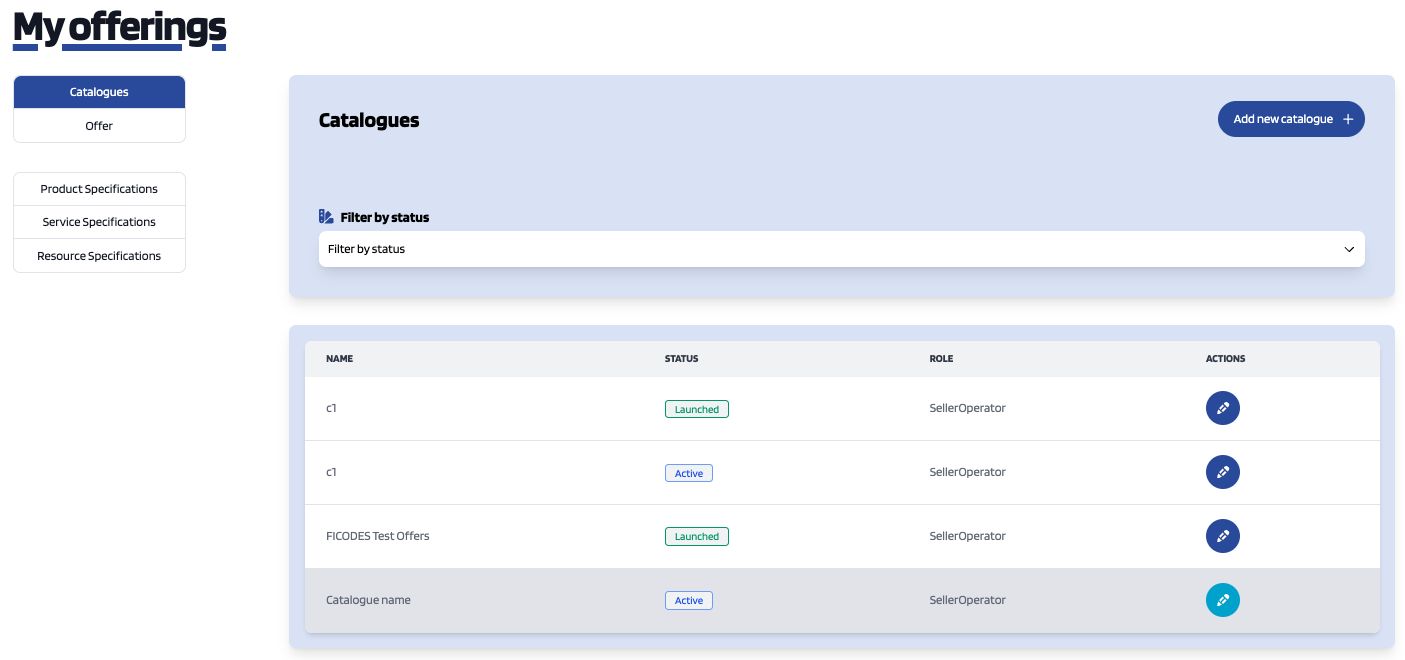
The Catalogues section is the one that is open by default when accessing My Offerings section. This section contains the catalogues the provider has created.
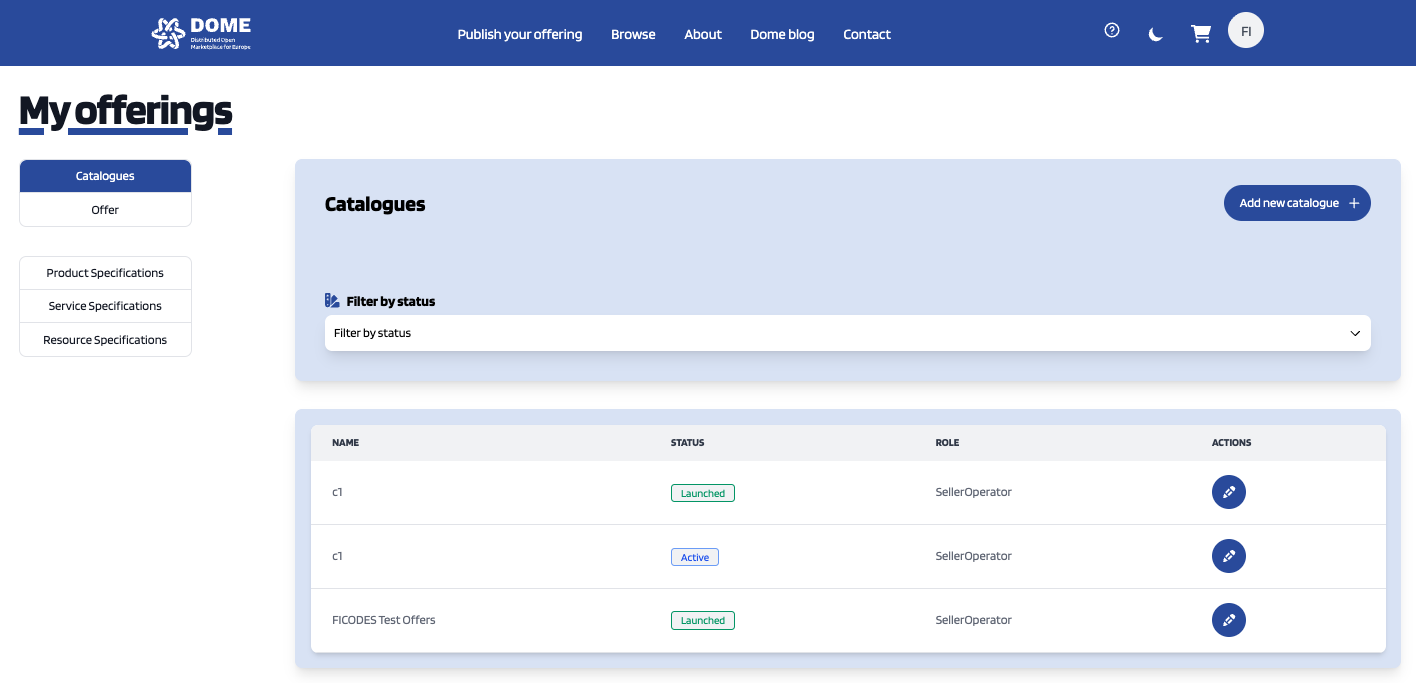
Additionally, it is possible to filter the shown catalogues by its state. To do that, click on Filter by state and choose the required parameters.
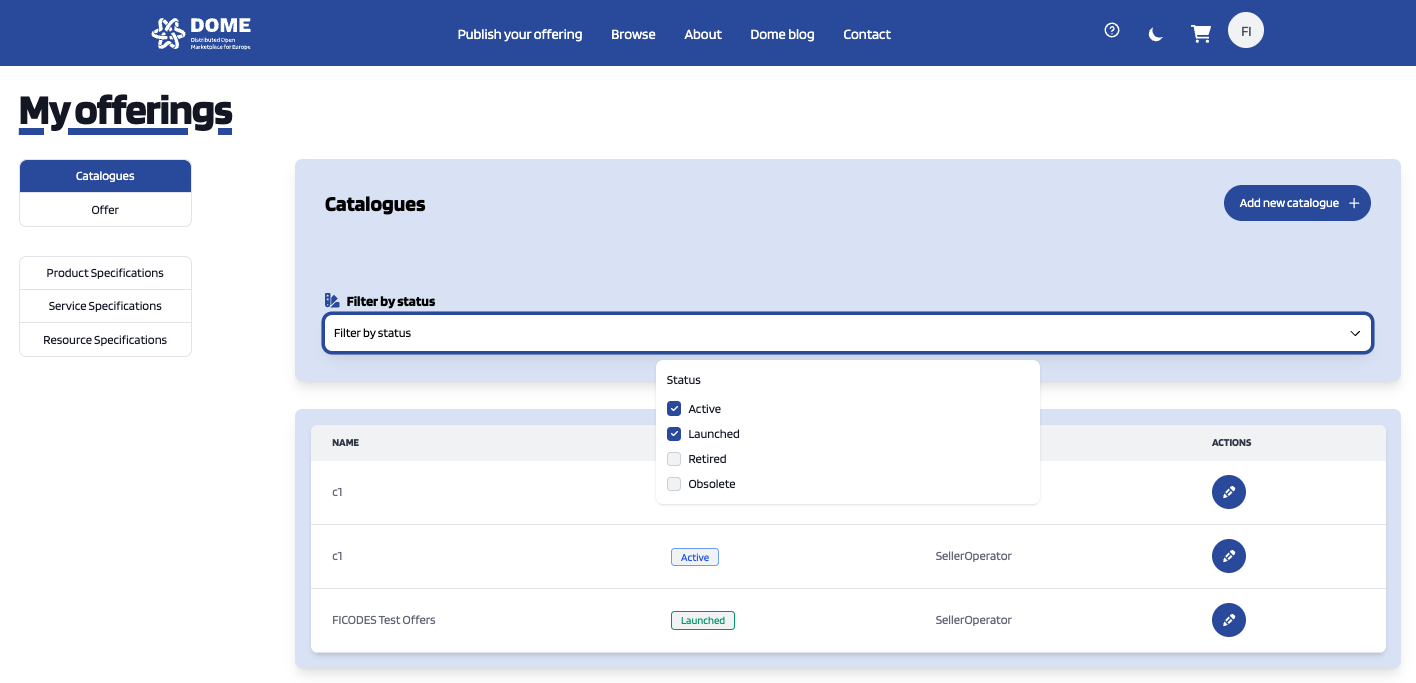
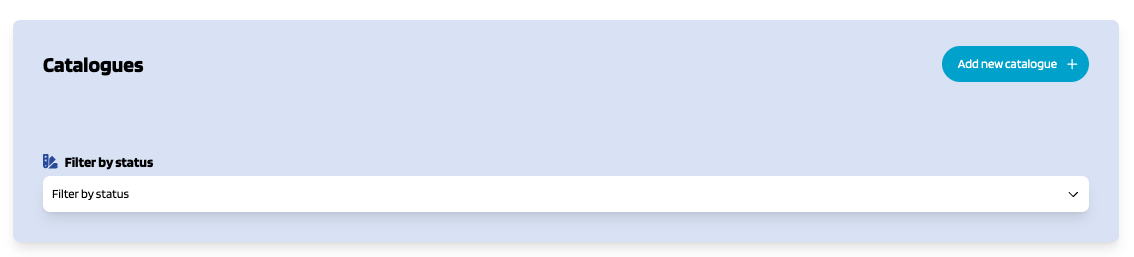
To create a new catalogue click on the Add new catalogue button.
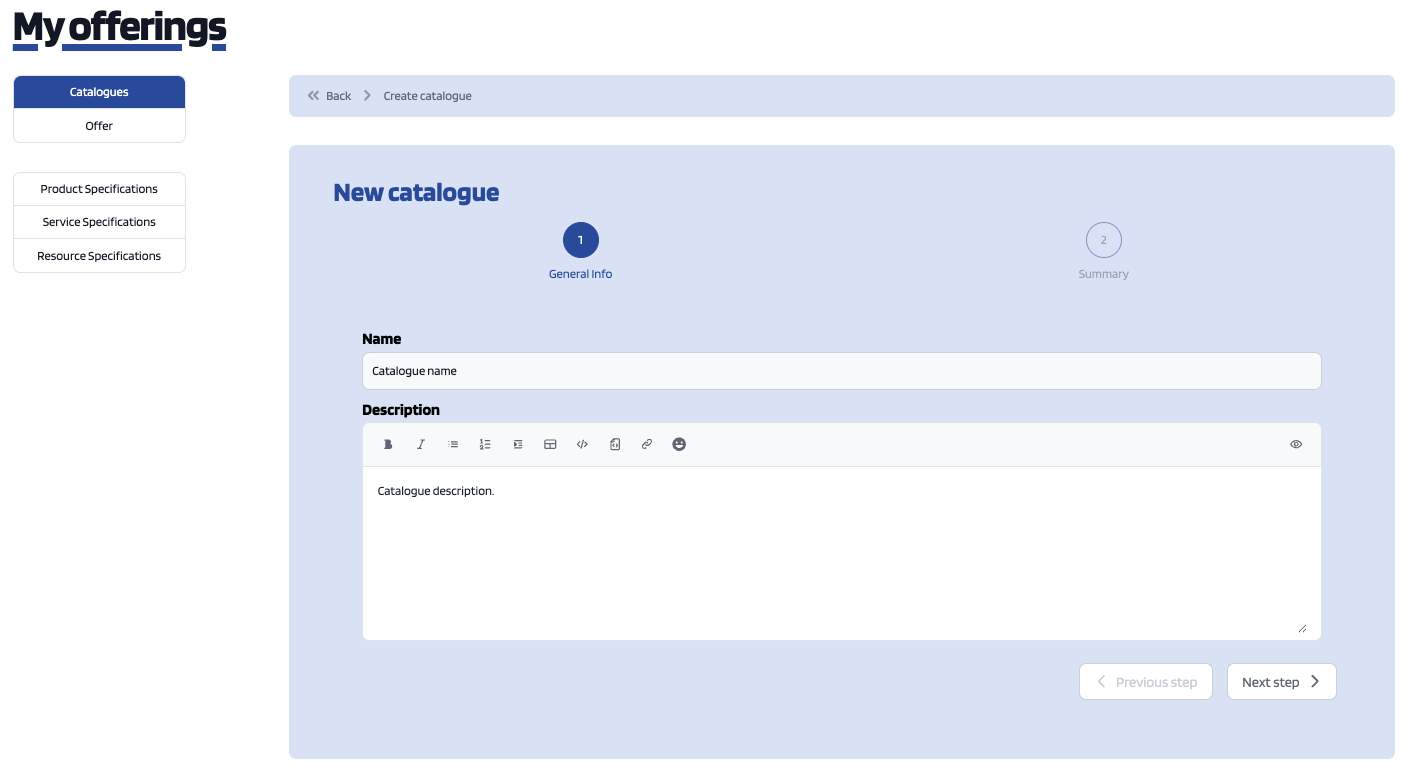
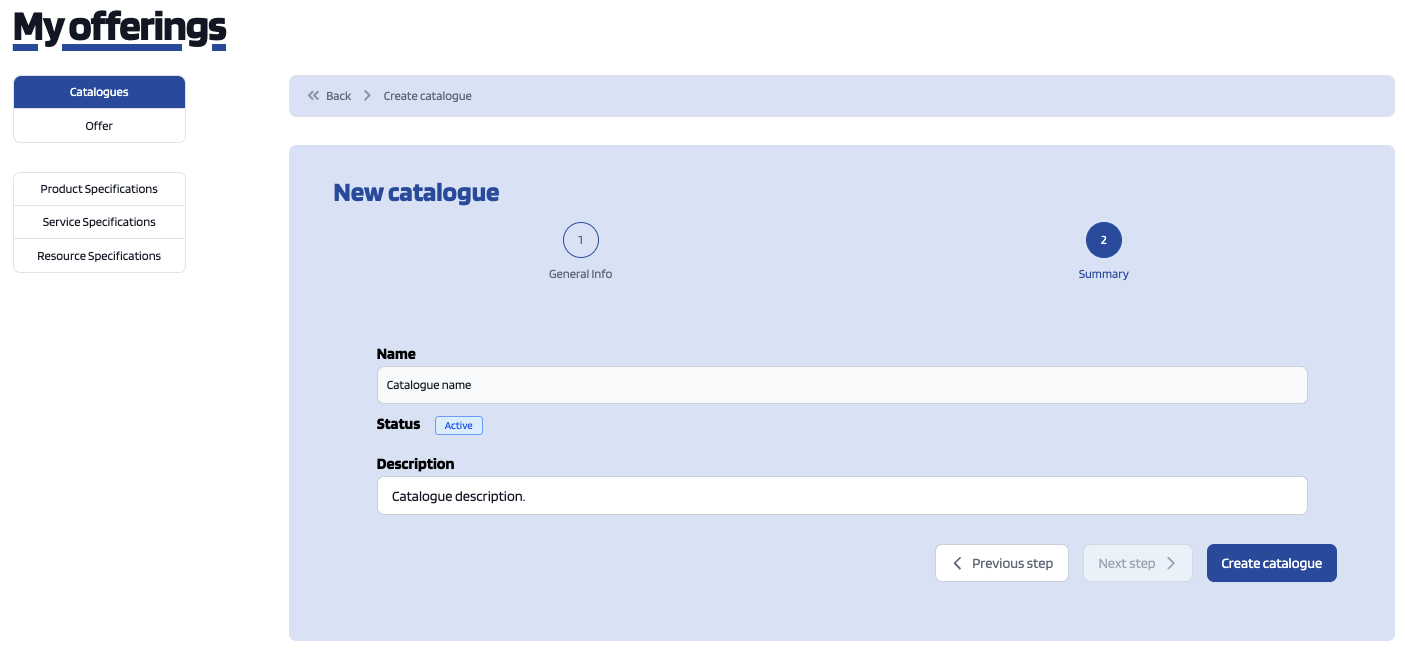
Then, provide a name and an optional description for the catalogue. Once you have filled the fields, click on Next, and then on Create Catalogue.
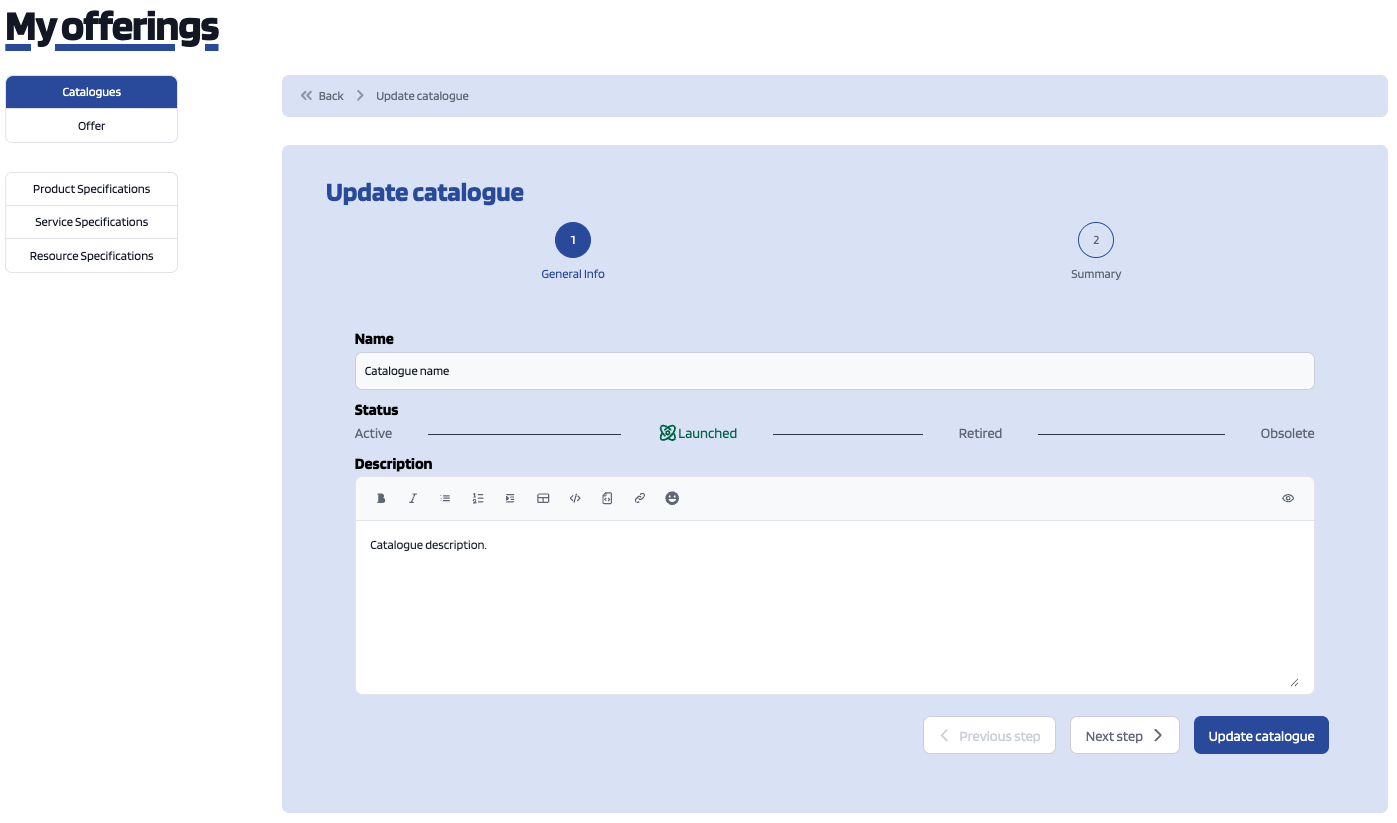
Providers can also update their catalogs. To do that, click on the Edit button of the catalog to open the update view.
Then, update the fields you want to modify, click on Next and then click on Update Catalogue. In this view, it is possible to change the Status of the catalogue. To start monetizing the catalogue, and make it appear in the Home you have to change its status to Launched.
How to check your orders and invoices
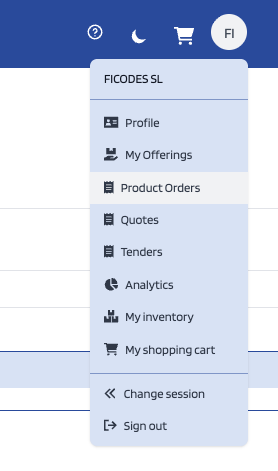
If you access to the product orders section available by clicking on Product Orders on the user's menu.
On this page you can check the orders related with the products that you've bought and the products that you've sold (the view is changed by clicking on "As Customer" and "As Provider" buttons shown at the top of the page).
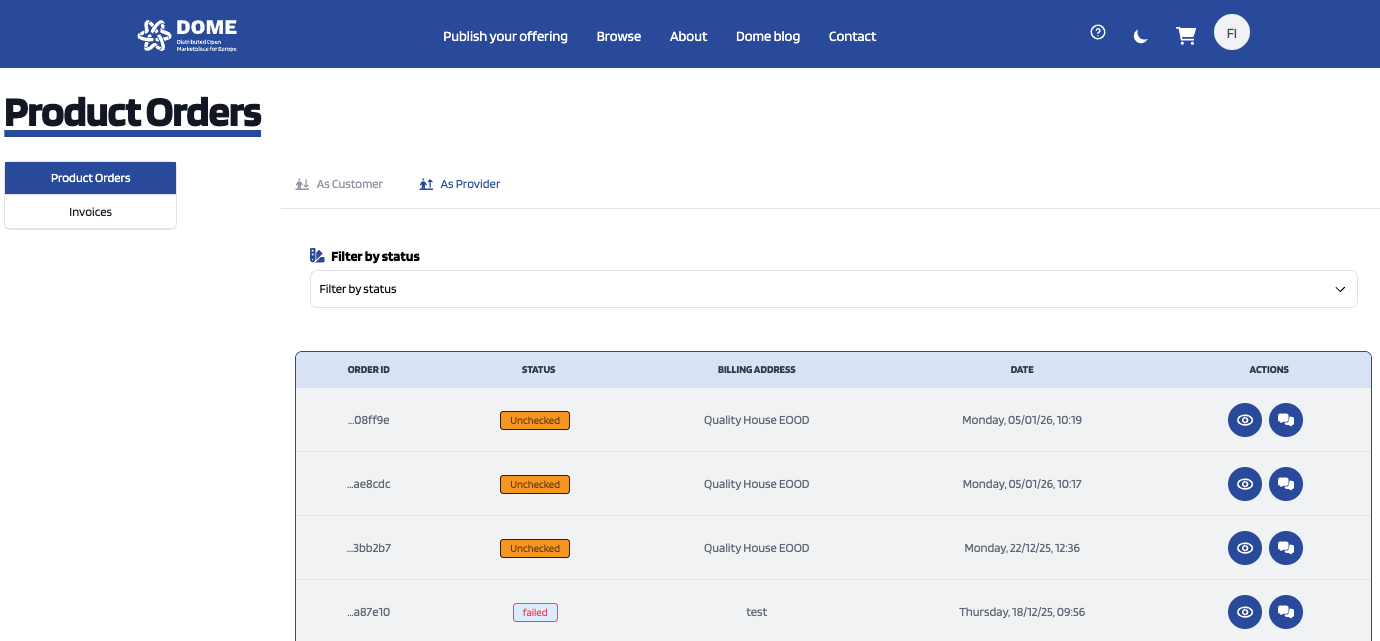
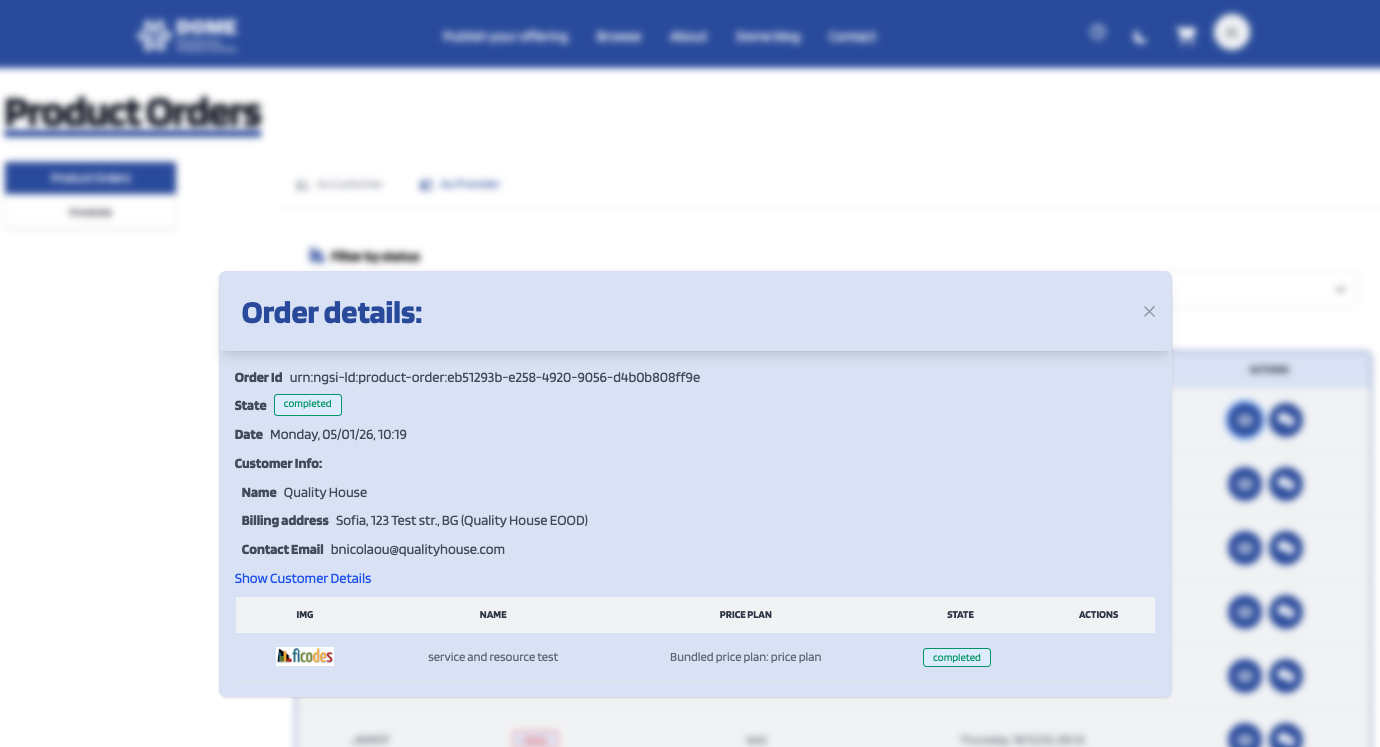
If you click on the "eye" button you can check the details of the order.
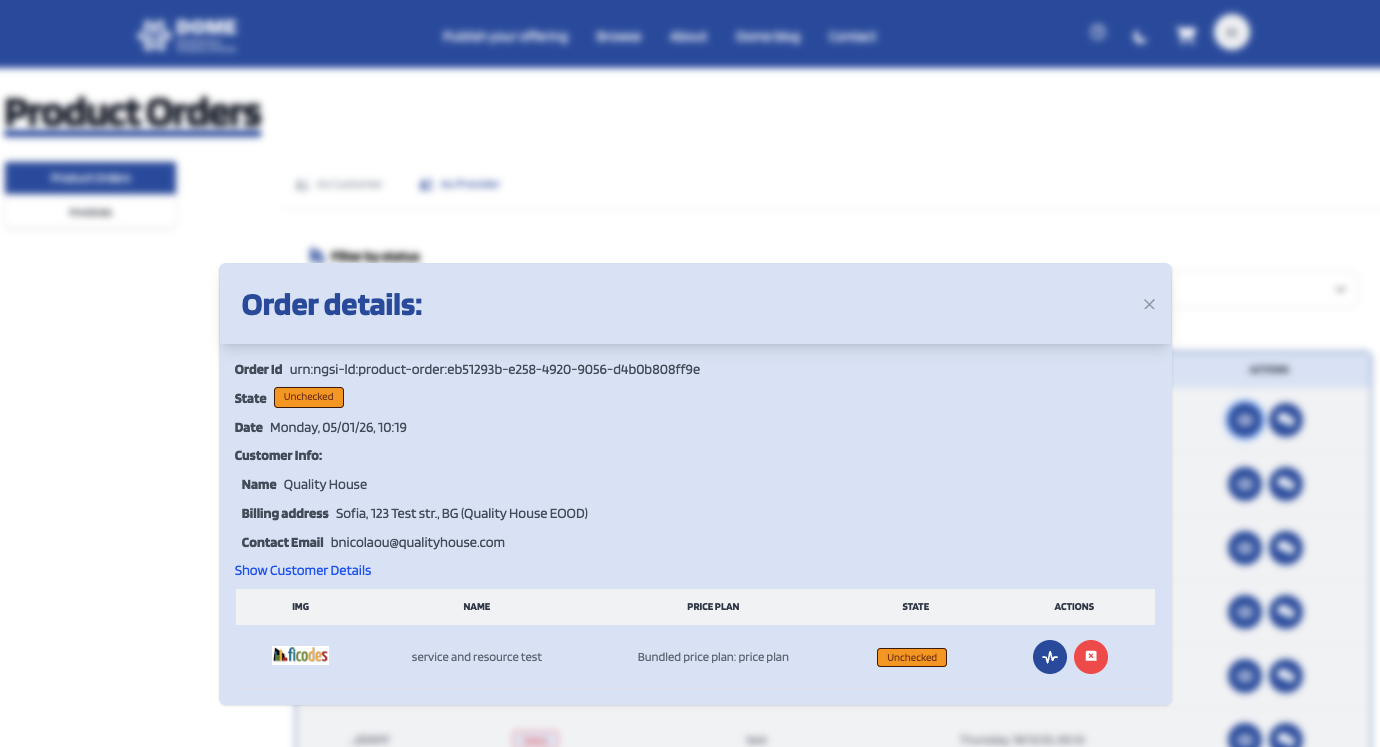
On this details if you click on "Show Customer Details" you'll be redirected to the buyer organization's page with their information.
If you're a provider you can make the order transit from unchecked status to acknowledged status, just to make clear that you've checked this order and are willing to accept i, by clicking on the blue button under the action button. If you don't want to accept the order you can transit to cancelled status by clicking on the red button.
Whenever you do that a confirmation popup will show.
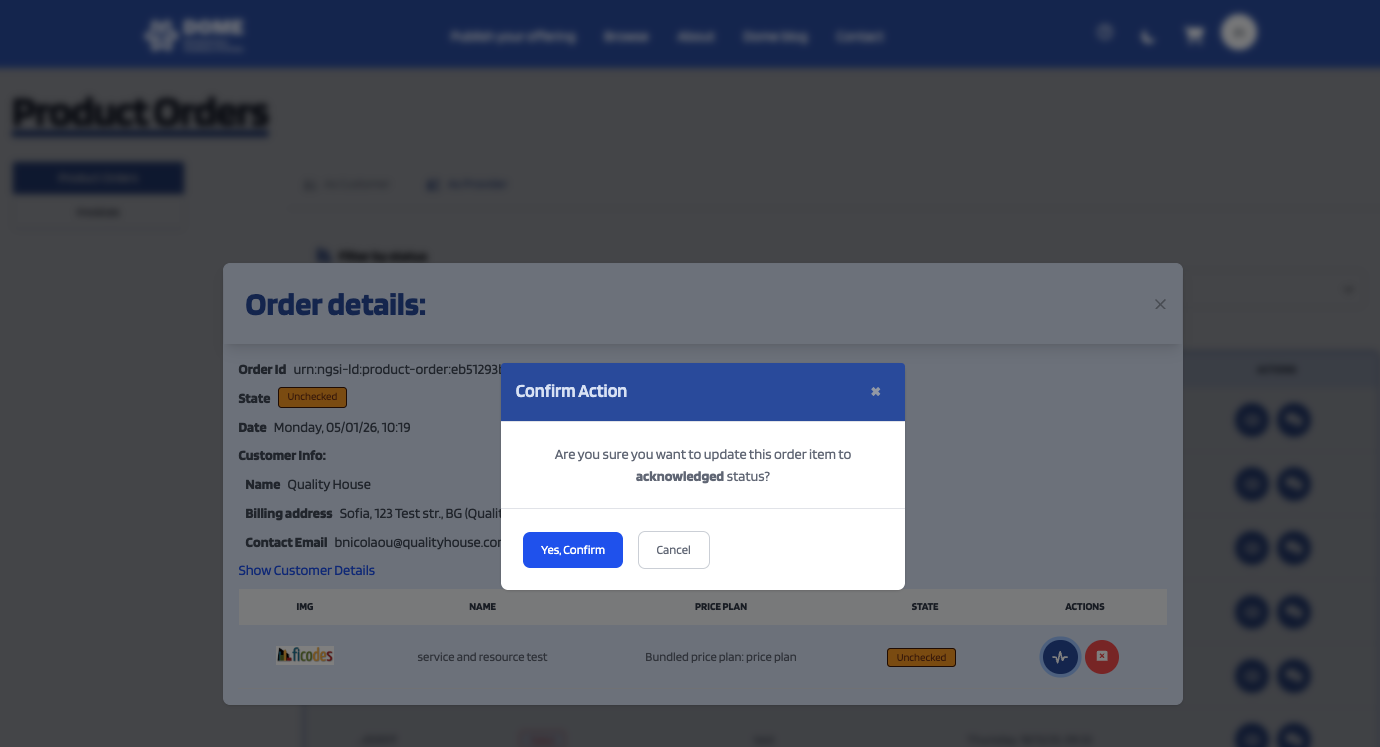
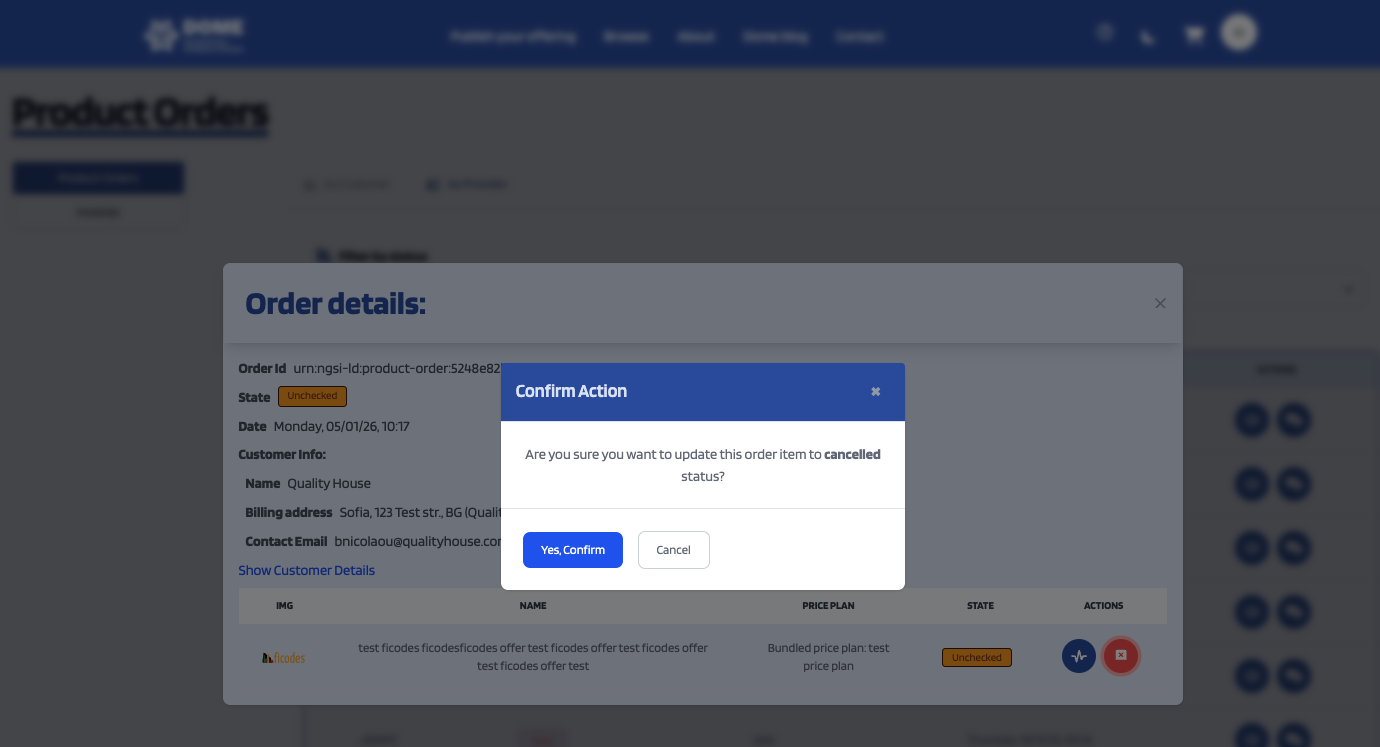
If you either en up confirming the order or cancelling it you'll see its status updated on the order list.
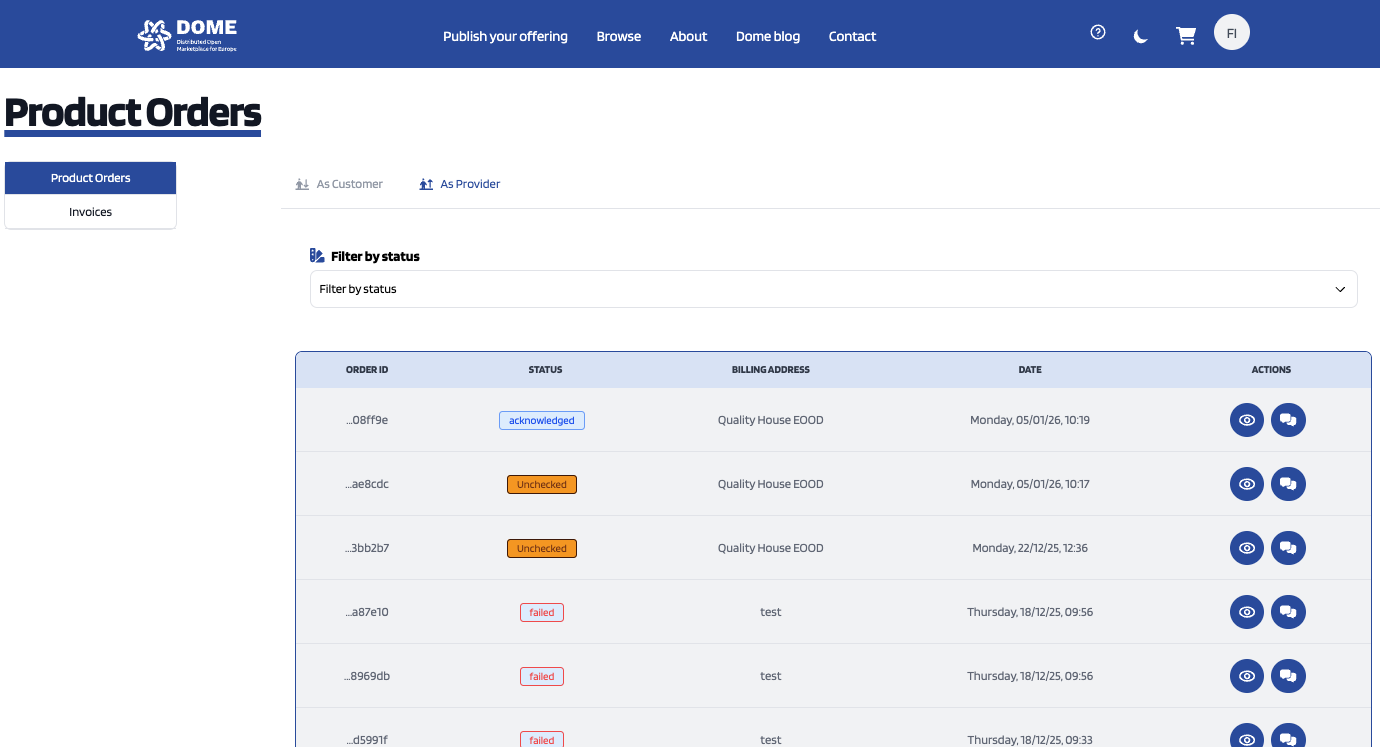
If you set its status to acknowledged confirming the order you can transit to other status after it in order to completed the transaction and completely sell the product.
After this status change if you check the order's details you can start the order process by clicking on the green play button under the actions column.
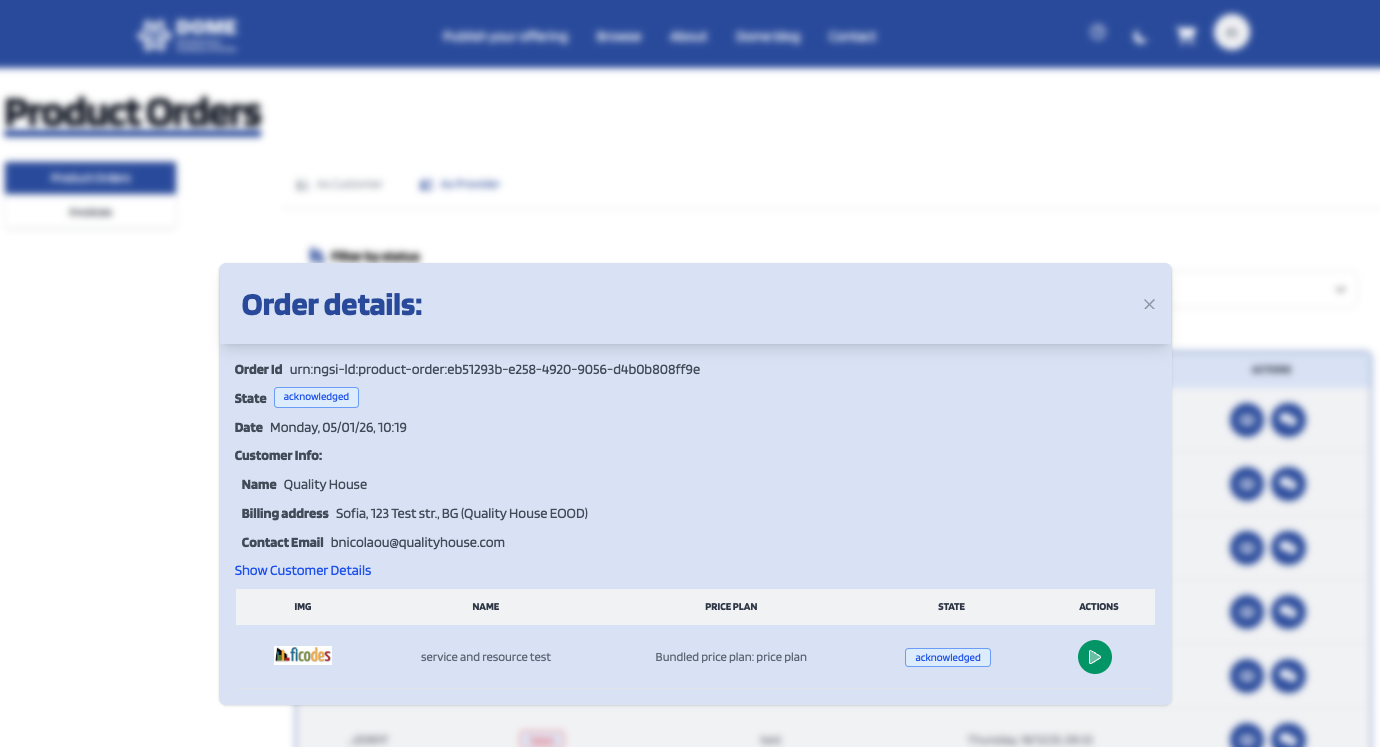
If you do so you'll see a popup message to confirm if you're sure of this action.
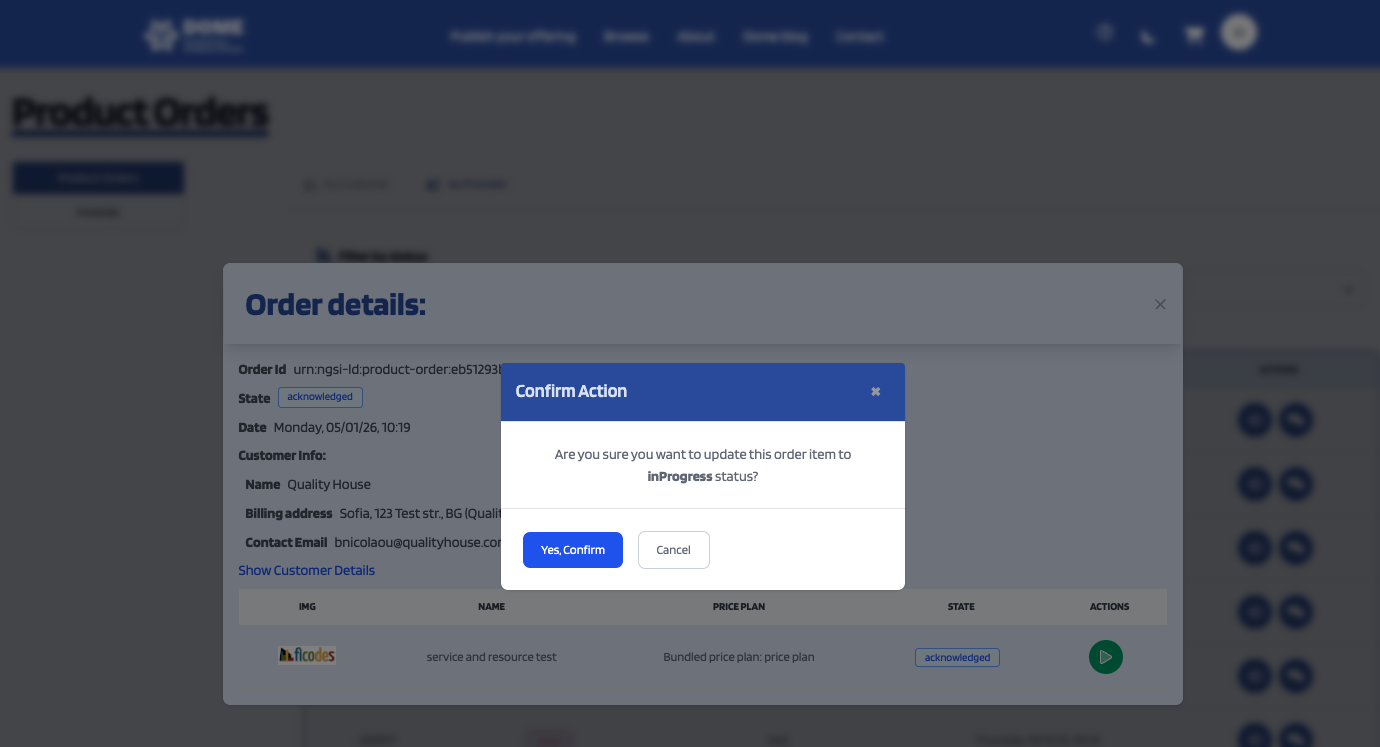
If you decided to confirm this action you'll see the order's status updated to inProgress. After this you can transit to Completed or Failed status. If everything is fine you can complete the order by clicking on the green check button, if not you can click on the red button and set the order status to failed.
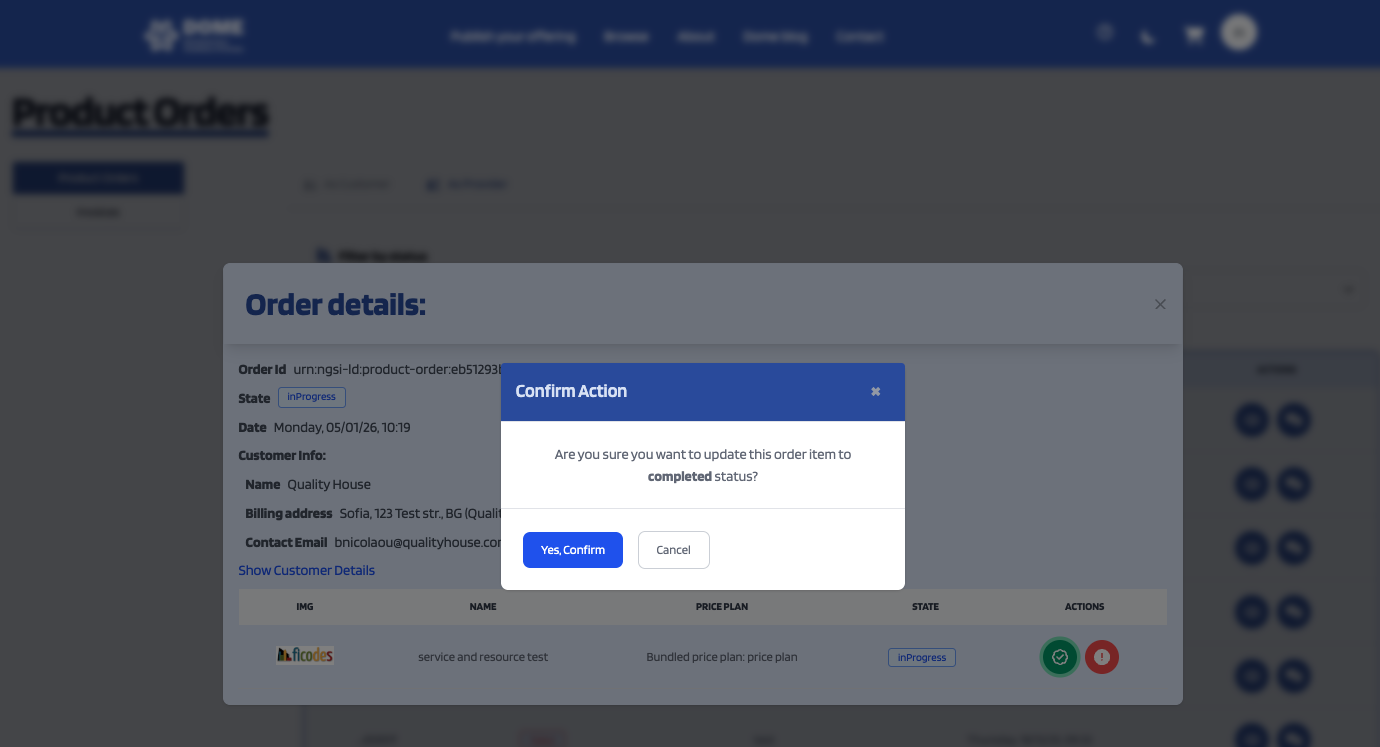
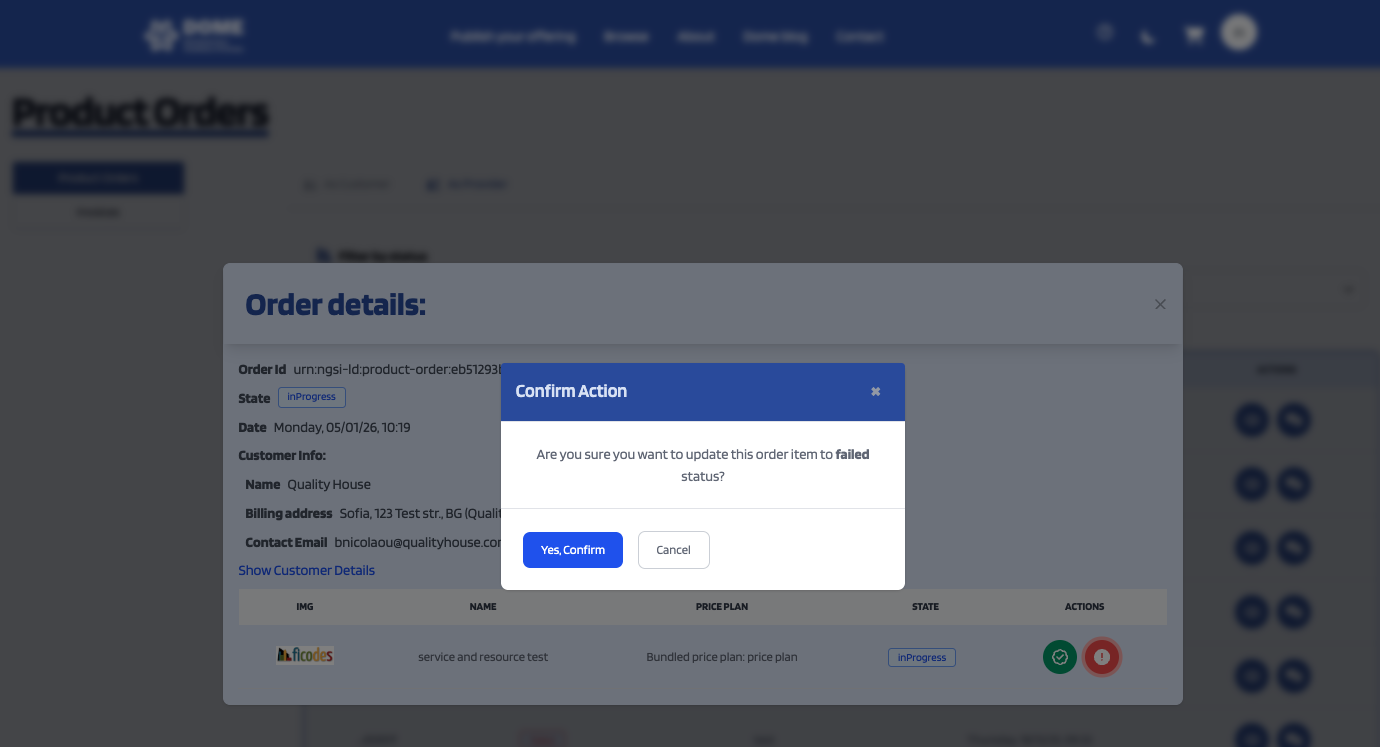
Whenever you end this steps the order will show up as completed.
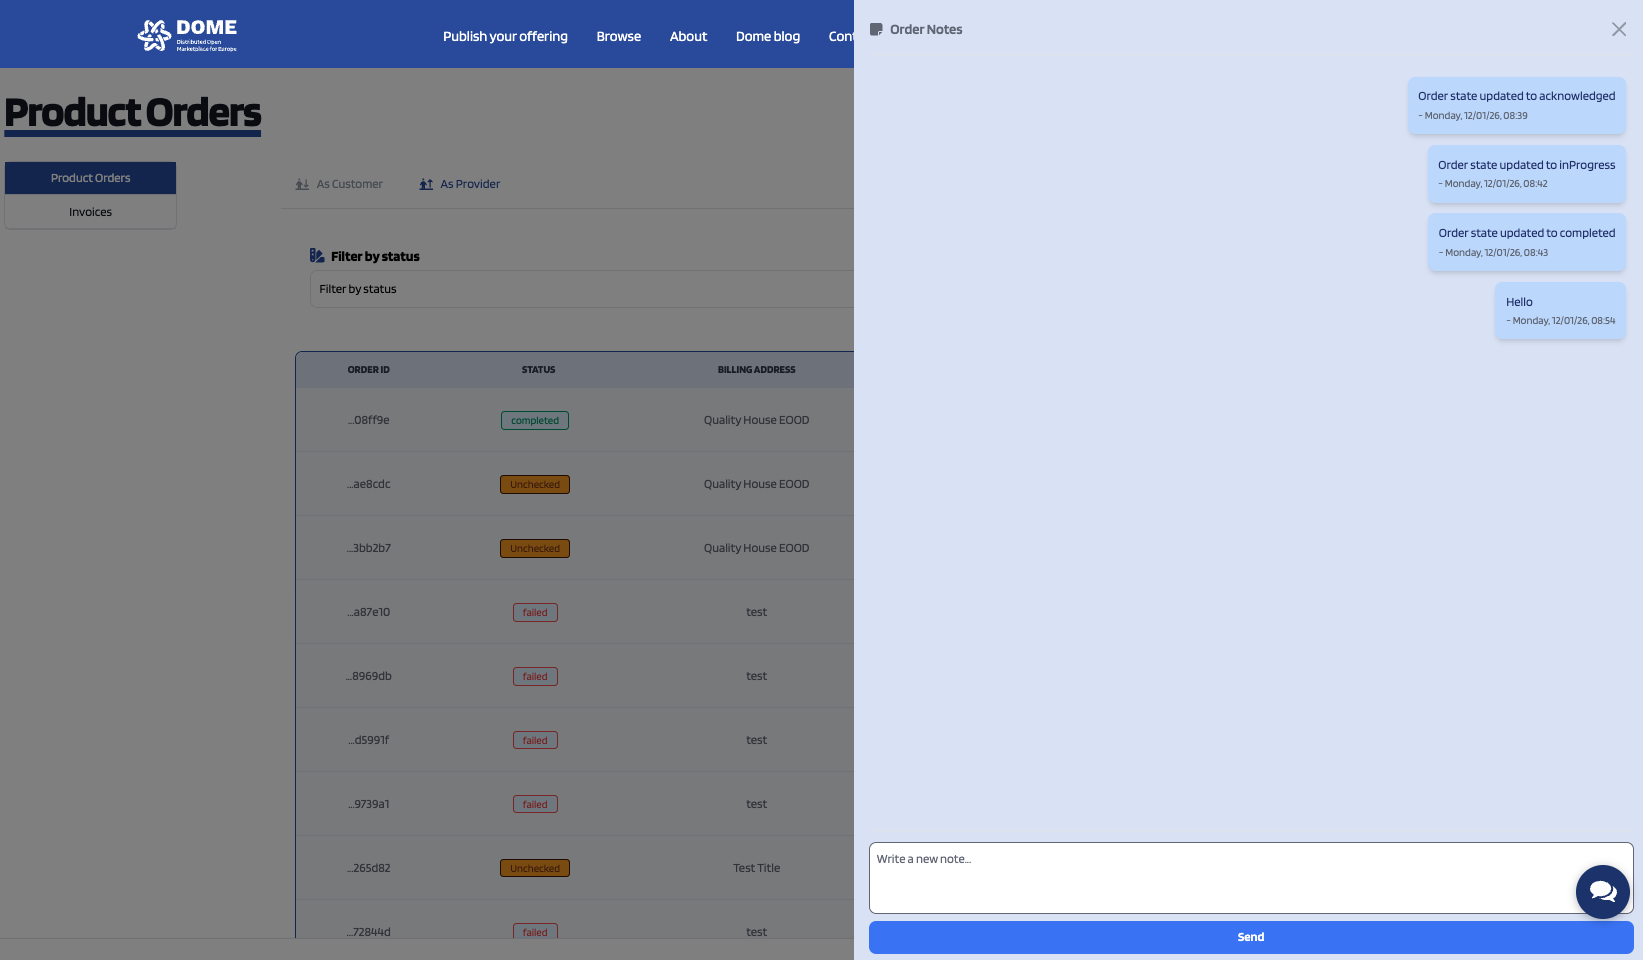
On this section there is a chat where both provider and customer can send messages and speak with eachother.
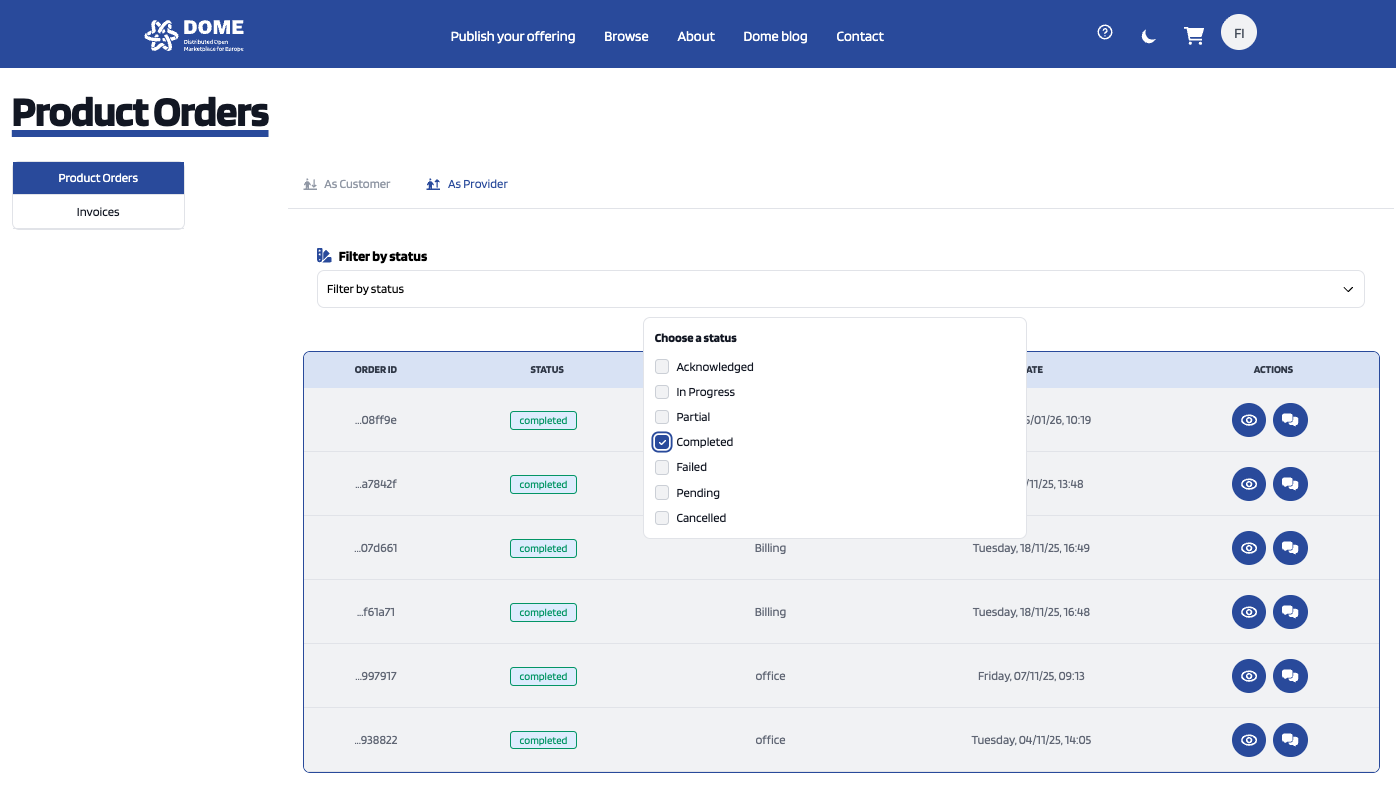
You can also find a filter you ease the search of orders as there is in other page sections. You can perform this filter clicking on "Filter by status" and checking the status that you want to show up.
You can change to the "Invoices" section inside this page and check every invoice related with your user as customer or provider. The same way as it is in the product orders section, you can change and check the invoice section filtered as customer or provider clicking on the As customer and As Provider buttons.
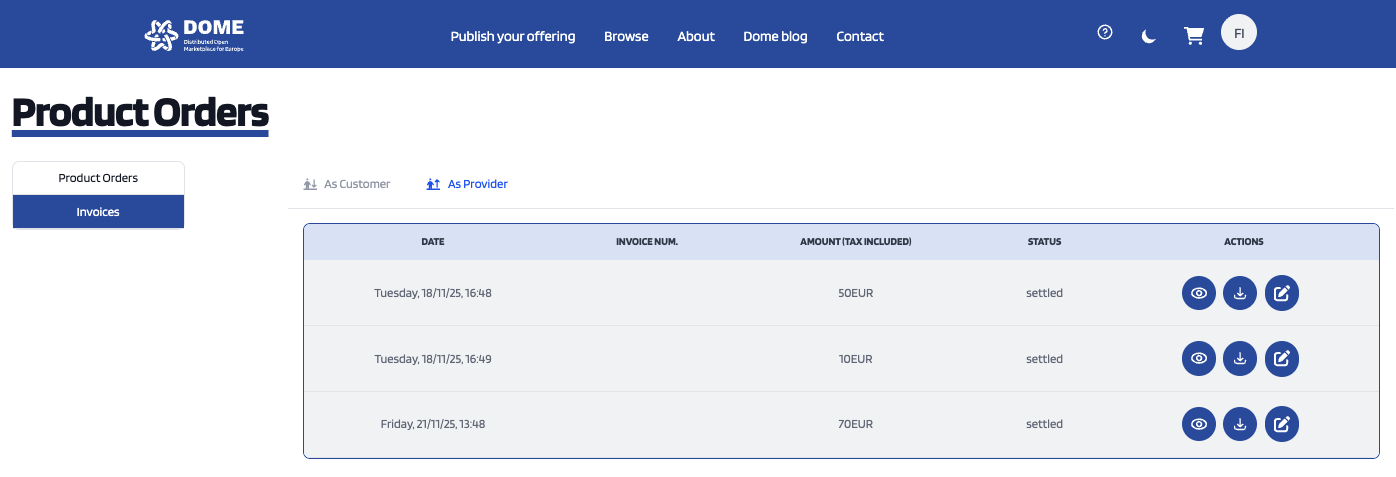
Here you can check the invoice's details by clicking on the eye button under the actions column.
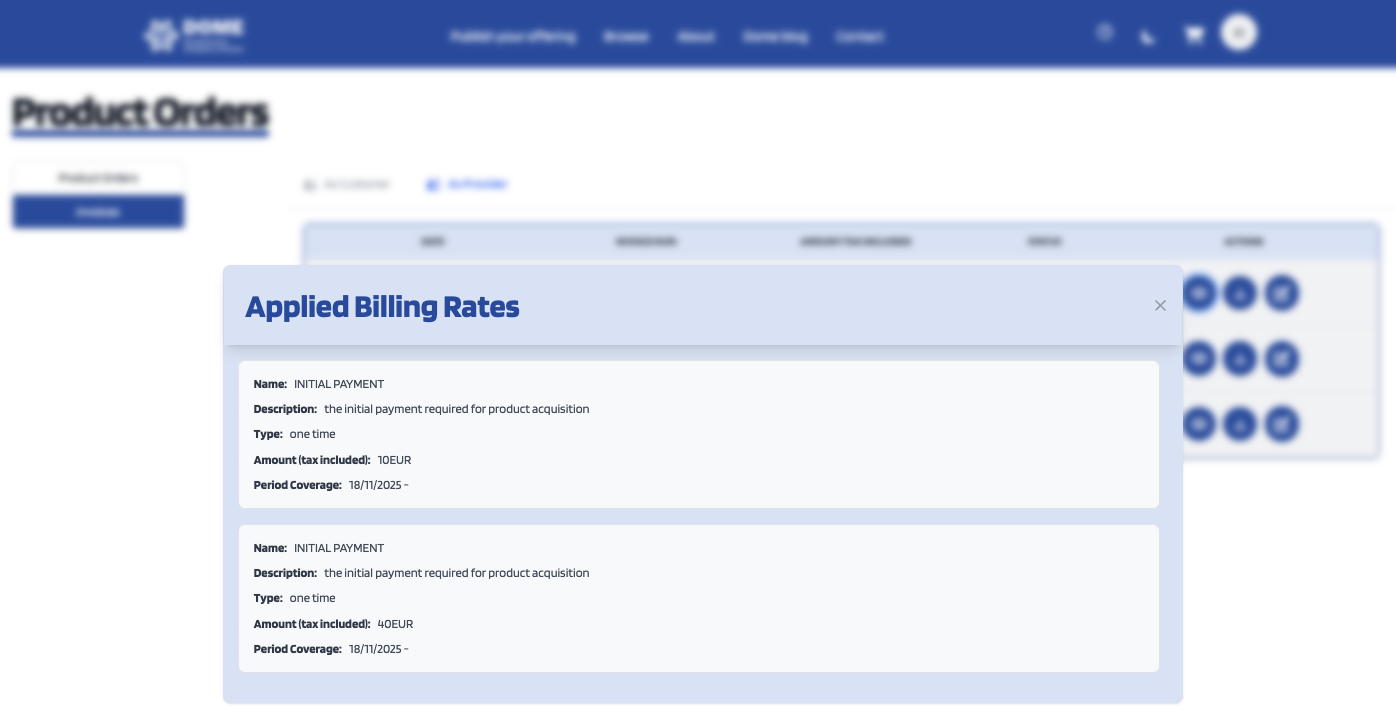
Download the invoice document by clicking on the download button (the button in the middle) under the actions column.