Credential Issuance
- Issuance Form: Selecting the Credential Type
- LEAR Credential Employee Issuance
- LEAR Credential Employee Issuance on behalf of another mandator
- LEAR Credential Machine Issuance
- LEAR Credential Machine Issuance on behalf of another mandator
- Gx Label Credentials Issuance
- Obtaining the Credential
Issuance Form: Selecting the Credential Type
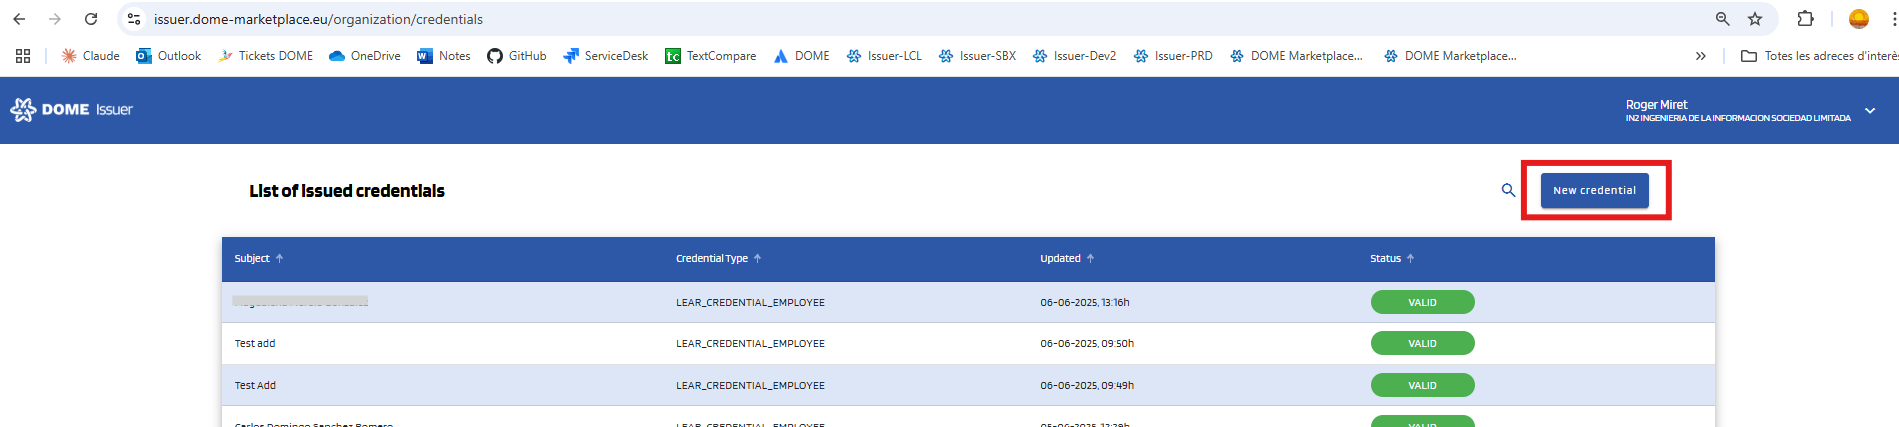
To issue a new credential, click the "New credential" button at the top right corner:
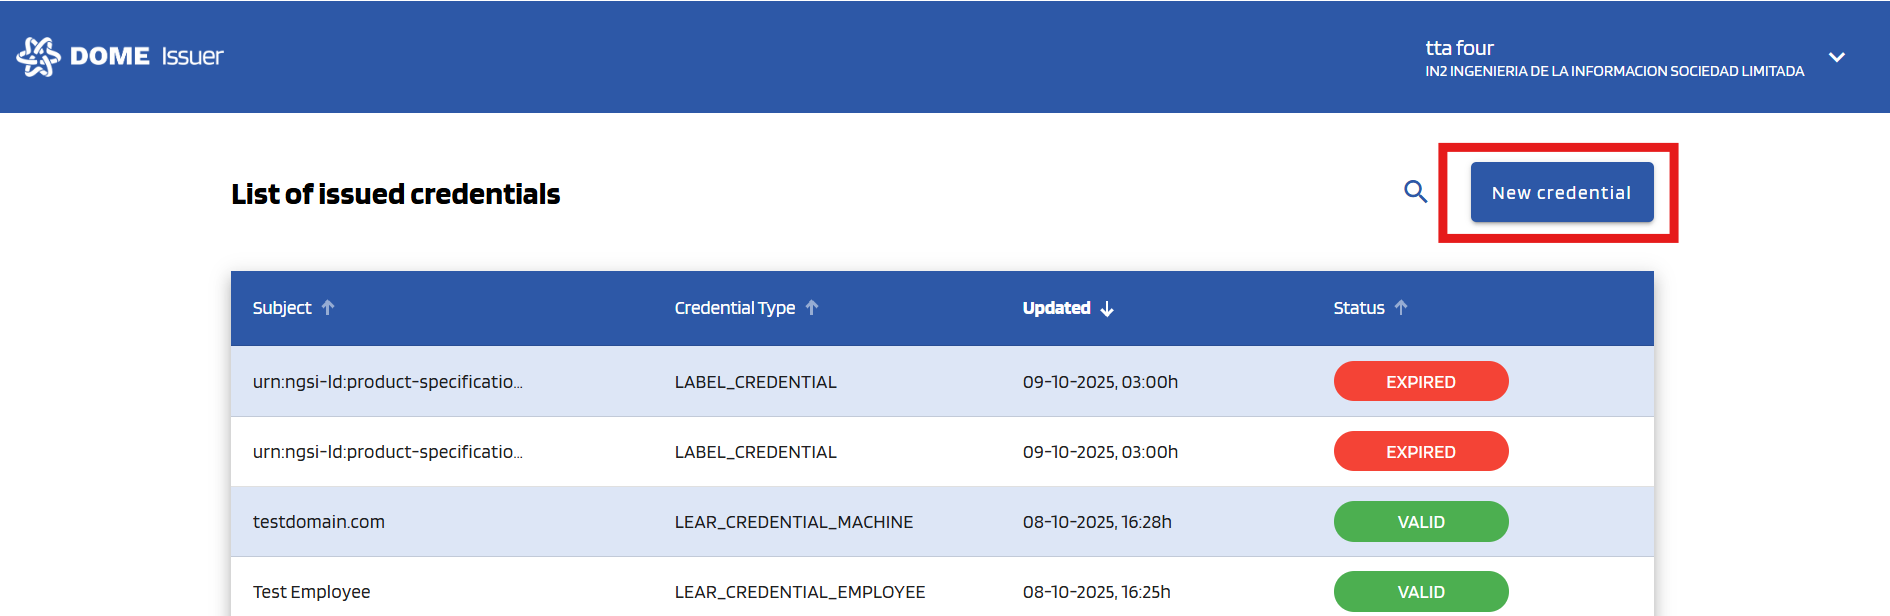
After clicking the "New credential" button, you will be redirected to the Credential Issuance form page. To start, select the type of the credential you wish to issue with the selector:
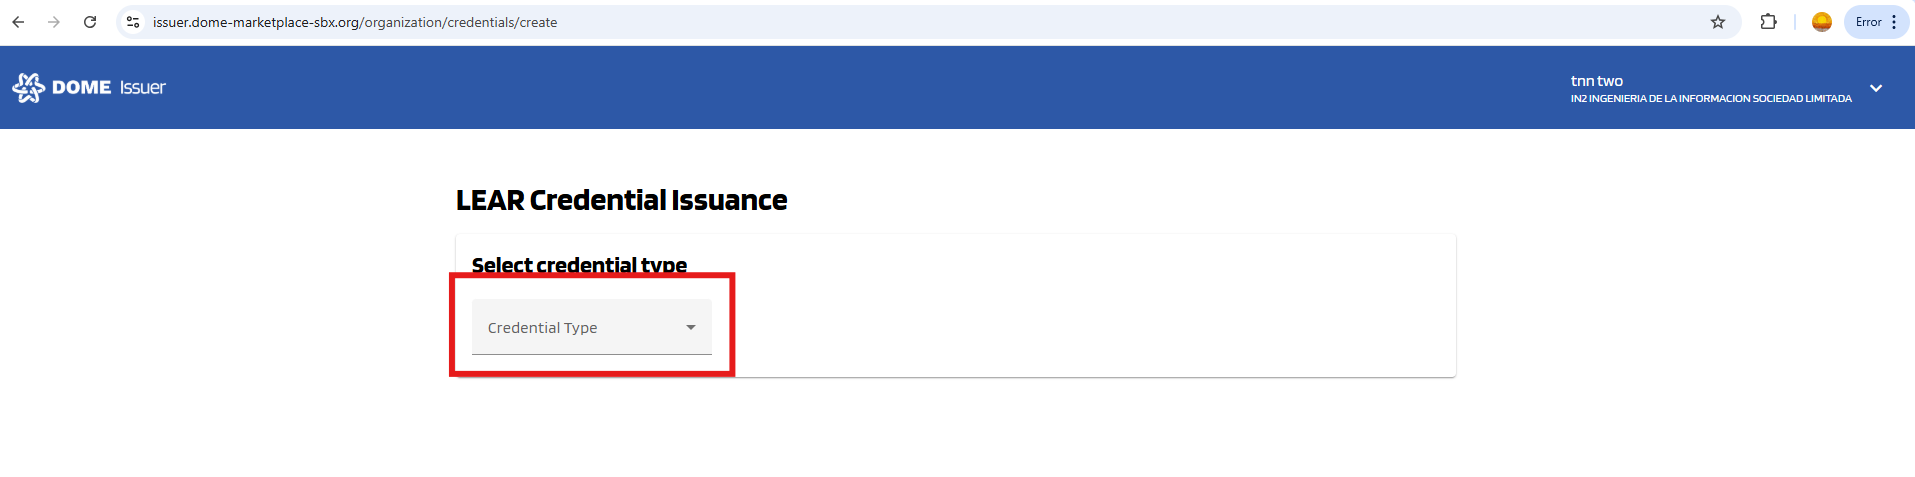
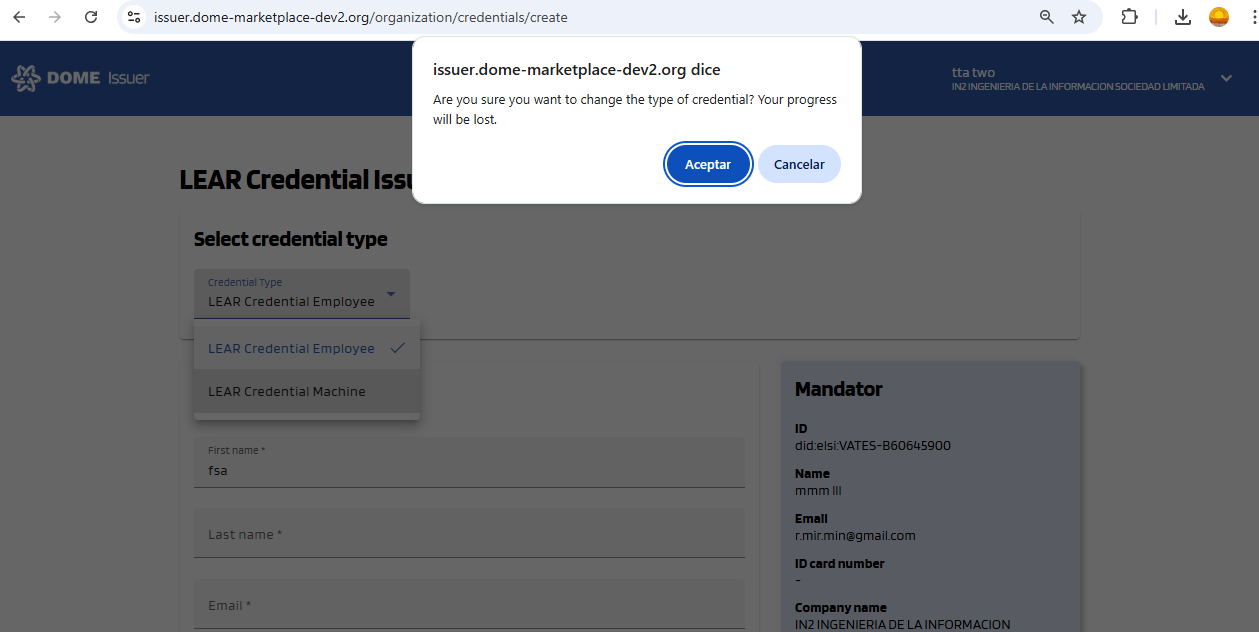
Click on it to see the available credential types:
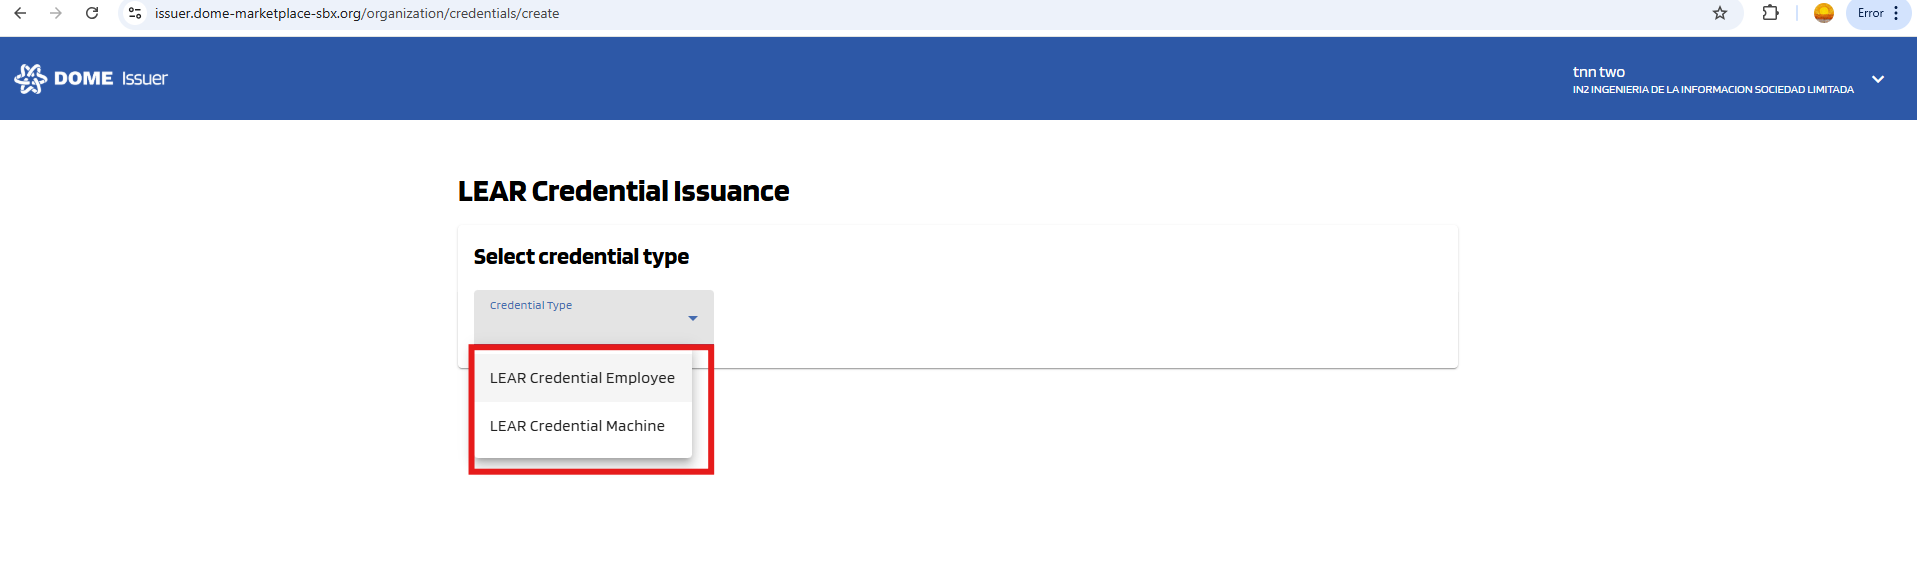
Click on the credential type you need. Then the credential type will be selected and you will see the Credential Issuance Form appear below, according to the selected type. Example for LEAR Credential Employee:
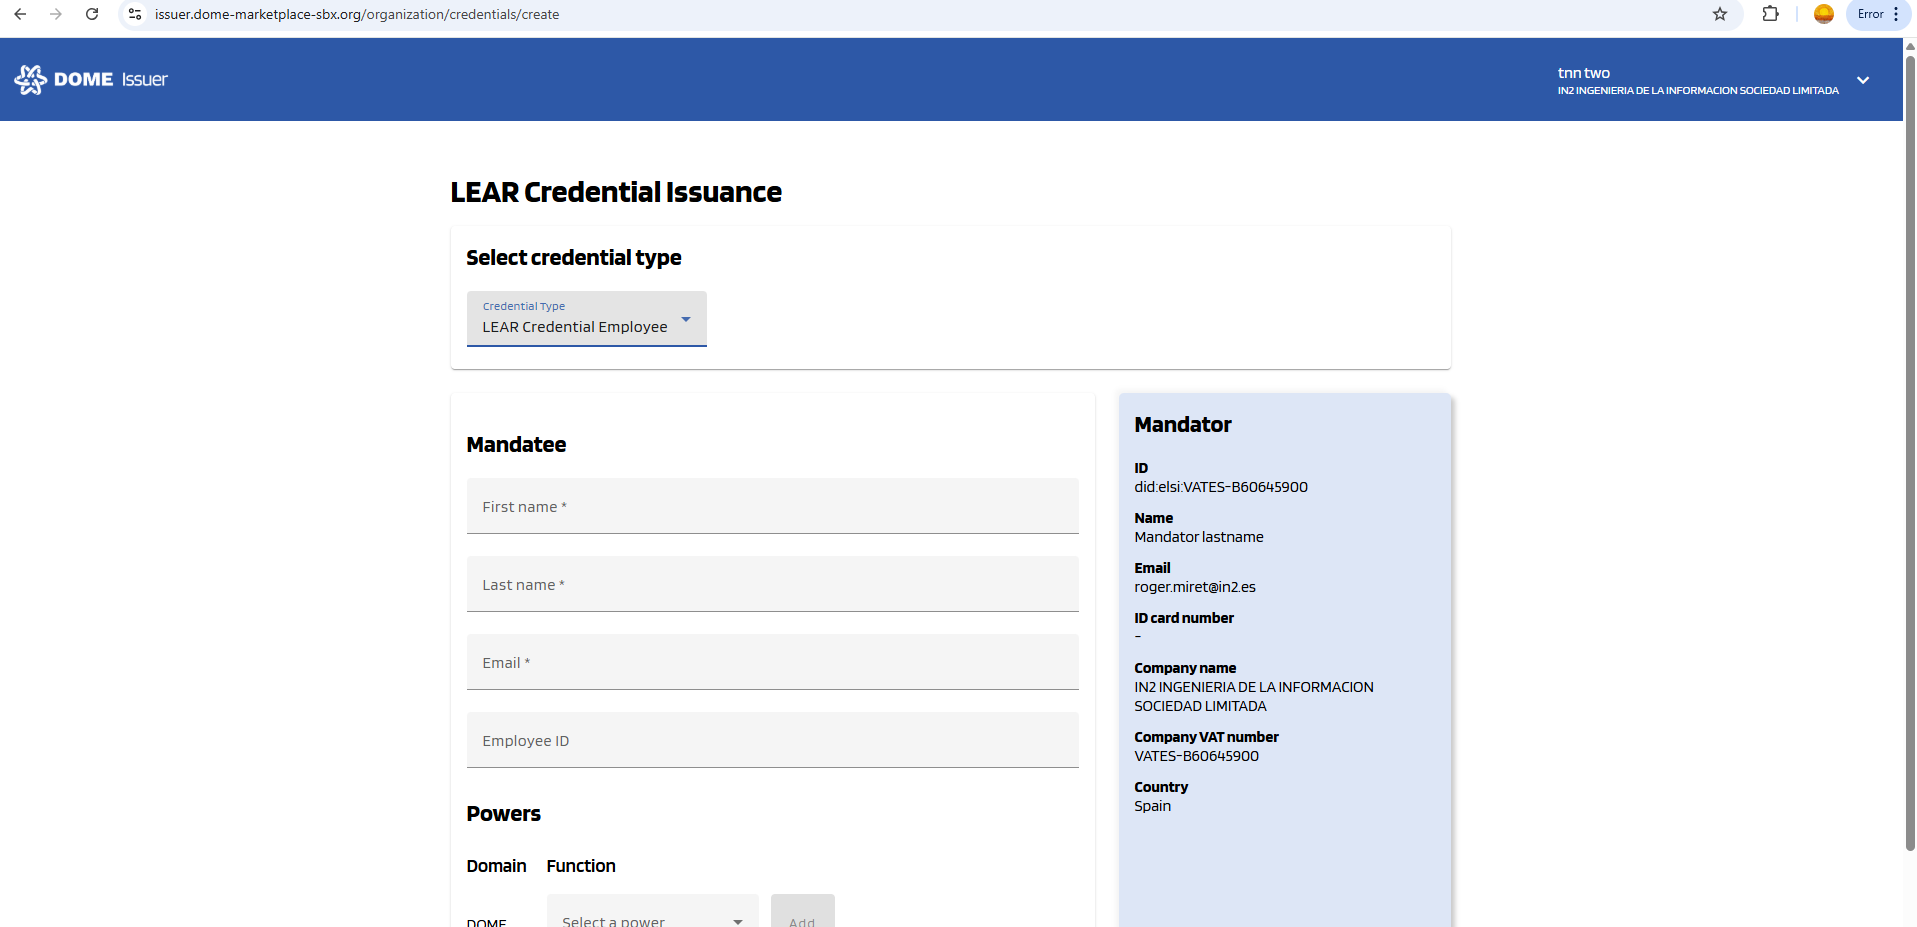
If you switch the credential type after you’ve started filling out the form, your progress will be lost. Normally, before switching, the browser will show an alert asking you to confirm whether you really want to proceed, but this may or may not happen depending on your browser settings.
LEAR Credential Employee Issuance
0. "New Credential" Form
To create a LEAR Credential Employee, click the "New credential" button, at the top right corner of the dashboard page, which will take you to the creation form.
1. Select the "LEAR Credential Employee" type
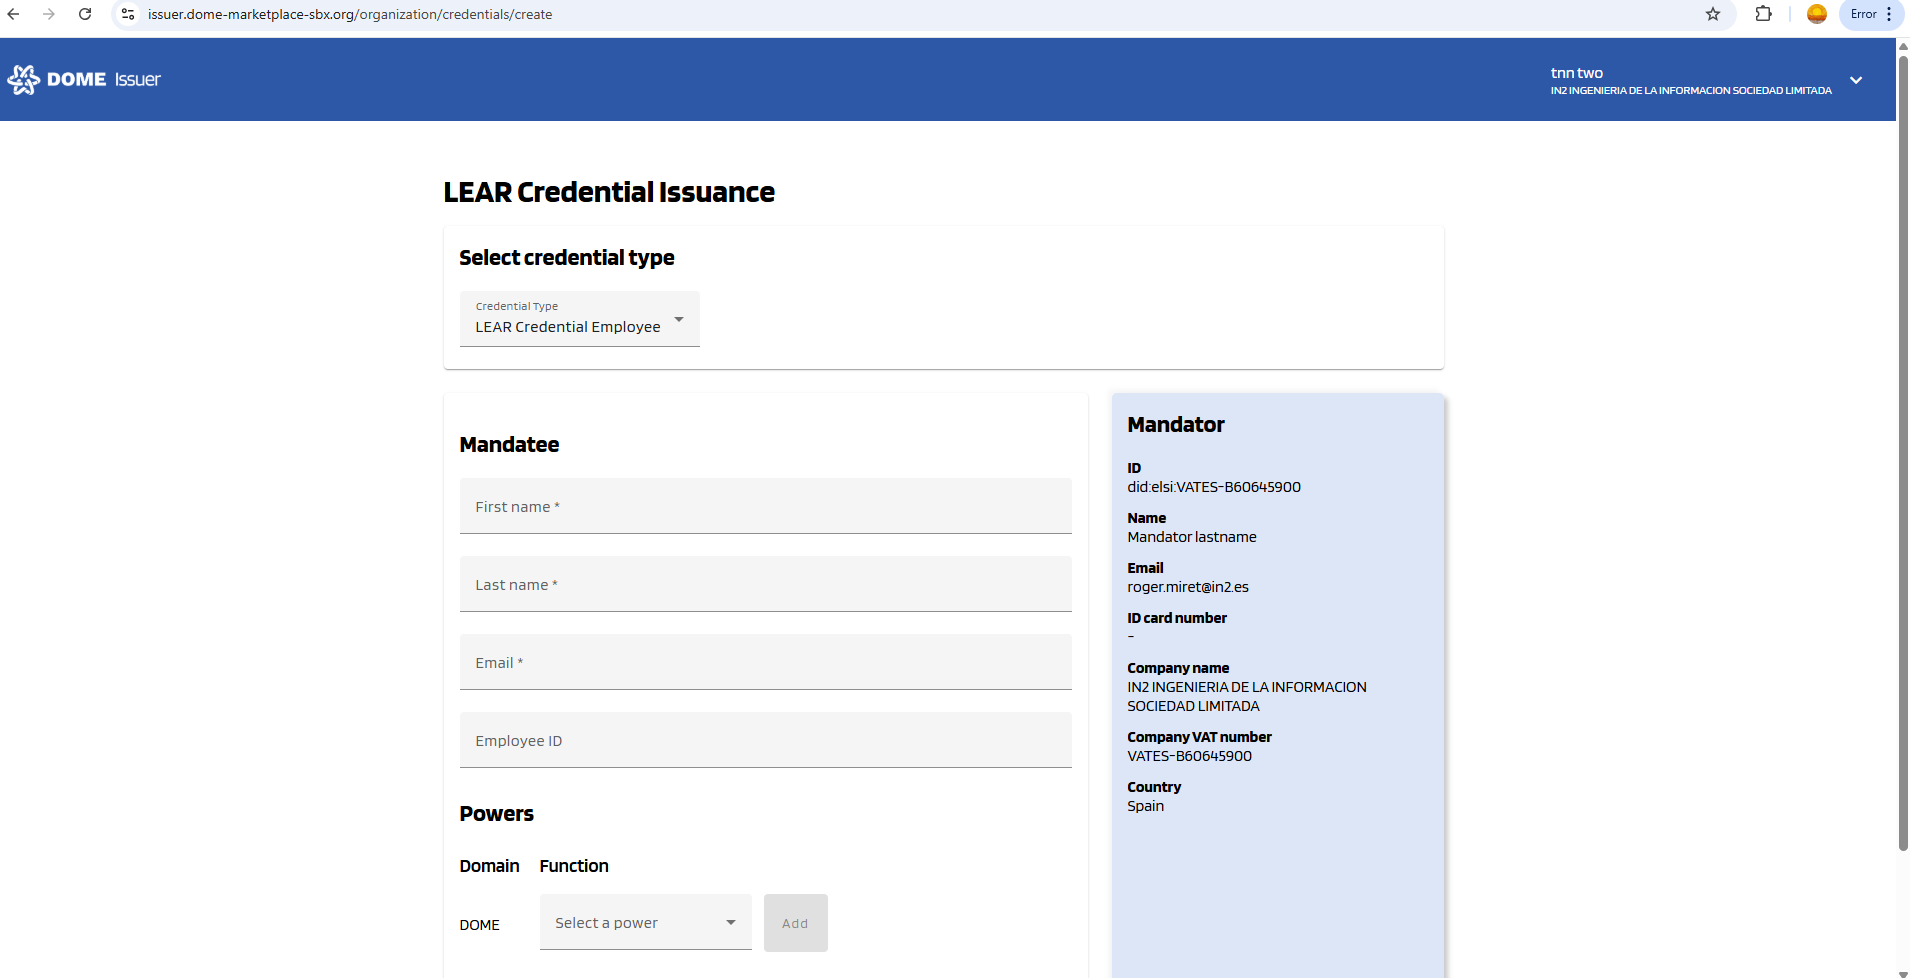
Select the LEAR Credential Employee type in the selector. Then the corresponding form will be displayed:
2. Complete the "New Credential" form
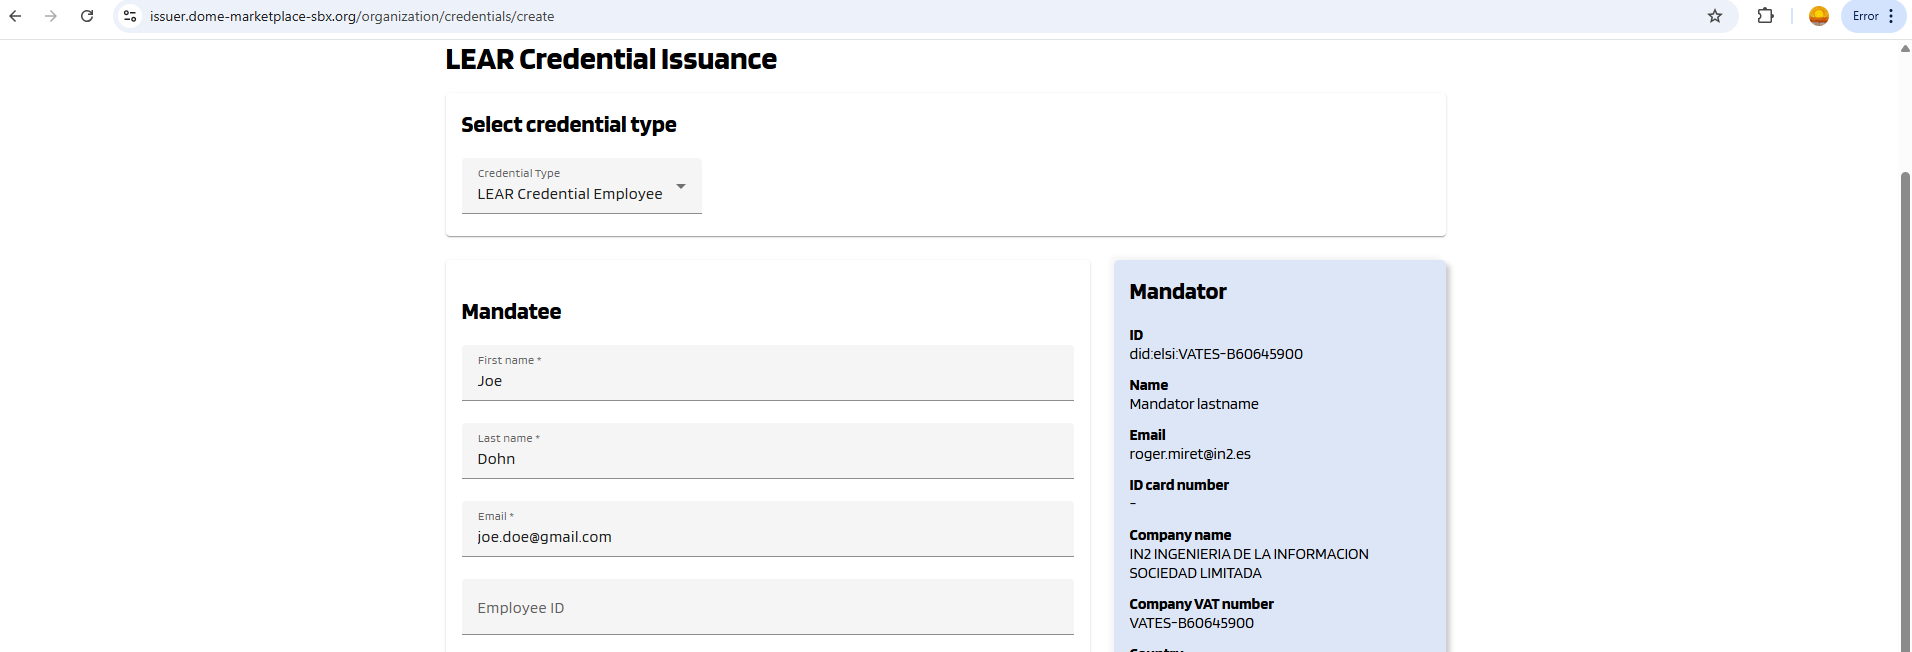
Fill all the Mandatee fields of the form, which are marked with a "*" symbol. The fields without "*" are optional --you can left them empty. Below, see an example of filled form.
3. Adding Powers to the Credential Subject
You can add different power using the combo box. Add at least one power by selecting it in the selector and clicking to the "Add" button. For each added power, select at least one action (toggle buttons). In the example below, "ProductOffering" represents a power with the "ProductOffering" function, and "Create", "Update" and "Delete" are the actions that can be included in this power. The "Create credential" button is disabled because the ProductOffering power doesn't have any added actions.
To learn mor about powers, see this guide.
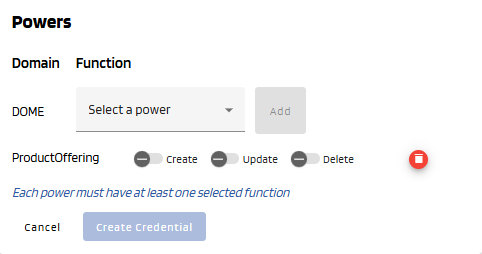
4. Create Credential
Once all mandatory fields all correctly filled, the "Create Credential" button will become brighter, indicating that it can be clicked. Click on it.
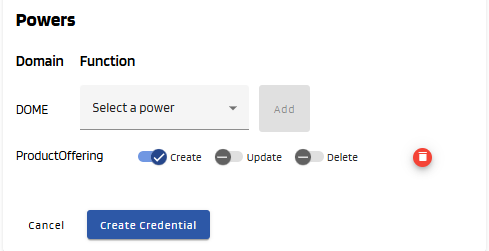
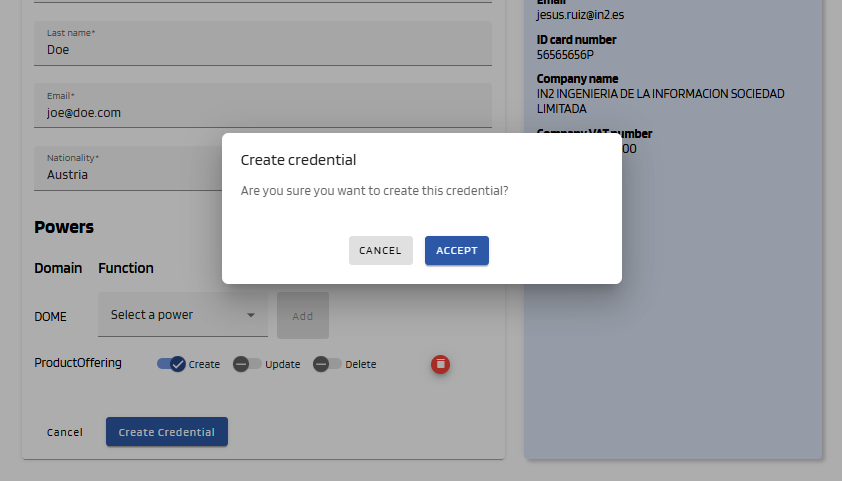
A popup will be displayed to confirm that you want to create the credential. Click "Accept" to create it. If the issuance is successful, a success message will be displayed and you will be redirected to the dashboard page.
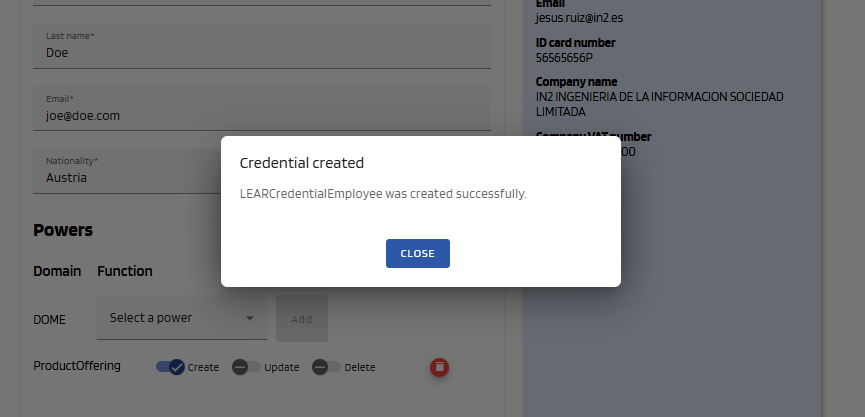
5. See the Issued Credential
Then you will be redirected to the dashboard and you will see that the Credential you just created has a status of DRAFT. After the user downloads it with the Wallet, it will have a status of VALID (you might have to refresh the page to see it change). For more details, see the Credential Management section.

LEAR Credential Employee Issuance on behalf of another mandator
0. "New Credential" Form
To create a LEAR Credential Employee on behalf of another mandator, click the "New credential (on behalf)" button, at the top right corner of the dashboard page, which will take you to the creation form.
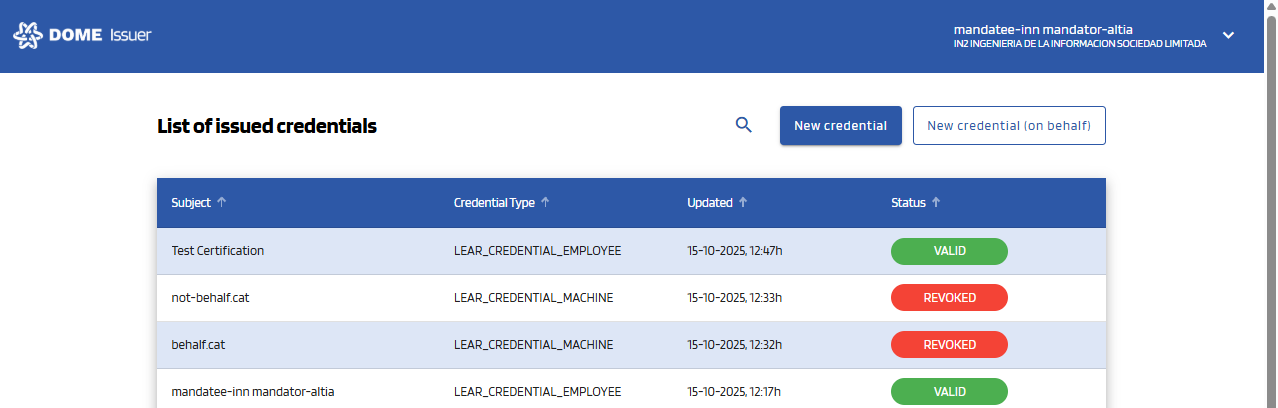
1. Select the "LEAR Credential Employee" type
Select the LEAR Credential Employee type in the selector. Then the corresponding form will be displayed:
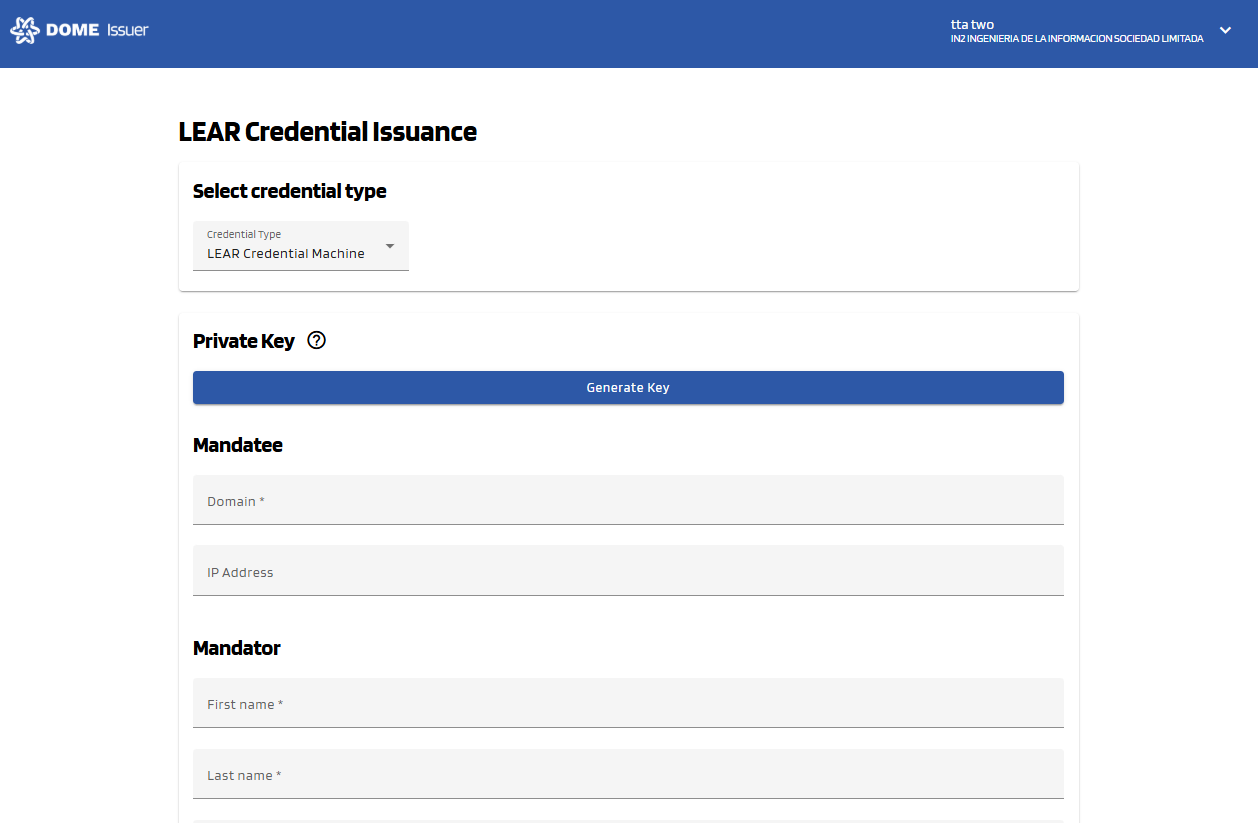
2. Complete the new credential form
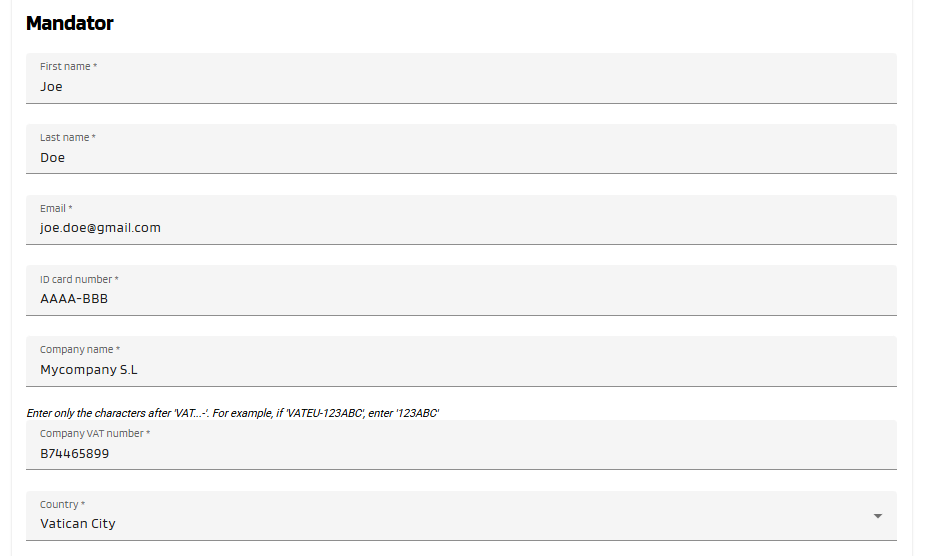
Fill all the Mandatee fields of the form, which are marked with a "*" symbol. The fields without "*" are optional --you can left them empty. Below, see an example of filled form.
Then fill all the Mandator fields:
3. Adding Powers to the Credential Subject
You can add different power using the combo box. Add at least one power by selecting it in the selector and clicking to the "Add" button. For each added power, select at least one action (toggle buttons). In the example below, "ProductOffering" represents a power with the "ProductOffering" function, and "Create", "Update" and "Delete" are the actions that can be included in this power. The "Create credential" button is disabled because the ProductOffering power doesn't have any added actions.
To learn mor about powers, see this guide.
4. Create Credential
Once all mandatory fields all correctly filled, the "Create Credential" button will become brighter, indicating that it can be clicked. Click on it.
A popup will be displayed to confirm that you want to create the credential. Click "Accept" to create it. If the issuance is successful, a success message will be displayed and you will be redirected to the dashboard page.
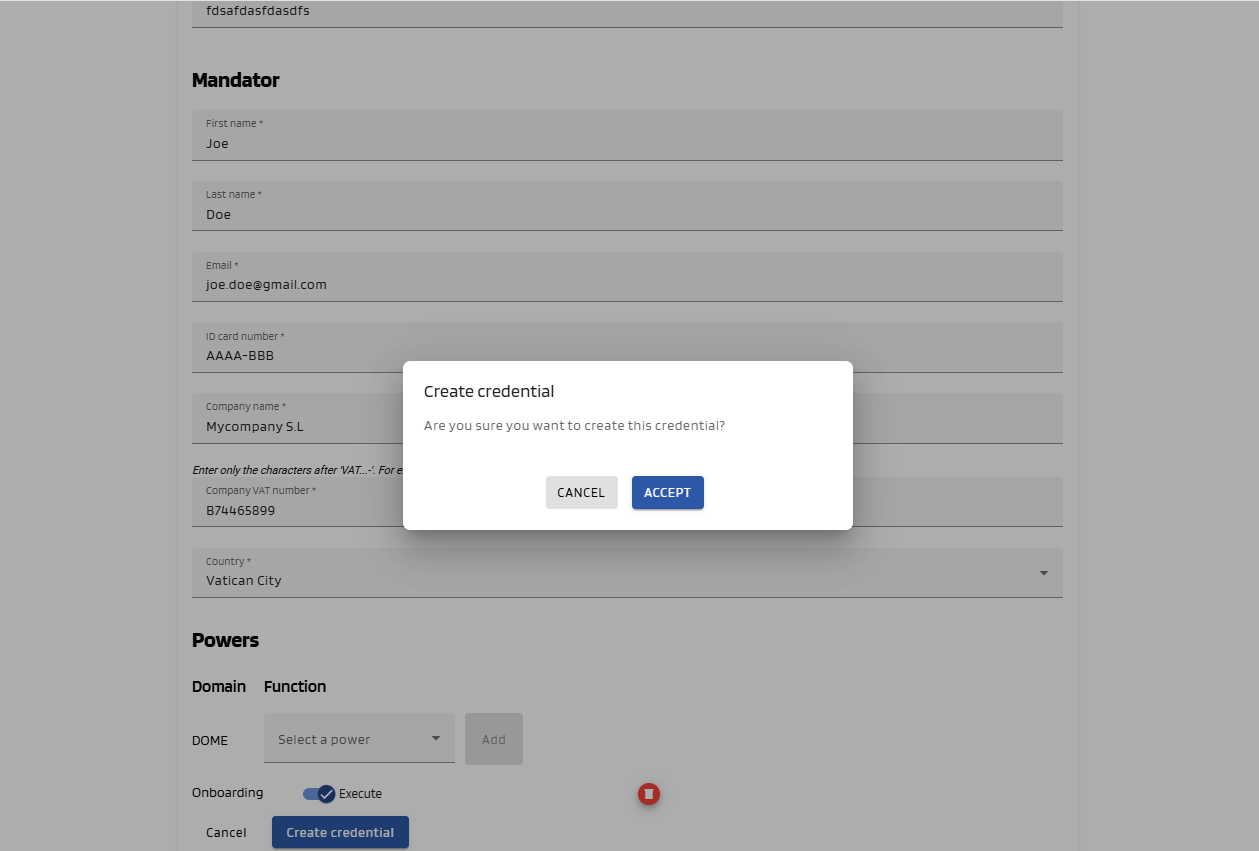
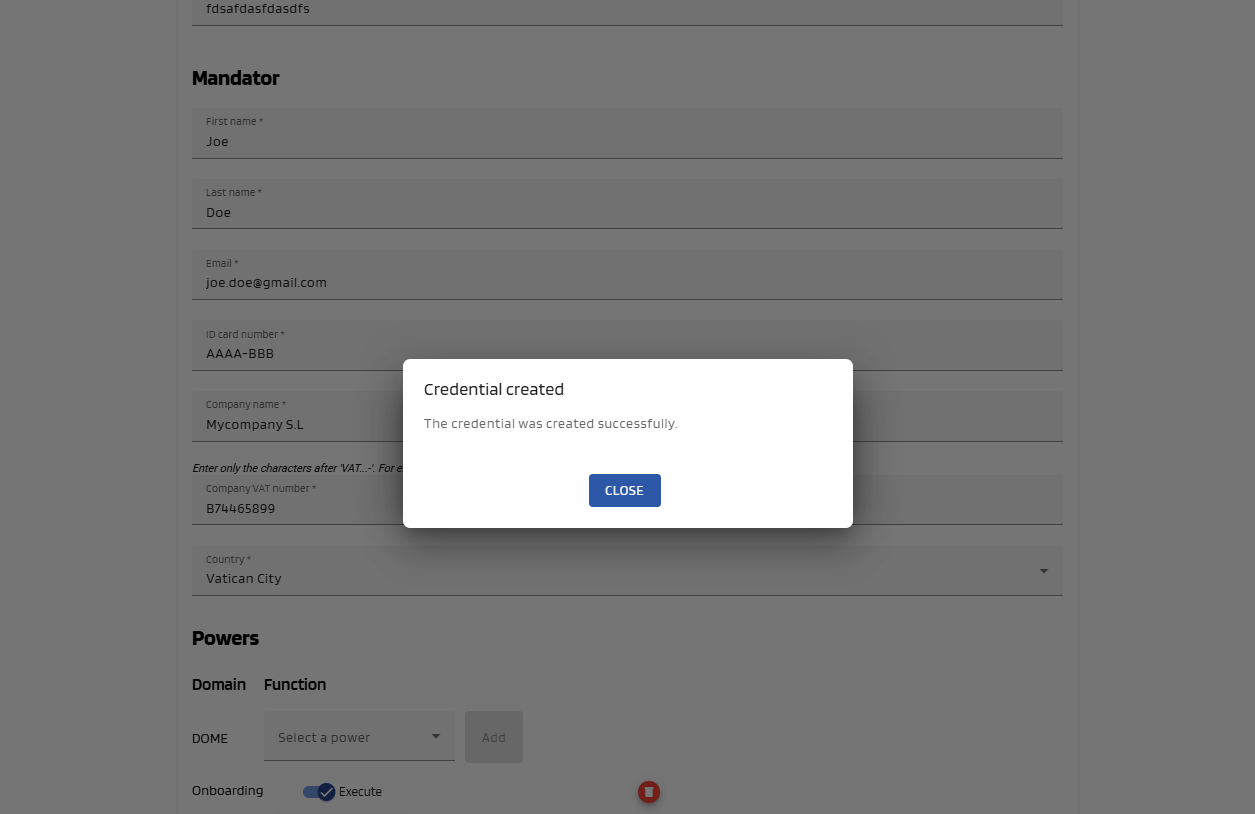
5. See the Issued Credential
You will see that the Credential you just created has a status of DRAFT. After the user downloads it with the Wallet, it will have a status of VALID (you might have to refresh the page to see it change). For more details, see the Credential Management section.
LEAR Credential Machine Issuance
0. "New Credential" Form
To create a LEAR Credential Machine, click the "New credential" button, at the top right corner of the dashboard page, which will take you to the creation form.
1. Select the "LEAR Credential Machine " type
Select the LEAR Credential Machine type in the selector. Then the corresponding form will be displayed:
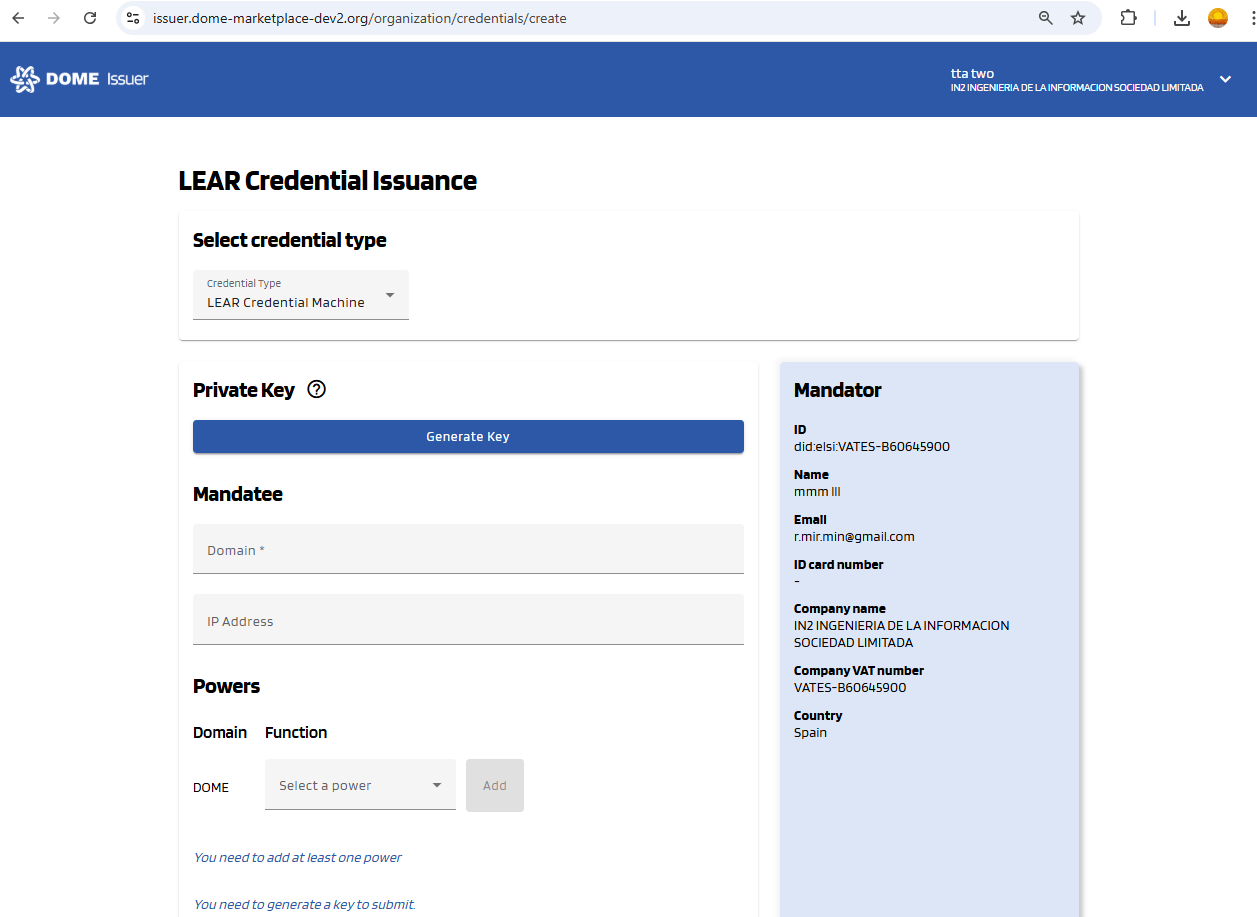
2. Generate and copy the private key
Click on the "Generate Key" button. This will create a private key that you need to copy and store safely, since it is associated to the Mandatee ID (did-key) that will be assigned to your credential. You will need it, for instance, for the Verifier integration. After the credential issuance, there won't be any way to recover it, so store it carefully.
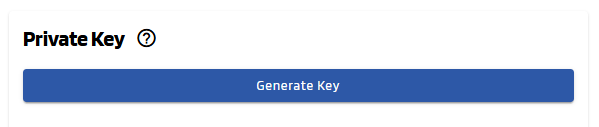
Before generating the private key:
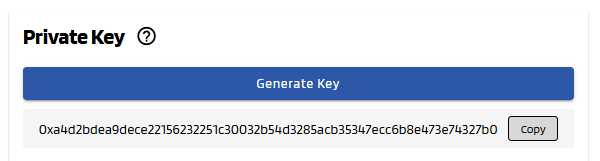
After generating it:
You can generate it as many times as you wish. The private key that you will need in the future will be the one that is set when you issue the credential. Once it is issued, you can see its did-key in the Details view of the Issuer and of the Wallet.
3. Complete the new credential form
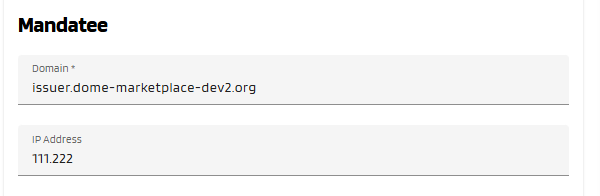
Fill all the Mandatee fields of the form, which are marked with a "*" symbol. The fields without "*" are optional --you can left them empty.
- Domain: the domain of the service that will use this credential machine to identify. Don't use prefixes such as "https://", and make sure you are not using "/" nor any path at the end.
- IP Address (optional): the IP to which the domain points to. If you have an elastic IP, leave this field blank. If you have a fixed IP, you can fill it or not (it is just an informative field).
Below, see an example of filled form.
4. Adding Powers to the Credential Subject
You can add different power functions using the combo box. Each power has one function. Add at least one power (=function) by selecting it in the selector and clicking to the "Add" button. For each added power, select at least one action (toggle buttons). In the example below, "Onboarding" is a function, and "Execute" are actions. The "Create credential" button is disabled because the Onboarding power doesn't have any actions.
To learn mor about powers, see this guide.
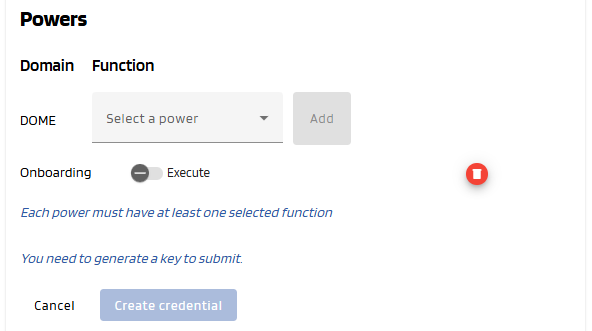
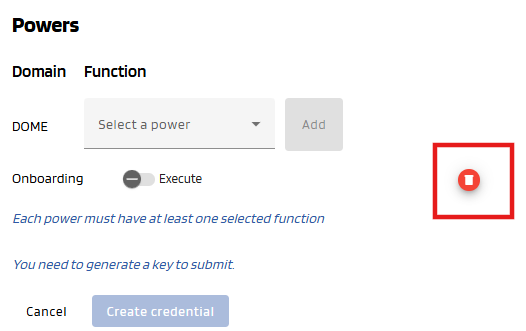
You can delete an added power by clicking to the red bin button at the right:
5. Create Credential
Once all mandatory fields all correctly filled (Private key has been generated, Mandatee filled and Powers added with an action), the "Create Credential" button will become brighter, indicating that it can be clicked. Click on it.
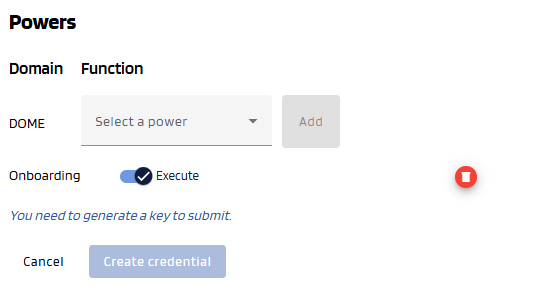
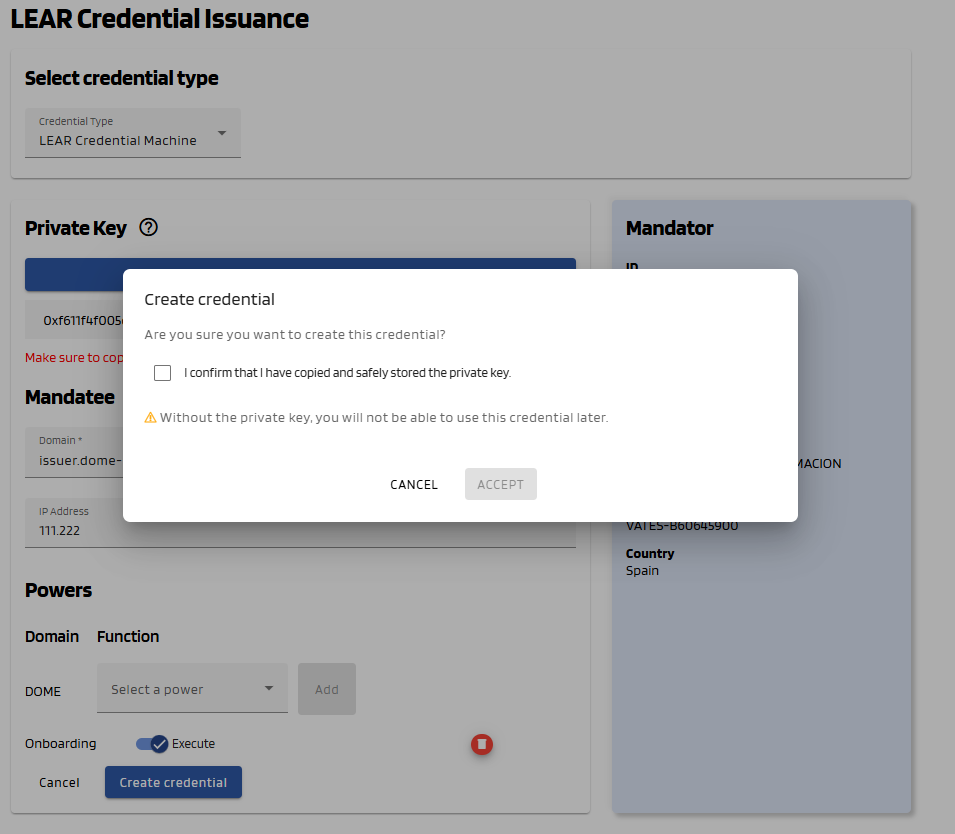
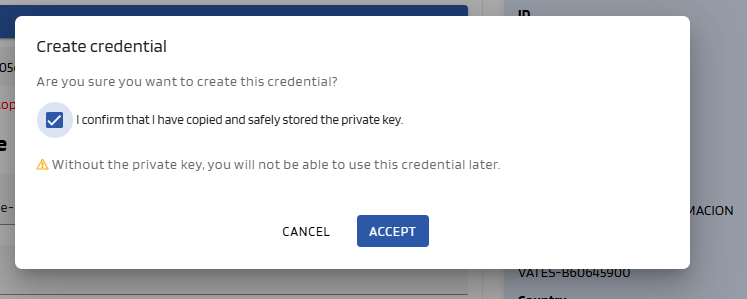
A popup will appear to confirm that you want to create the credential. You will first be asked whether you have copied your private key. Please note that once the credential is issued, it will not be possible to recover the private key, so make sure to store it safely. After doing so, select the confirmation radio button and click "Accept" to proceed. If the issuance is successful, a confirmation message will appear and you will be redirected to the dashboard page.
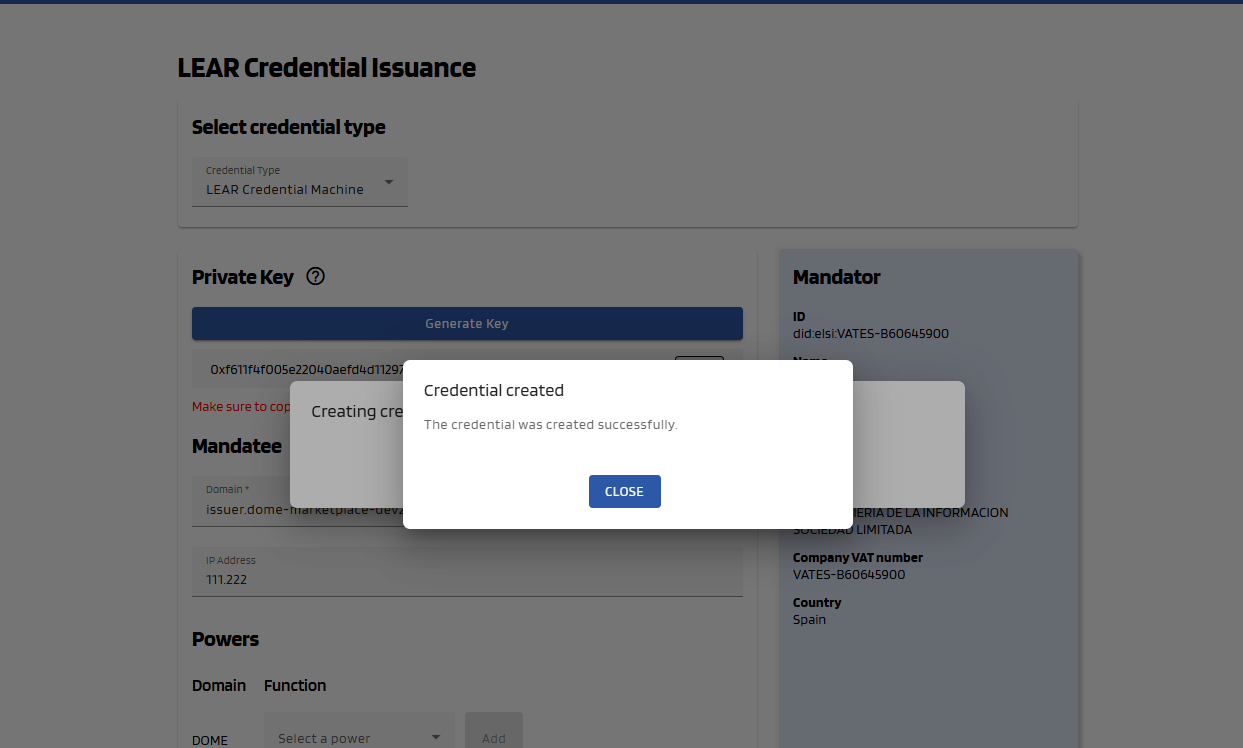
Please be aware that the credential offer will be sent to the mandator email in v2.0.0 and to your email (the one contained in the mandatee of the LEARCredentialEmployee you used to login) in v2.1.0.
5. See the Issued Credential
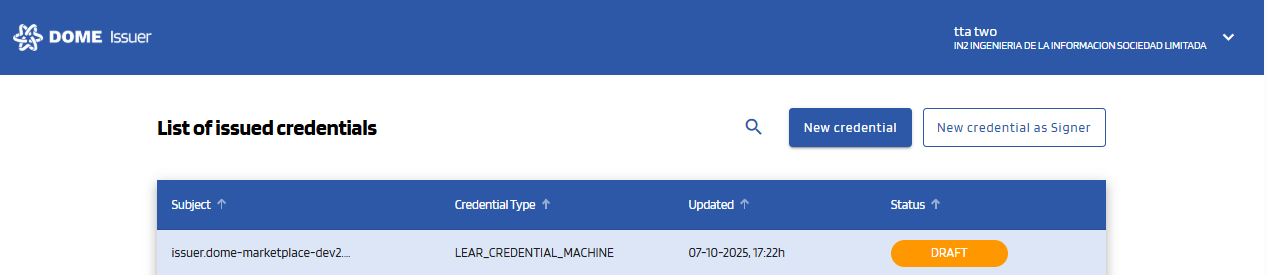
You will see that the Credential you just created has a status of DRAFT. After the user downloads it with the Wallet, it will have a status of VALID (you might have to refresh the page to see it change). For more details, see the Credential Management section.
LEAR Credential Machine Issuance on behalf of another mandator
0. "New Credential" Form
To create a LEAR Credential Machine on behalf of another mandator, click the "New credential(on behalf)" button, at the top right corner of the dashboard page, which will take you to the creation form.
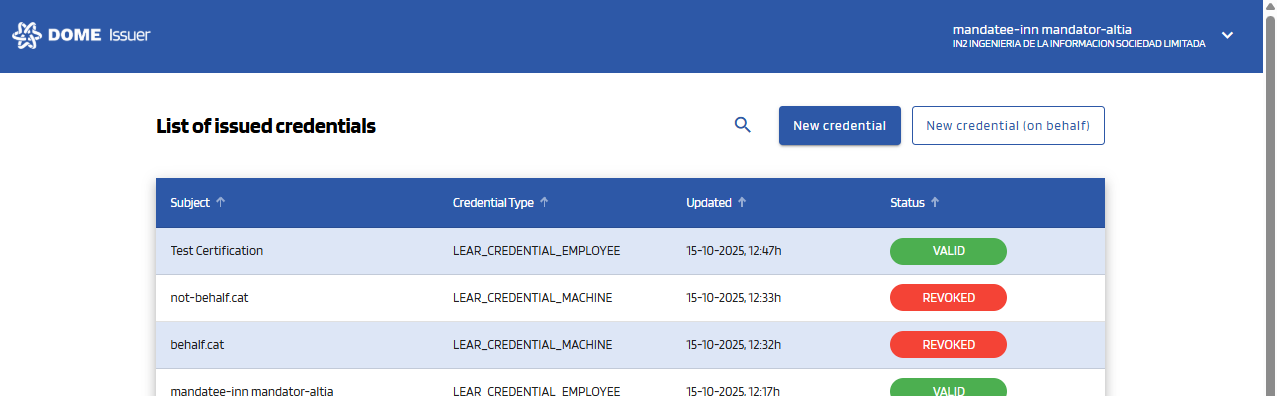
1. Select the "LEAR Credential Machine" type
Select the LEAR Credential Machine type in the selector. Then the corresponding form will be displayed:
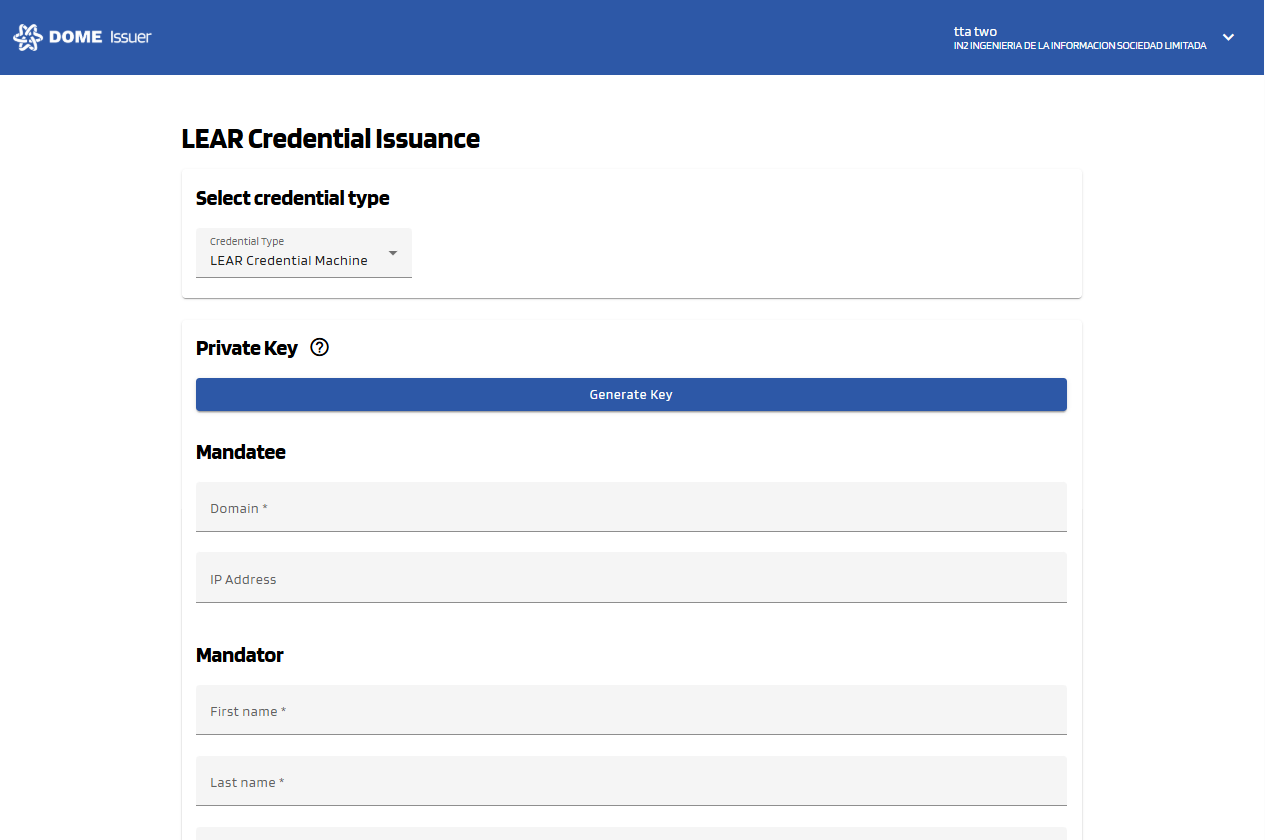
2. Generate and copy the private key
Click on the "Generate Key" button. This will create a private key that you need to copy and store safely, since it is associated to the Mandatee ID (did-key) that will be assigned to your credential. You will need it, for instance, for the Verifier integration. After the credential issuance, there won't be any way to recover it, so store it carefully.
Before generating the private key:
After generating it:
You can generate it as many times as you wish. The private key that you will need in the future will be the one that is set when you issue the credential. Once it is issued, you can see its did-key in the Details view of the Issuer and of the Wallet.
3. Complete the new credential form
Fill all the Mandatee fields of the form, which are marked with a "*" symbol. The fields without "*" are optional --you can left them empty.
- Domain: the domain of the service that will use this credential machine to identify. Don't use prefixes such as "https://", and make sure you are not using "/" nor any path at the end.
- IP Address (optional): the IP to which the domain points to. If you have an elastic IP, leave this field blank. If you have a fixed IP, you can fill it or not (it is just an informative field).
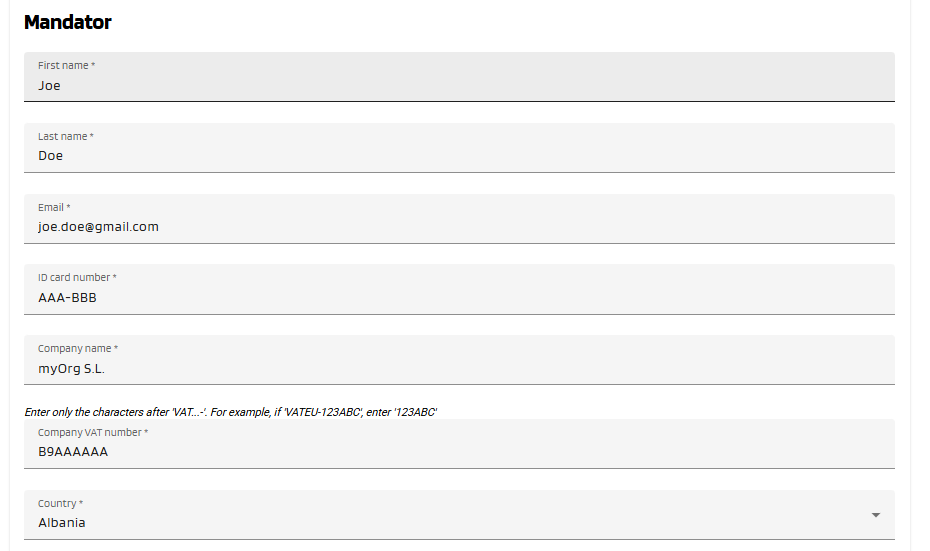
Below, see an example of filled form.
Then fill the Mandator form fields:
4. Adding Powers to the Credential Subject
You can add different power functions using the combo box. Each power has one function. Add at least one power (=function) by selecting it in the selector and clicking to the "Add" button. For each added power, select at least one action (toggle buttons). In the example below, "Onboarding" is a function, and "Execute" are actions. The "Create credential" button is disabled because the Onboarding power doesn't have any actions.
To learn mor about powers, see this guide.
You can delete an added power by clicking to the red bin button at the right:
5. Create Credential
Once all mandatory fields all correctly filled (Private key has been generated, Mandatee filled and Powers added with an action), the "Create Credential" button will become brighter, indicating that it can be clicked. Click on it.
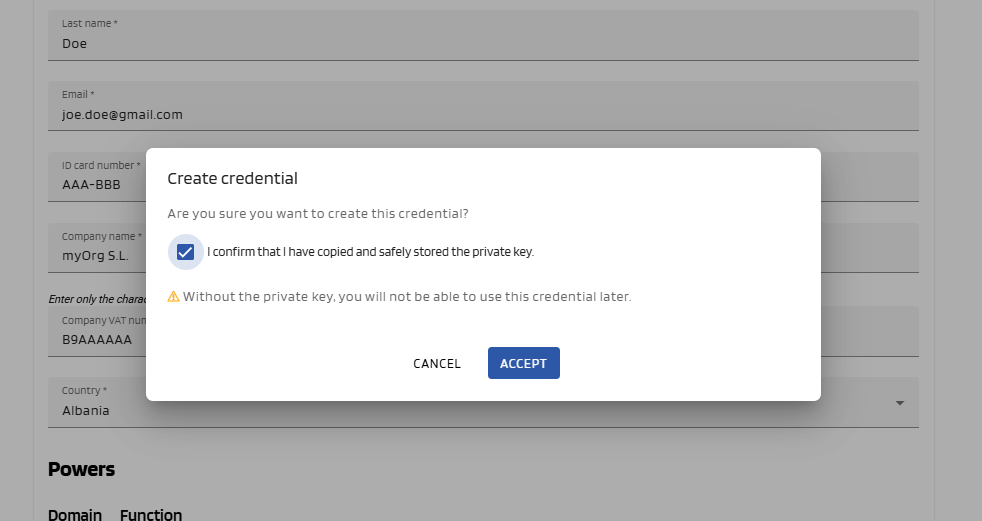
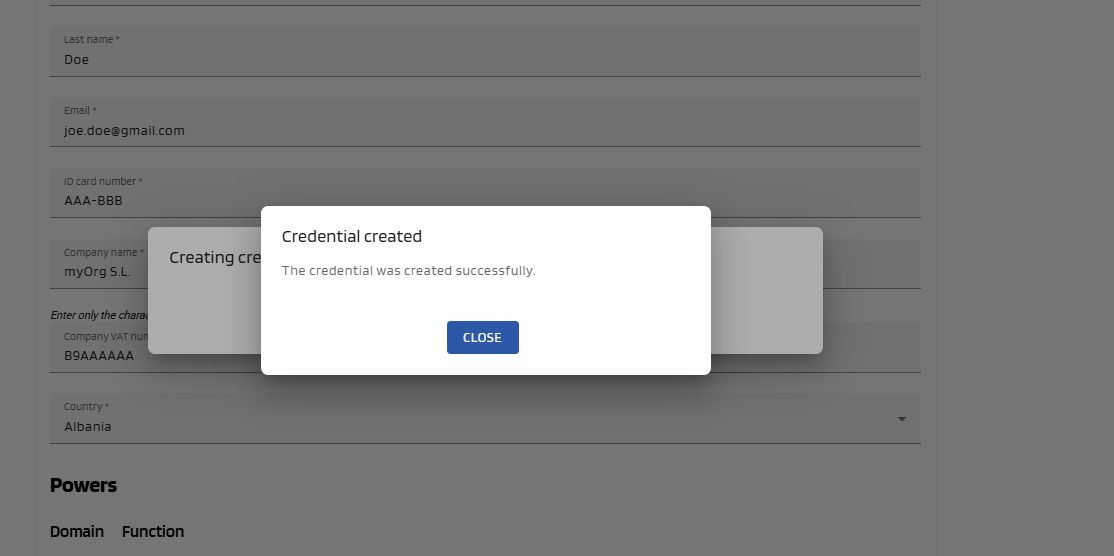
A popup will appear to confirm that you want to create the credential. You will first be asked whether you have copied your private key. Please note that once the credential is issued, it will not be possible to recover the private key, so make sure to store it safely. After doing so, select the confirmation radio button and click "Accept" to proceed. If the issuance is successful, a confirmation message will appear and you will be redirected to the dashboard page.
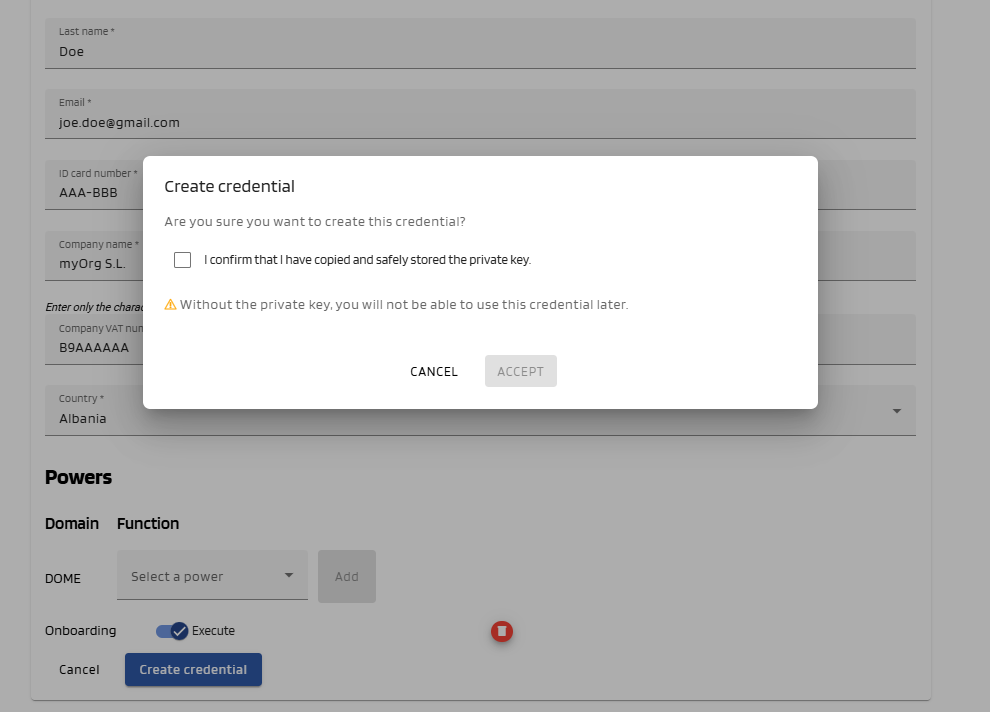
Please be aware that the credential offer will be sent to the mandator email.
5. See the Issued Credential
You will see that the Credential you just created has a status of DRAFT. After the user downloads it with the Wallet, it will have a status of VALID (you might have to refresh the page to see it change). For more details, see the Credential Management section.
Gx Label Credentials Issuance
At the moment, Label Credentials cannot be issued through the Issuer UI (web interface). However, they can be created via an API request to the issuer service.
Below is an example of how to issue a Label Credential using curl:
curl --location 'https://issuer.dome-marketplace-dev2.org/vci/v1/issuances' \
--header 'Content-Type: application/json' \
--header 'Authorization: Bearer eyJraW....' \
--header 'X-ID-TOKEN: ...' \
--data-raw '{
"schema": "gx:LabelCredential",
"operation_mode": "S",
"format": "jwt_vc_json",
"response_uri": "https://dome-marketplace-sbx.org/admin/uploadcertificate/urn:ngsi-ld:product-specification:6a8476a3-88e5-49de-873b-4ad36ebf6TNN",
"credential_owner_email": "roger.miret@in2.es",
"payload": {
"credentialSubject": {
"id": "urn:ngsi-ld:product-specification:6a8476a3-88e5-49de-873b-4ad36ebf6TNN",
"gx:labelLevel": "BL",
"gx:engineVersion": "1.3.0",
"gx:rulesVersion": "CD25.03",
"gx:compliantCredentials": [
{
"id": "urn:criteria:dp-1",
"type": "gx:DataProtection",
"gx:digestSRI": "sha256-c482dc40dbb262467...ad8578a0466992e82f1d580b"
}
],
"gx:validatedCriteria": [
"https://w3id.org/gaia-x/specs/cd24.06/criterion/P1.2.5",
"https://w3id.org/gaia-x/specs/cd24.06/criterion/P1.1.1"
]
},
"validFrom": "2024-08-22T00:00:00Z",
"validUntil": "2026-08-22T00:00:00Z"
}
}'
Make sure to replace:
After a Gx:Label Credential is issued, it is automatically uploaded to the Marketplace to certify the product identified by the “response_uri” field.
If the upload process fails, the credential holder will receive an email with instructions to manually upload the credential.
Obtaining the Credential
After a credential is issued, the receipee of the credential receives an email with a Credential Offer, which allows them to activate the credential with the DOME Digital Wallet. See this guide for the step-by-step information.